background image

A S U S   A 7 S 8 X - M X

A S U S   A 7 S 8 X - M X

A S U S   A 7 S 8 X - M X

A S U S   A 7 S 8 X - M X

A S U S   A 7 S 8 X - M X

2 - 3 3

2 - 3 3

2 - 3 3

2 - 3 3

2 - 3 3

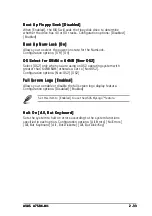
Boot Up Floppy Seek [Disabled]

Boot Up Floppy Seek [Disabled]

Boot Up Floppy Seek [Disabled]

Boot Up Floppy Seek [Disabled]

Boot Up Floppy Seek [Disabled]

When [Enabled], the BIOS will seek the flopy disk drive to determine
whether the drive has 40 or 80 tracks. Configuration options: [Disabled]
[Enabled]

Boot Up Num-Lock [On]

Boot Up Num-Lock [On]

Boot Up Num-Lock [On]

Boot Up Num-Lock [On]

Boot Up Num-Lock [On]

Allows you to select the power-on state for the NumLock.
Configuration options: [Off] [On]

OS Select for DRAM > 64MB [Non-OS2]

OS Select for DRAM > 64MB [Non-OS2]

OS Select for DRAM > 64MB [Non-OS2]

OS Select for DRAM > 64MB [Non-OS2]

OS Select for DRAM > 64MB [Non-OS2]

Select [OS2] only when you are using an OS2 operating system with
greater than 64MB RAM; otherwise, set to [Non-OS2].
Configuration options: [Non-OS2] [OS2]

Full Screen Logo [Enabled]

Full Screen Logo [Enabled]

Full Screen Logo [Enabled]

Full Screen Logo [Enabled]

Full Screen Logo [Enabled]

Allows you to enable or disable the full screen logo display feature.
Configuration options: [Disabled] [Enabled]

Halt On [All, But Keyboard]

Halt On [All, But Keyboard]

Halt On [All, But Keyboard]

Halt On [All, But Keyboard]

Halt On [All, But Keyboard]

Sets the system to halt on errors according to the system functions
specified in each option. Configuration options: [All Errors] [No Errors]
[All, But Keyboard] [All , But Diskette] [All, But Disk/Key]

Set this item to [Enabled] to use the ASUS MyLogo™ feature.

Содержание Motherboard A7S8X-MX

Страница 1: ...Motherboard A7S8X MX ...

Страница 2: ...ES OR AGENTS BE LIABLE FOR ANY INDIRECT SPECIAL INCIDENTAL OR CONSEQUENTIAL DAMAGES INCLUDING DAMAGES FOR LOSS OF PROFITS LOSS OF BUSINESS LOSS OF USE OR DATA INTERRUPTION OF BUSINESS AND THE LIKE EVEN IF ASUS HAS BEEN ADVISED OF THE POSSIBILITY OF SUCH DAMAGES ARISING FROM ANY DEFECT OR ERROR IN THIS MANUAL OR PRODUCT SPECIFICATIONS AND INFORMATION CONTAINED IN THIS MANUAL ARE FURNISHED FOR INFOR...

Страница 3: ...ve ASUS features 1 4 1 4 Before you proceed 1 5 1 5 Motherboard overview 1 6 1 5 1 Placement direction 1 6 1 5 2 Screw holes 1 6 1 5 3 Motherboard layout 1 7 1 6 Central Processing Unit CPU 1 8 1 7 System memory 1 10 1 7 1 Overview 1 10 1 7 2 Memory Configurations 1 10 1 7 3 Installing a DIMM 1 12 1 7 4 Removing a DIMM 1 12 1 8 Expansion slots 1 13 1 8 1 Installing an expansion card 1 13 1 8 2 Con...

Страница 4: ... 13 2 3 2 System Date 2 13 2 3 3 Legacy Diskette A 2 13 2 3 4 HDD SMART Monitoring 2 13 2 3 5 Installed Memory 2 13 2 3 6 Primary and Secondary IDE Master Slave 2 14 2 3 7 First and Second SATA Master 2 15 2 4 Advanced Menu 2 16 2 4 1 CPU configuration 2 17 2 4 2 Chipset configuration 2 18 2 4 3 PCIPnP 2 21 2 4 4 Onboard device configuration 2 22 2 4 5 USB configuration 2 24 2 5 Power Menu 2 25 2 ...

Страница 5: ...ort Chapter 3 Software support Chapter 3 Software support Chapter 3 Software support 3 1 Installing an operating system 3 2 3 2 Support CD information 3 2 3 2 1 Running the support CD 3 2 3 2 2 Drivers menu 3 3 3 2 3 Utilities menu 3 4 3 2 4 ASUS Contact information 3 5 ...

Страница 6: ...r is encouraged to try to correct the interference by one or more of the following measures Reorient or relocate the receiving antenna Increase the separation between the equipment and receiver Connect the equipment to an outlet on a circuit different from that to which the receiver is connected Consult the dealer or an experienced radio TV technician for help Canadian Department of Communications...

Страница 7: ...ect voltage in your area If you are not sure about the voltage of the electrical outlet you are using contact your local power company If the power supply is broken do not try to fix it by yourself Contact a qualified service technician or your retailer Operation safety Operation safety Operation safety Operation safety Operation safety Before installing the motherboard and adding devices on it ca...

Страница 8: ...to change system settings through the BIOS Setup menus Detailed descriptions of the BIOS parameters are also provided Chapter 3 Software support Chapter 3 Software support Chapter 3 Software support Chapter 3 Software support Chapter 3 Software support This chapter describes the contents of the support CD that comes with the motherboard package Where to find more information Where to find more inf...

Страница 9: ...nformation to help you complete a task IMPORTANT IMPORTANT IMPORTANT IMPORTANT IMPORTANT Instructions that you MUST follow to complete a task Bold text Bold text Bold text Bold text Bold text Indicates a menu or an item to select Italics Used to emphasize a word or a phrase Key Keys enclosed in the less than and greater than sign means that you must press the enclosed key Example Enter means that ...

Страница 10: ...ocket A for AMD Athlon XP Sempron processors Northbridge SiS 741GX Southbridge SiS 964 without RAID support 333 266 200 MHz 2 x 184 pin DIMM sockets support unbufferred non ECC 333 266 200 MHz DDR SDRAM memory modules 1 x AGP slot for 1 5V AGP cards 2 x PCI slots SiS 964 Southbridge supports 4 x Ultra DMA 133 100 66 hard disk drives 2 x Serial ATA hard disk drives supported only under Windows XP 2...

Страница 11: ...Form Factor Form Factor Form Factor Form Factor 1 x Floppy disk drive connector 1 x Primary IDE connector 1 x Secondary IDE connector 2 x Serial ATA connectors 1 x CPU fan connector 1 x Chassis fan connector 2 x USB 2 0 connectors for 4 additional USB 2 0 ports 1 x GAME MIDI connector 1 x 20 pin ATX power connector 1 x CD in connector 1 x AUX connector 1 x Front panel audio connector 1 x COM port ...

Страница 12: ...x i i x i i x i i x i i x i i ...

Страница 13: ...ASUS A7S8X MX ASUS A7S8X MX ASUS A7S8X MX ASUS A7S8X MX ASUS A7S8X MX 1 1 1 1 1 1 1 1 1 1 1 Product introduction This chapter describes the motherboard features and the new technologies it supports ...

Страница 14: ...ong line of ASUS quality motherboards Before you start installing the motherboard and hardware devices on it check the items in your package with the list below 1 2 Package contents Check your motherboard package for the following items Motherboard Motherboard Motherboard Motherboard Motherboard ASUS A7S8X MX motherboard Cables Cables Cables Cables Cables 1 x Serial port COM cable 1 x Ultra DMA ca...

Страница 15: ...ted graphics The SiS 741GX IGUI Host Memory Controller HMC features the SiS Real256E an integrated graphics engine for enhanced 3D 2D and video capabilities Serial ATA technology Serial ATA technology Serial ATA technology Serial ATA technology Serial ATA technology The motherboard supports the Serial ATA technology through the Serial ATA interfaces and the SiS 964 The SATA specification allows fo...

Страница 16: ...rashFree BIOS ASUS CrashFree BIOS ASUS CrashFree BIOS This feature allows you to restore the original BIOS data from a floppy disk when the BIOS codes and data are corrupted This protection eliminates the need to buy a replacement ROM chip See page 2 6 for details ASUS MyLogo ASUS MyLogo ASUS MyLogo ASUS MyLogo ASUS MyLogo This new feature present in the motherboard allows you to personalize and a...

Страница 17: ...lectricity Hold components by the edges to avoid touching the ICs on them Whenever you uninstall any component place it on a grounded antistatic pad or in the bag that came with the component Before you install or remove any component ensure Before you install or remove any component ensure Before you install or remove any component ensure Before you install or remove any component ensure Before y...

Страница 18: ...1 5 1 1 5 1 1 5 1 1 5 1 1 5 1 Placement direction Placement direction Placement direction Placement direction Placement direction When installing the motherboard make sure that you place it into the chassis in the correct orientation The edge with external ports goes to the rear part of the chassis as indicated in the image below 1 5 2 1 5 2 1 5 2 1 5 2 1 5 2 Screw holes Screw holes Screw holes Sc...

Страница 19: ...9 8cm 7 8in 24 4cm 9 6in PCI1 AD1888 PCI2 DDR DIMM2 64 72 bit 184 pin module DDR DIMM1 64 72 bit 184 pin module USBPW5678 USBPW1234 SB_PWR1 SPEAKER1 AGP1 CR2032 3V Lithium Cell CMOS Power ATXPWR USB78 SATA1 SATA2 REL8201CL PS 2KBMS T Mouse B Keyboard Below Mic In Center Line Out Top Line In USB2 0 T USB1 B USB2 Top RJ 45 T USB4 B USB3 PARALLEL PORT SPDIF_O VGA1 Socket 462 PRI_IDE SEC_IDE FSB_SEL1 ...

Страница 20: ... l d G o l d G o l d triangle triangle triangle triangle triangle Do not use processors with core speeds of less than 1 GHz on this motherboard Installing the CPU Installing the CPU Installing the CPU Installing the CPU Installing the CPU Follow these steps to install a CPU 1 Locate the 462 pin ZIF socket on the motherboard A7S8X MX A7S8X MX CPU Socket 462 AMD CPU CPU NOTCH LOCK CPU NOTCH TO INNER...

Страница 21: ...ifted up to 90 100 angle otherwise the CPU does not fit in completely The CPU fits only in one correct orientation DO NOT force the CPU into the socket to prevent bending the pins and damaging the CPU 5 When the CPU is in place push down the socket lever to secure the CPU The lever clicks on the side tab to indicate that it is locked Gold triangle Gold triangle Gold triangle Gold triangle Gold tri...

Страница 22: ...trates the location of the DDR DIMM sockets 1 7 2 1 7 2 1 7 2 1 7 2 1 7 2 Memory Configurations Memory Configurations Memory Configurations Memory Configurations Memory Configurations You may install 64 MB 128 MB 256 MB 512 MB and 1 GB unbuffered non ECC DDR DIMMs into the DIMM sockets using the memory configurations in this section Installing DDR DIMMs other than the recommended configurations ma...

Страница 23: ...ory Frequency Memory Frequency Memory Frequency Memory Frequency Memory Frequency 333 MHz PC2700 PC2100 333 266 MHz 266 MHz PC2100 266 MHz Obtain DDR DIMMs only from qualified vendors for better system performance Recommended memory configurations Recommended memory configurations Recommended memory configurations Recommended memory configurations Recommended memory configurations S o c k e t s S ...

Страница 24: ...til the retaining clips snap back in place and the DIMM is properly seated 1 Unlock a DIMM socket by pressing the retaining clips outward 2 Align a DIMM on the socket such that the notch on the DIMM matches the break on the socket Locked retaining clip Locked retaining clip Locked retaining clip Locked retaining clip Locked retaining clip Make sure to unplug the power supply before adding or remov...

Страница 25: ...he slot that you intend to use Keep the screw for later use 4 Align the card connector with the slot and press firmly until the card is completely seated on the slot 5 Secure the card to the chassis with the screw you removed earlier 6 Replace the system cover Make sure to unplug the power cord before adding or removing expansion cards Failure to do so may cause you physical injury and damage moth...

Страница 26: ...rrupt 4 Communications Port COM1 5 Sound Card sometimes LPT2 6 Floppy Disk Controller 7 Printer Port LPT1 8 System CMOS Real Time Clock 9 ACPI Mode when used 10 IRQ holder for PCI Steering 12 PS 2 Compatible Mouse Port 13 Numeric Data Processor 14 Primary IDE Channel 15 Secondary IDE Channel These IRQs are usually available for ISA or PCI devices IRQ assignments for this motherboard IRQ assignment...

Страница 27: ...ifications The figure shows a LAN card installed on a PCI slot 1 8 5 1 8 5 1 8 5 1 8 5 1 8 5 AGP slot AGP slot AGP slot AGP slot AGP slot This motherboard has an Accelerated Graphics Port AGP slot that supports 1 5V AGP cards When you buy an AGP card make sure that you ask for one with 1 5V specification Note the notches on the card golden fingers to ensure that they fit the AGP slot on your mothe...

Страница 28: ...utton cell battery powers the RAM data in CMOS which include system setup information such as system passwords To erase the RTC RAM 1 Turn OFF the computer and unplug the power cord 2 Remove the onboard battery 3 Move the jumper cap from pins 1 2 default to pins 2 3 Keep the cap on pins 2 3 for about 5 10 seconds then move the cap back to pins 1 2 4 Re install the battery 5 Plug the power cord and...

Страница 29: ...nnected USB devices Set to 5VSB to wake up from S3 and S4 sleep modes no power to CPU DRAM in slow refresh power supply in reduced power mode The USBPW1234 jumper is for the rear USB ports The USBPW5678 jumper is for the internal USB connectors that you can connect to additional USB ports The USB device wake up feature requires a power supply that can provide 500mA on the 5VSB lead for each USB po...

Страница 30: ...rnal frequency selection 3 pin FSB_SEL1 FSB_SEL0 External frequency selection 3 pin FSB_SEL1 FSB_SEL0 External frequency selection 3 pin FSB_SEL1 FSB_SEL0 These jumpers allow you to set the CPU Front Side Bus FSB frequency Refer to the jumper settings below A7S8X MX FSB_SEL1 FSB_SEL0 166MHZ Default 1 FSB_SEL1 FSB_SEL0 133MHZ 1 FSB_SEL1 FSB_SEL0 100MHZ 1 A7S8X MX External frequency selection Make s...

Страница 31: ...audio sources 5 5 5 5 5 Line Out port lime Line Out port lime Line Out port lime Line Out port lime Line Out port lime This port connects a headphone or a speaker In 4 6 channel configuration the function of this port becomes Front Speaker Out 6 6 6 6 6 Microphone port pink Microphone port pink Microphone port pink Microphone port pink Microphone port pink This port connects a microphone Audio 2 4...

Страница 32: ...and 4 These two 4 pin Universal Serial Bus USB ports are available for connecting USB 2 0 devices 9 9 9 9 9 Video Graphics Adapter port Video Graphics Adapter port Video Graphics Adapter port Video Graphics Adapter port Video Graphics Adapter port This 15 pin port is for a VGA monitor or other VGA compatible devices 10 10 10 10 10 Coaxial S PDIF Out port Coaxial S PDIF Out port Coaxial S PDIF Out ...

Страница 33: ...tor 34 1 pin FLOPPY Floppy disk drive connector 34 1 pin FLOPPY Floppy disk drive connector 34 1 pin FLOPPY This connector is for the provided floppy disk drive FDD signal cable Insert one end of the cable to this connector then connect the other end to the signal connector at the back of the floppy disk drive Pin 5 on the connector is removed to prevent incorrect cable connection when using an FD...

Страница 34: ...nnector on the motherboard a black connector for an Ultra DMA 133 100 66 IDE slave device optical drive hard disk drive and a gray connector for an Ultra DMA 133 100 66 IDE master device hard disk drive If you install two hard disk drives you must configure the second drive as a slave device by setting its jumper accordingly Refer to the hard disk documentation for the jumper settings Pin 20 on th...

Страница 35: ...l ATA hard disk drives Serial ATA is supported under Windows XP 2000 2003 only Legacy operating systems such as Windows 98 SE Me do not support native Serial ATA mode See page 2 23 Plug your Serial ATA boot disk on the master port SATA1 to support S3 function Refer to the table below for details Serial ATA Master Slave connectors Serial ATA Master Slave connectors Serial ATA Master Slave connector...

Страница 36: ... CHA_FAN1 3 pin CPU_FAN1 3 pin CHA_FAN1 3 pin CPU_FAN1 3 pin CHA_FAN1 The fan connectors support cooling fans of 350 mA 740 mA 8 88 W max or a total of 1 A 2 22 A 26 64 W max at 12 V Connect the fan cables to the fan connectors on the motherboard making sure that the black wire of each cable matches the ground pin of the connector Do not forget to connect the fan cables to the fan connectors Insuf...

Страница 37: ... 1394 cable 1394 cable to the USB connectors Doing so will damage the motherboard 5 5 5 5 5 USB connectors 10 1 pin USB56 USB78 USB connectors 10 1 pin USB56 USB78 USB connectors 10 1 pin USB56 USB78 USB connectors 10 1 pin USB56 USB78 USB connectors 10 1 pin USB56 USB78 These connectors are for USB 2 0 ports Connect the USB GAME module cable to any of these connectors then install the module to a...

Страница 38: ...oper orientation and push down firmly until the connectors completely fit A7S8X MX A7S8X MX ATX power connector ATXPWR1 3 3VDC 12 0VDC COM PS_ON COM COM COM 5 0VDC 5 0VDC 5 0VDC PWR_OK 12 0VDC 3 3VDC 3 3VDC COM 5 0VDC COM 5 0VDC COM 5VSB 8 8 8 8 8 Internal audio connectors 4 pin CD AUX Internal audio connectors 4 pin CD AUX Internal audio connectors 4 pin CD AUX Internal audio connectors 4 pin CD ...

Страница 39: ...e to a slot opening at the back of the system chassis 9 9 9 9 9 Front panel audio connector 10 1 pin FP_AUIDO1 Front panel audio connector 10 1 pin FP_AUIDO1 Front panel audio connector 10 1 pin FP_AUIDO1 Front panel audio connector 10 1 pin FP_AUIDO1 Front panel audio connector 10 1 pin FP_AUIDO1 This connector is for a chassis mounted front panel audio I O module that supports either AC 97 audio...

Страница 40: ...unted speaker and allows you to hear system beeps and warnings A7S8X MX A7S8X MX Speaker connector SPEAKER NC SPEAKER SPEAKER1 KEY 12 12 12 12 12 Power LED connector 3 1 pin PWR_LED1 Power LED connector 3 1 pin PWR_LED1 Power LED connector 3 1 pin PWR_LED1 Power LED connector 3 1 pin PWR_LED1 Power LED connector 3 1 pin PWR_LED1 This 3 1 pin connector is for the system power LED Connect the 3 pin ...

Страница 41: ...ard disk drive activity Red 2 pin HDLED Hard disk drive activity Red 2 pin HDLED Hard disk drive activity Red 2 pin HDLED This 2 pin connector is for the HDD Activity LED Connect the HDD Activity LED cable to this connector The IDE LED lights up or flashes when data is read from or written to the HDD Power Soft off button Black 2 pin PWRBTN Power Soft off button Black 2 pin PWRBTN Power Soft off b...

Страница 42: ...1 30 1 30 1 30 1 30 1 30 Chapter 1 Product introduction Chapter 1 Product introduction Chapter 1 Product introduction Chapter 1 Product introduction Chapter 1 Product introduction ...

Страница 43: ...X MX ASUS A7S8X MX ASUS A7S8X MX ASUS A7S8X MX 2 1 2 1 2 1 2 1 2 1 2 BIOS setup This chapter tells how to change the system settings through the BIOS Setup menus Detailed descriptions of the BIOS parameters are also provided ...

Страница 44: ...py disk bootable floppy disk bootable floppy disk bootable floppy disk bootable floppy disk in case you need to restore the BIOS in the future Copy the original motherboard BIOS using the ASUS Update or AFLASH utilities Visit the ASUS website and download the latest BIOS file for this motherboard using the ASUS Update utility 2 1 1 2 1 1 2 1 1 2 1 1 2 1 1 Creating a bootable floppy disk Creating a...

Страница 45: ... Updating the BIOS file 1 Download the latest BIOS file from the ASUS website www asus com Rename the file to BIN and save it to the bootable floppy disk you created earlier 2 Insert the disk that contains the new BIOS file into the floppy drive 3 Reboot the computer The succeeding screens are for reference only The actual displays may not exactly match what you see on your screen Windows 2000 env...

Страница 46: ...pter 2 BIOS setup 4 Press Alt F2 during POST to display the following screen 5 AWDFLASH checks the new BIOS file from the floppy disk 7 After the new BIOS file is copied the computer returns to POST 6 After verification AWDFLASH flashes the new BIOS file Do not shut down the computer during the flash process ...

Страница 47: ... MX ROM A7S8X MX ROM A7S8X MX ROM 2 Save the BIOS file to a floppy disk then restart the system 3 Press Alt F2 during POST to display the following EZFlash starting BIOS update Checking for floppy 4 Insert the floppy disk that contains the BIOS file to the floppy disk drive When the correct BIOS file is found EZ Flash performs the BIOS update process and automatically reboots the system when done ...

Страница 48: ...8X MX ROM A7S8X MX ROM A7S8X MX ROM A7S8X MX ROM Recovering the BIOS from a floppy disk Recovering the BIOS from a floppy disk Recovering the BIOS from a floppy disk Recovering the BIOS from a floppy disk Recovering the BIOS from a floppy disk To recover the BIOS from a floppy disk 1 Turn on the system 2 Insert the floppy disk with the original or updated BIOS file to the floppy disk drive 3 The u...

Страница 49: ...ilities screen menu 3 The ASUS Update utility is copied to your system 2 1 5 2 1 5 2 1 5 2 1 5 2 1 5 ASUS Update utility ASUS Update utility ASUS Update utility ASUS Update utility ASUS Update utility The ASUS Update is a utility that allows you to manage save and update the motherboard BIOS in Windows environment The ASUS Update utility allows you to Save the current BIOS file Download the latest...

Страница 50: ...the Internet Updating the BIOS through the Internet To update the BIOS through the Internet 1 Launch the ASUS Update utility from the Windows desktop by clicking Start Start Start Start Start Programs Programs Programs Programs Programs ASUS ASUS ASUS ASUS ASUS ASUSUpdate ASUSUpdate ASUSUpdate ASUSUpdate ASUSUpdate ASUSUpdate ASUSUpdate ASUSUpdate ASUSUpdate ASUSUpdate The ASUS Update main window ...

Страница 51: ... ASUSUpdate ASUSUpdate ASUSUpdate ASUSUpdate ASUSUpdate ASUSUpdate The ASUS Update main window appears 2 Select Update BIOS from a Update BIOS from a Update BIOS from a Update BIOS from a Update BIOS from a file file file file file option from the drop down menu then click Next Next Next Next Next 4 From the FTP site select the BIOS version that you wish to download Click Next 5 Follow the screen ...

Страница 52: ... that the computer can recognize these changes and record them in the CMOS RAM of the Flash ROM The Flash ROM on the motherboard stores the Setup utility When you start up the computer the system provides you with the opportunity to run this program Press Delete during the Power On Self Test POST to enter the Setup utility otherwise POST continues with its test routines To enter Setup after POST r...

Страница 53: ... corresponding functions Navigation Key s Navigation Key s Navigation Key s Navigation Key s Navigation Key s Function Description Function Description Function Description Function Description Function Description F1 or Alt H F1 or Alt H F1 or Alt H F1 or Alt H F1 or Alt H Displays the General Help screen from anywhere in the BIOS Setup Esc Esc Esc Esc Esc Jumps to the Exit menu or returns to the...

Страница 54: ...he first page press End to go to the last page To exit the help window press Enter or Esc Sub menu Sub menu Sub menu Sub menu Sub menu Note that a right pointer symbol as shown on the left appears to the left of certain fields This pointer indicates that you can display a sub menu from this field A sub menu contains additional options for a field parameter To display a sub menu move the highlight ...

Страница 55: ... 44M 3 5 in Legacy Diskette A 1 44M 3 5 in Legacy Diskette A 1 44M 3 5 in Legacy Diskette A 1 44M 3 5 in Sets the type of floppy drive installed Configuration options None 360K 5 25 in 1 2M 5 25 in 720K 3 5 in 1 44M 3 5 in 2 88M 3 5 in 2 3 4 2 3 4 2 3 4 2 3 4 2 3 4 HDD SMART Monitoring Disabled HDD SMART Monitoring Disabled HDD SMART Monitoring Disabled HDD SMART Monitoring Disabled HDD SMART Moni...

Страница 56: ...y detect incorrect parameters In these cases select Manual to manually enter the IDE hard disk drive parameters Refer to the next section for details Before attempting to configure a hard disk drive make sure you have the correct configuration information supplied by the drive manufacturer Incorrect settings may cause the system to fail to recognize the installed hard disk Primary IDE Master Auto ...

Страница 57: ... Precomp 0 Landing Zone 0 Sector 0 Select Menu Item Specific Help Selects the type of fixed disk connected to the system Primary IDE Master 2 3 7 2 3 7 2 3 7 2 3 7 2 3 7 First and Second SATA Master First and Second SATA Master First and Second SATA Master First and Second SATA Master First and Second SATA Master Extended IDE Drive Auto Extended IDE Drive Auto Extended IDE Drive Auto Extended IDE ...

Страница 58: ...The Advanced menu items allow you to change the settings for the CPU and other system devices CPU Configuration Chipset PCIPnP Onboard Device Configuration USB Configuration Select Menu Item Specific Help Press Enter to Set Take caution when changing the settings of the Advanced menu items Incorrect field values may cause the system to malfunction ...

Страница 59: ...2 4 1 2 4 1 2 4 1 2 4 1 CPU configuration CPU configuration CPU configuration CPU configuration CPU configuration The items in this menu show the CPU related information auto detected by the BIOS CPU Type AMD Sempron tm CPU Speed 1500 MHz Cache RAM 256 K Select Menu Item Specific Help CPU Configuration ...

Страница 60: ...en press Enter to display a pop up menu with the configuration options AGP Bridge Configuration Frequency Control Init Display First AGP slot Select Menu Item Specific Help Press Enter to set Chipset AGP Bridge Configuration AGP Bridge Configuration AGP Bridge Configuration AGP Bridge Configuration AGP Bridge Configuration Graphics Aperture Size 64MB AGP Fast Write Support Disabled AGP Data Transf...

Страница 61: ...from the chipset to the AGP Configuration options Disabled Enabled AGP Data Transfer Rate Auto Allows you to select the AGP data transfer rate Configuration options Auto 4x Dual Display Support Disabled Enables or disables dual display support Configuration options Disabled Enabled Onboard Shared Memory 32 MB This item allows you to set the memory space reserved for the VGA frame buffer display me...

Страница 62: ...ows you to select the frequency ratio between the CPU and DRAM Configuration options SPD 5 4 1 1 DRAM Frequency xxx MHz Shows the DDR operating frequency The BIOS auto detects the value of this item CPU Frequency 166 Displays the frequency set by the clock generator to the system bus and PCI bus The BIOS auto detects the value of this item Init Display First PCI slot Init Display First PCI slot In...

Страница 63: ...ices Configuration options No Yes Resources Controlled By Auto Resources Controlled By Auto Resources Controlled By Auto Resources Controlled By Auto Resources Controlled By Auto When set to Auto this allows the BIOS to automatically configure all the boot and Plug and Play devices When set to Manual you can assign the available IRQ resources to the PCI devices Configuration options Auto Manual PC...

Страница 64: ...oard LAN Enabled Allows you to enable or disable the onboard LAN controller Keep the default enabled if you wish to use the onboard LAN feature Set to Disabled if you installed a PCI LAN card Configuration options Enabled Disabled Onboard LAN Boot ROM Disabled Onboard LAN Boot ROM Disabled Onboard LAN Boot ROM Disabled Onboard LAN Boot ROM Disabled Onboard LAN Boot ROM Disabled Allows you to enabl...

Страница 65: ...P ECP ECP EPP EPP Mode Select EPP1 7 EPP Mode Select EPP1 7 EPP Mode Select EPP1 7 EPP Mode Select EPP1 7 EPP Mode Select EPP1 7 Allows you to select the EPP mode This items becomes configurable only if the Parallel Port Mode Parallel Port Mode Parallel Port Mode Parallel Port Mode Parallel Port Mode is set to EPP or ECP EPP Configuration options EPP1 9 EPP1 7 ECP Mode Use DMA 3 ECP Mode Use DMA 3...

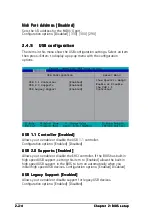
Страница 66: ... the USB 1 1 controller Configuration options Enabled Disabled USB 2 0 Supports Enabled USB 2 0 Supports Enabled USB 2 0 Supports Enabled USB 2 0 Supports Enabled USB 2 0 Supports Enabled Allows you to enable or disable the EHCI controller If the BIOS has built in high speed USB support setting this item to Enabled allows the built in high speed USB support in the BIOS to turn on automatically whe...

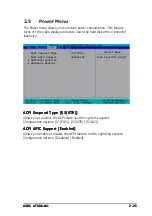
Страница 67: ...end Type S3 STR ACPI Suspend Type S3 STR ACPI Suspend Type S3 STR Allows you to select the ACPI state used for system suspend Configuration options S1 POS S3 STR S1 S3 ACPI APIC Support Enabled ACPI APIC Support Enabled ACPI APIC Support Enabled ACPI APIC Support Enabled ACPI APIC Support Enabled Allows you enable or disable the ACPI feature on the operating system Configuration options Disabled E...

Страница 68: ... on AC Power Loss Power Off Restore on AC Power Loss Power Off Restore on AC Power Loss Power Off Restore on AC Power Loss Power Off Allows you to set whether or not to reboot the system after power interruptions Power Off leaves your system off while Power On reboots the system Last State sets the system back to the state it was before the power interruption Configuration options Power Off Power ...

Страница 69: ...bles system wake up by MAC power management event PME Set this item to Enabled if you want to use the wake on LAN feature to wake up the system Configuration options Disabled Enabled PCIPME Power Up Control Disabled PCIPME Power Up Control Disabled PCIPME Power Up Control Disabled PCIPME Power Up Control Disabled PCIPME Power Up Control Disabled Enables or disables system wake up by PCIPME Configu...

Страница 70: ...isplay a pop up menu Key in a value Min 0 Max 31 then press Enter Selecting 0 means the alarm will set off everyday Time hh mm ss Alarm 0 0 0 Time hh mm ss Alarm 0 0 0 Time hh mm ss Alarm 0 0 0 Time hh mm ss Alarm 0 0 0 Time hh mm ss Alarm 0 0 0 To set the time of alarm 1 Highlight this item and press Enter to display a pop up menu for the hour field 2 Key in a value Min 0 Max 23 then press Enter ...

Страница 71: ... F F The onboard hardware monitor automatically detects and displays the system and CPU temperatures in these fields CPU FAN Speed xxxxRPM CPU FAN Speed xxxxRPM CPU FAN Speed xxxxRPM CPU FAN Speed xxxxRPM CPU FAN Speed xxxxRPM Chassis FAN Speed xxxxRPM or N A Chassis FAN Speed xxxxRPM or N A Chassis FAN Speed xxxxRPM or N A Chassis FAN Speed xxxxRPM or N A Chassis FAN Speed xxxxRPM or N A The onbo...

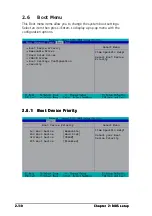
Страница 72: ...options Boot Device Priority Removable Drives Hard Drisk Drives CDROM Drives Boot Settings Configuration Security Select Menu Item Specific Help Select Boot Device Priority 2 6 1 2 6 1 2 6 1 2 6 1 2 6 1 Boot Device Priority Boot Device Priority Boot Device Priority Boot Device Priority Boot Device Priority Select Menu Item Specific Help Select your Boot Device Priority 1st Boot Device Removable 2n...

Страница 73: ...N Disabled 2 6 2 2 6 2 2 6 2 2 6 2 2 6 2 Removable drives Removable drives Removable drives Removable drives Removable drives Removable Drives 1 Floppy Disks Item Specific Help Use up or down arrow to select a device then press to move it up or to move it down the list Press ESC to exit this menu Select Menu 2 6 3 2 6 3 2 6 3 2 6 3 2 6 3 Hard Disk Drives Hard Disk Drives Hard Disk Drives Hard Disk...

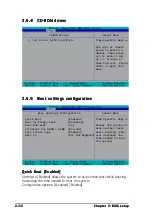
Страница 74: ...n Boot settings configuration Boot settings configuration Boot settings configuration Boot settings configuration Boot Settings COnfiguration Quick Boot Enabled Boot Up Floppy Seek Disabled Boot Num Lock On OS Select for DRAM 64MB Non OS2 Full Screen Logo Enabled Halt On All But Keyboard Item Specific Help Allows the system to skip certain tests while booting This will decrease the time needed to ...

Страница 75: ...elect for DRAM 64MB Non OS2 OS Select for DRAM 64MB Non OS2 OS Select for DRAM 64MB Non OS2 Select OS2 only when you are using an OS2 operating system with greater than 64MB RAM otherwise set to Non OS2 Configuration options Non OS2 OS2 Full Screen Logo Enabled Full Screen Logo Enabled Full Screen Logo Enabled Full Screen Logo Enabled Full Screen Logo Enabled Allows you to enable or disable the fu...

Страница 76: ...ers again then press Enter The password field setting is changed to Set To clear the password 1 Highlight the password field and press Enter twice The following message appears PASSWORD DISABLED Press any key to continue 2 Press any key to return to the menu A note about passwords A note about passwords A note about passwords A note about passwords A note about passwords The Supervisor password is...

Страница 77: ...re entering the BIOS Setup Select System to require the password before entering the system Configuration options Setup System 2 7 Exit menu The Exit menu items allow you to load the BIOS setup default settings save or discard any changes you made or exit the Setup utility Exit Save Changes Exit Discard Changes Load Setup Default Discard Changes Item Specific Help This option saves data to CMOS an...

Страница 78: ...ad Setup Defaults Load Setup Defaults Load Setup Defaults Load Setup Defaults This option allows you to load the default values for each of the parameters on the Setup menus When you select this option or if you press F5 a confirmation window appears Select Yes to load default values Select Exit Saving Changes or make other changes before saving the values to the non volatile RAM Discard Changes D...

Страница 79: ...ASUS A7S8X MX ASUS A7S8X MX ASUS A7S8X MX ASUS A7S8X MX ASUS A7S8X MX 3 1 3 1 3 1 3 1 3 1 3 Software support This chapter describes the contents of the support CD that comes with the motherboard package ...

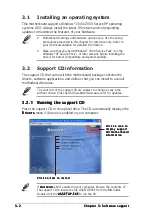
Страница 80: ...ail all motherboard features 3 2 1 3 2 1 3 2 1 3 2 1 3 2 1 Running the support CD Running the support CD Running the support CD Running the support CD Running the support CD Place the support CD to the optical drive The CD automatically displays the Drivers Drivers Drivers Drivers Drivers menu if Autorun is enabled in your computer Motherboard settings and hardware options vary Use the setup proce...

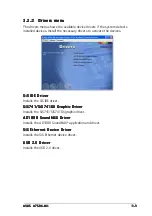
Страница 81: ...41 SiS741GX Graphic Driver SiS741 SiS741GX Graphic Driver SiS741 SiS741GX Graphic Driver SiS741 SiS741GX Graphic Driver SiS741 SiS741GX Graphic Driver Installs the SiS741 SiS741GX graphic driver AD1888 SoundMAX Driver AD1888 SoundMAX Driver AD1888 SoundMAX Driver AD1888 SoundMAX Driver AD1888 SoundMAX Driver Installs the AD1888 SoundMAX application and driver SiS Ethernet Device Driver SiS Etherne...

Страница 82: ...ASUS Update ASUS Update ASUS Update The ASUS Update utility allows you to update the motherboard BIOS in a Windows environment This utility requires an Internet connection either through a network or an Internet Service Provider ISP See page 2 8 for details Microsoft DirectX Microsoft DirectX Microsoft DirectX Microsoft DirectX Microsoft DirectX Installs the Microsoft DirectX 9 0b driver Anti Viru...

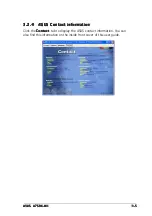
Страница 83: ...3 2 4 3 2 4 ASUS Contact information ASUS Contact information ASUS Contact information ASUS Contact information ASUS Contact information Click the Contact Contact Contact Contact Contact tab to display the ASUS contact information You can also find this information on the inside front cover of this user guide ...

Страница 84: ...3 6 3 6 3 6 3 6 3 6 Chapter 3 Software support Chapter 3 Software support Chapter 3 Software support Chapter 3 Software support Chapter 3 Software support ...

Отзывы: