background image

2-3

ASUS USB Monitor

2.3 

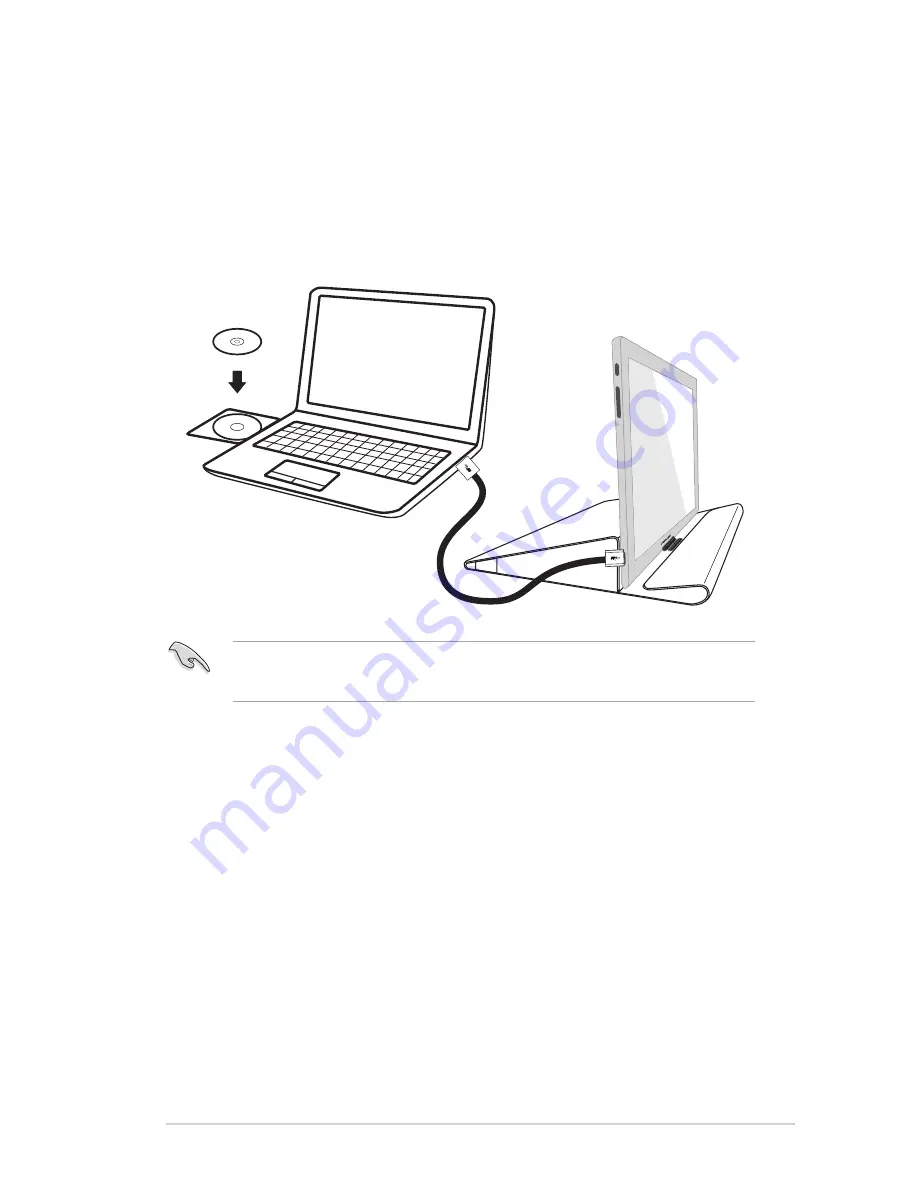
Installing driver

The USB monitor will work only when the included support-CD are installed 

properly. Before installation, please make sure the USB cable is connected 

between the USB monitor and the system. 

Insert the included support-CD into your computer, the auto-run program 

will start to install the needed software and driver.

USB

• 

The auto-run program only works under Windows Operation System. 

• 

Please check ASUS Support website for latest driver and software updates.

Содержание MB169B+

Страница 1: ...MB169B USB Monitor User Guide ...

Страница 2: ...GES FOR LOSS OF PROFITS LOSS OF BUSINESS LOSS OF USE OR DATA INTERRUPTION OF BUSINESS AND THE LIKE EVEN IF ASUS HAS BEEN ADVISED OF THE POSSIBILITY OF SUCH DAMAGES ARISING FROM ANY DEFECT OR ERROR IN THIS MANUAL OR PRODUCT SPECIFICATIONS AND INFORMATION CONTAINED IN THIS MANUAL ARE FURNISHED FOR INFORMATIONAL USE ONLY AND ARE SUBJECT TO CHANGE AT ANY TIME WITHOUT NOTICE AND SHOULD NOT BE CONSTRUED...

Страница 3: ...rence to radio communications However there is no guarantee that interference will not occur in a particular installation If this equipment does cause harmful interference to radio or television reception which can be determined by turning the equipment off and on the user is encouraged to try to correct the interference by one or more of the following measures Reorient or relocate the receiving a...

Страница 4: ...s are not damaged If you detect any damage contact your dealer immediately Avoid dust humidity and temperature extremes Do not place this USB monitor in any area where it may become wet Place this USB monitor on a stable surface Never push objects or spill liquid of any kind into the slots on this USB monitor cabinet If you encounter technical problems with this USB monitor contact a qualified ser...

Страница 5: ...n depending on the desktop pattern you use When the same image is displayed for hours an afterimage of the previous screen may remain after switching the image The screen will recover slowly or you can turn off the Power Switch for hours When the screen becomes black or flashes or cannot work anymore contact your dealer or service center to fix it Do not repair the screen by yourself Conventions u...

Страница 6: ...de optional documentation that may have been added by your dealer These documents are not part of the standard package Takeback services ASUS recycling and takeback programs come from our commitment to the highest standards for protecting our environment We believe in providing solutions for our customers to be able to responsibly recycle our products batteries and other components as well as the ...

Страница 7: ...t portability and simplicity to your daily life enhancing both of your viewing experience and style 1 2 Package contents Check your package for the following items USB Monitor Quick Start Guide CD ROM Warranty Card USB 3 0 Cable Leather Case Stand If any of the above items is damaged or missing contact your retailer immediately ...

Страница 8: ...Minimum requirements Windows 7 with 1 4GHz Core 2 Duo Mac OS X 10 6 1GB RAM Recommended requirements Windows 7 with 2 4GHz Core 2 Duo or above Mac OS X 10 6 or above 2GB RAM Video Playback Recommendations Windows Media Player WMP CyberLink PowerDVD Core WinDVD ...

Страница 9: ...wer Button Power Indicator Press this button to turn the monitor on or off The color of the power indicator defines as the below table Status Description White ON Amber Standby mode Dark OFF 2 Brightness Adjustment Press this button to adjust brightness level 3 Micro B USB 3 0 Port ...

Страница 10: ...tect its real time position The screen shot will automatically change from landscape to portrait position or vice versa depending on monitor s current position To disable you can uncheck this function via ASUS Ezlink Utility The Auto Rotate function will not work under MAC OS or Windows XP environment ...

Страница 11: ...e of the monitor then adjust the monitor to the angle that is most comfortable for you You can adjust the monitor s angle by two positions with leather case There are two strips for viewing angle adjustment For upright position use the far side strip from the top cover For tilt back position use the other one instead ...

Страница 12: ...2 2 Chapter 2 Setup 2 2 Connecting the USB cable Connect one end of the USB cable to the monitor s USB port the other end to your computer s USB port USB ...

Страница 13: ...ion please make sure the USB cable is connected between the USB monitor and the system Insert the included support CD into your computer the auto run program will start to install the needed software and driver USB The auto run program only works under Windows Operation System Please check ASUS Support website for latest driver and software updates ...

Страница 14: ...isplay Colors 262 K Digital Input USB 3 0 Colors Dark Gray Power Consumption 7 W Operating Temp 0 50 Phys Dimension WxHxD 379 1 x 235 8 x 8 5 mm Box Dimension WxHxD 435 x 297 x 57 mm Net Weight Esti 0 8 kg Gross Weight Esti 2 kg Regulation Approvals UL cUL CB CCC EuP BSMI EAC CU RoHS WEEE J MOSS EMC CE FCC KCC VCCI RCM Specifications are subject to change without notice ...

Страница 15: ...e USB monitor and the computer Inspect the signal cable and make sure none of the pins are bent Connect the computer with another available monitor to check if the computer is properly working Screen image is too light or dark Adjust the Brightness settings via the button Screen image bounces or a wave pattern is present in the image Make sure the USB cable is properly connected between the USB mo...

Отзывы: