28
ASUS P3W User’s Manual
3. HARDWARE SETUP
CPU
3. H/W SETUP
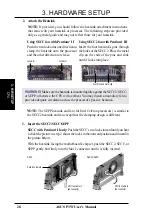
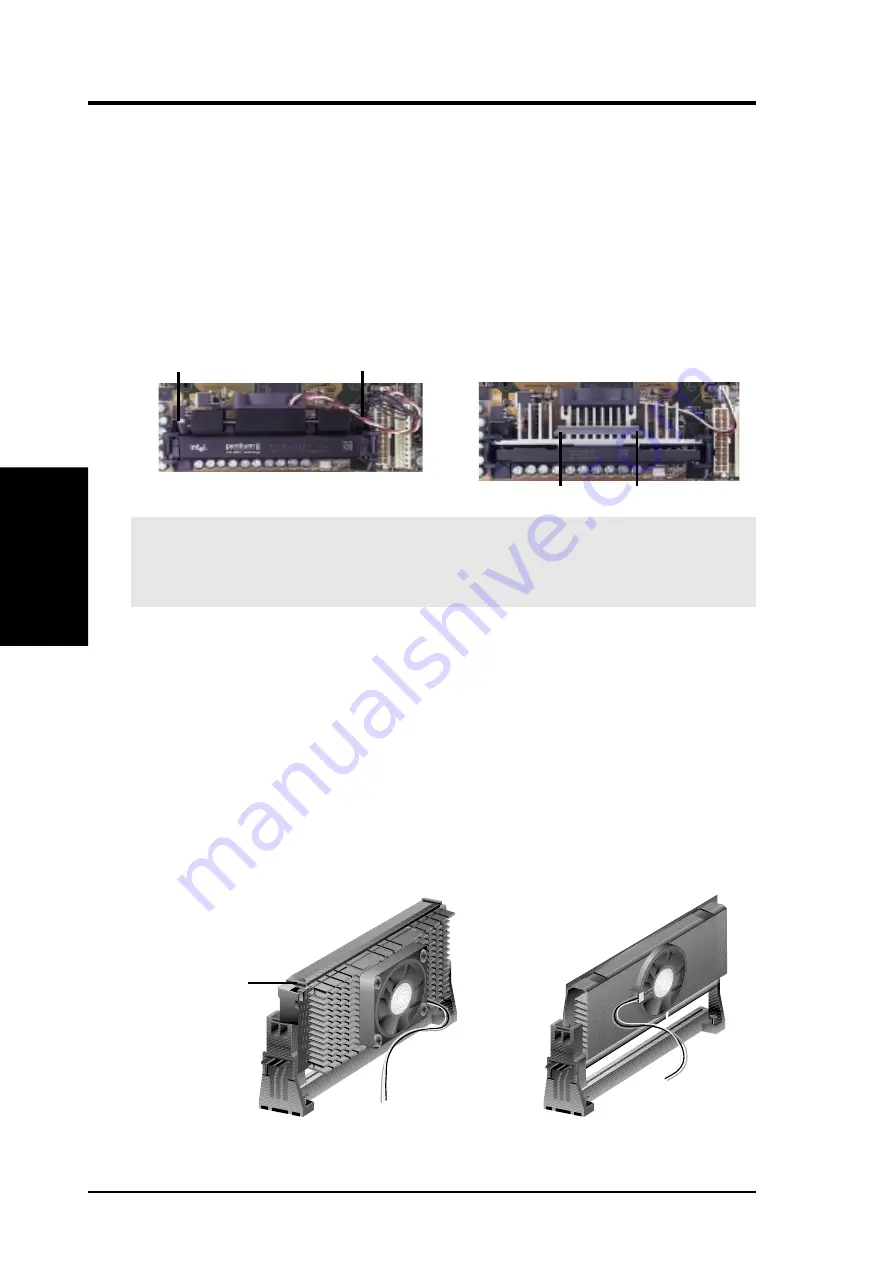
3. Insert the SECC2/SECC/SEPP
SECC with Pentium
®
II only: Push the SECC’s two locks inward until you hear
a click (the picture in step 2 shows the locks in the outward position and inward in
the picture below).
With the heatsink facing the motherboard’s chipset, push the SECC2, SECC, or
SEPP gently but firmly into the Slot 1 connector until it is fully inserted.
SECC2/SEPP
Push lock inward
SECC
CPU fan cable to
fan connector
CPU fan cable to
fan connector
2. Attach the Heatsink
NOTE: If provided, you should follow the heatsink attachment instructions
that came with your heatsink or processor. The following steps are provided
only as a general guide and may not reflect those for your heatsink.
Using SECC fan with Pentium
®
II
Push the two lock arms one direction to
clamp the heatsink onto the processor
and the other direction to release.
Using SECC2 fan with Pentium
®
III
Insert the four heatsink’s pins through
the holes of the SECC2. Place the metal
clip on the ends of the pins and slide
until it locks into place.
WARNING!
Make sure the heatsink is mounted tightly against the SECC2, SECC,
or SEPP; otherwise, the CPU will overheat. You may install an auxiliary fan to
provide adequate circulation across the processor’s passive heatsink.
NOTE: The SEPP heatsink and fan (for Intel Celeron processors) is similar to
the SECC2 heatsink and fan except that the clamping design is different.
Four Pins and metal clip
Lock Arm
Lock Arm
Содержание Intel 810 Motherboard P3W
Страница 1: ... P3W Intel 810 Motherboard USER S MANUAL ...
Страница 80: ...ASUS P3W User s Manual 80 4 BIOS SETUP 4 BIOS SETUP This page was intentionally left blank ...
Страница 116: ...ASUS P3W User s Manual 116 6 SOFTWARE REFERENCE 6 S W REFERENCE Windows 98 6 6 Hardware Information 1 Click here ...

