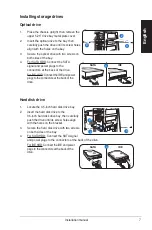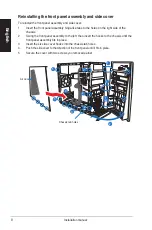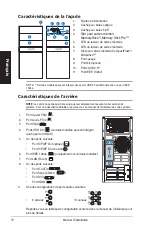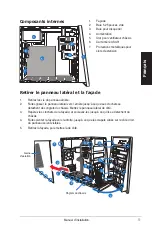
Installation manual
English
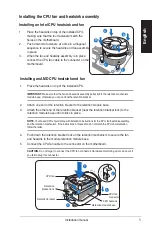
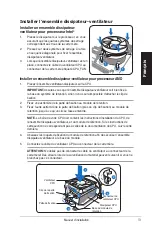
Installing the CPU fan and heatsink assembly
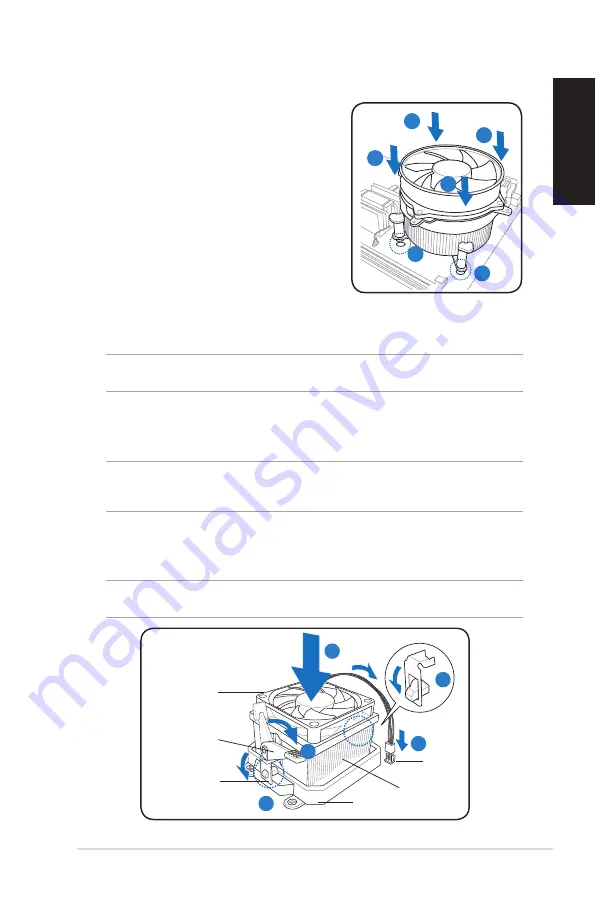
Installing an Intel CPU heatsink and fan
1.
Place the heatsink on top of the installed CPU,
making sure that the four fasteners match the
holes on the motherboard.
2.
Push down two fasteners at a time in a diagonal
sequence to secure the heatsink and fan assembly
in place.
3.
When the fan and heatsink assembly is in place,
connect the CPU fan cable to the connector on the
motherboard.
A
B
B
A
1
1
Installing an AMD CPU heatsink and fan
1. Place the heatsink on top of the installed CPU.
IMPORTANT.
Make sure that the fan and heatsink assembly perfectly fits the retention mechanism
module base; otherwise you can not lock the retention bracket.
2.
Attach one end of the retention bracket to the retention module base.
3.
Attach the other end of the retention bracket (near the retention bracket lock) to the
retention module base until it clicks in place.
NOTE.
Your boxed CPU should come with installation instructions for the CPU, fan/heatsink assembly,
and the retention mechanism. If the instructions in this section do not match the CPU documentation,
follow the latter.
4.
Push down the retention bracket lock on the retention mechanism to secure the fan
and heatsink to the module retention module base.
5.
Connect the CPU fan cable to the connector on the motherboard.
CAUTION.
Do not forget to connect the CPU fan connector! Hardware monitoring error can occur if
you fail to plug this connector.
Retention module base
CPU heatsink
CPU fan
Retention
bracket lock
Retention bracket
CPU fan
connector
2
1
5
3
4
Содержание G series
Страница 25: ...한국어 G 시리즈 ASUS PC 데스크탑 베어본 설치 설명서 Download the latest manual from the ASUS website at http support asus com ...
Страница 41: ...繁體中文 G Series 華碩個人電腦 桌上型準系統 安裝手冊 請至華碩網站 http support asus com 下載最新的手冊 ...
Страница 49: ...簡體中文 G 系列 華碩個人電腦 桌上型準系統 安裝手冊 請至華碩網站 http support asus com 下載最新的手冊 ...


