Asus EXR8ASVG255H Скачать руководство пользователя страница 22

3-4

Chapter 3: General Instructions

•.

Position.(Only.available.for.VGA.input)

: adjusts the horizontal position 

(H-Position) and the vertical position (V-Position) of the image. The 

adjusting range is from 0 to 100.

•.

Focus.(Only.available.for.VGA.input)

: reduces Horizonal-line noise 

and Vertical-line noise of the image by adjusting (Phase) and (Clock) 

separately. The adjusting range is from 0 to 100.

• 

Phase adjusts the phase of the pixel clock signal. With a wrong phase 

adjustment, the screen shows horizontal disturbances.

• 

Clock  (pixel  frequency)  controls  the  number  of  pixels  scanned  by  one 

horizontal sweep. If the frequency is not correct, the screen shows vertical 

stripes and the image is not proportional.

•.

Auto.Adjust.

: Automatically adjusts the image to its optimized position, 

clock, and phase (for VGA mode only).
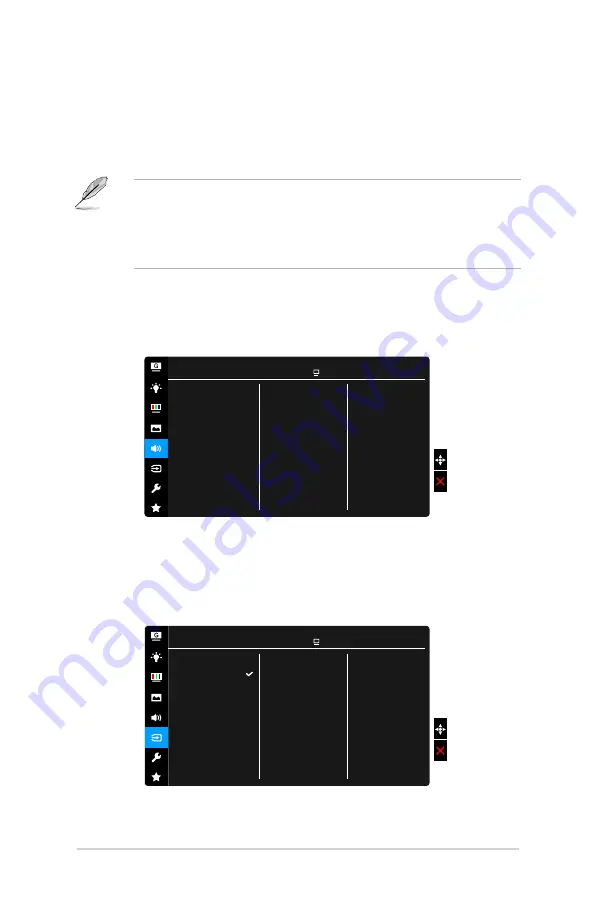
5.. Sound

Set the sound related setting from this menu.

Volume

Mute

Source                

Sound

ASUS VG255

Racing Mode VGA 1920x1080 @ 60Hz

•.

Volume

: the adjusting range is from 0 to 100.

•.

Mute

: toggles the monitor sound between on and off.

•.

Source

: decides the monitor sound comes from which source.

6.. Input.Select.

In this function, you can select your desired input source.

VGA

HDMI-1

HDMI-2    

Input Select

ASUS VG255

Racing Mode VGA 1920x1080 @ 60Hz

Содержание EXR8ASVG255H

Страница 1: ...VG255 series LCD Monitor User Guide ...

Страница 2: ...NTABILITY OR FITNESS FOR A PARTICULAR PURPOSE IN NO EVENT SHALL ASUS ITS DIRECTORS OFFICERS EMPLOYEES OR AGENTS BE LIABLE FOR ANY INDIRECT SPECIAL INCIDENTAL OR CONSEQUENTIAL DAMAGES INCLUDING DAMAGES FOR LOSS OF PROFITS LOSS OF BUSINESS LOSS OF USE OR DATA INTERRUPTION OF BUSINESS AND THE LIKE EVEN IF ASUS HAS BEEN ADVISED OF THE POSSIBILITY OF SUCH DAMAGES ARISING FROM ANY DEFECT OR ERROR IN THI...

Страница 3: ... 1 4 1 3 4 GameVisual Function 1 5 Chapter 2 Setup 2 1 Assembling the monitor arm base 2 1 2 2 Adjusting the monitor 2 2 2 3 Detaching the arm for VESA wall mount 2 3 2 4 Connecting the cables 2 4 2 5 Turning on the monitor 2 4 Chapter 3 General instructions 3 1 OSD On Screen Display menu 3 1 3 1 1 How to reconfigure 3 1 3 1 2 OSD function introduction 3 1 3 2 Specifications summary 3 6 3 3 Troubl...

Страница 4: ... user is encouraged to try to correct the interference by one or more of the following measures Reorient or relocate the receiving antenna Increase the separation between the equipment and receiver Connect the equipment into an outlet on a circuit different from that to which the receiver is connected Consult the dealer or an experienced radio TV technician for help The use of shielded cables for ...

Страница 5: ...oper ventilation is provided The monitor should be operated only from the type of power source indicated on the label If you are not sure of the type of power supply to your home consult your dealer or local power company Use the appropriate power plug which complies with your local power standard Do not overload power strips and extention cords Overloading can result in fire or electric shock Avo...

Страница 6: ...eaner directly on the screen as it may drip inside the monitor and cause an electric shock The following symptoms are normal with the monitor The screen may flicker during the initial use due to the nature of the fluorescent light Turn off the Power Switch and turn it on again to make sure that the flicker disappears You may find slightly uneven brightness on the screen depending on the desktop pa...

Страница 7: ...de optional documentation that may have been added by your dealer These documents are not part of the standard package Takeback Services ASUS recycling and takeback programs come from our commitment to the highest standards for protecting our environment We believe in providing solutions for our customers to be able to responsibly recycle our products batteries and other components as well as the ...

Страница 8: ...viii ...

Страница 9: ...e your viewing experience With these features you can enjoy the convenience and delightful visual experience that the monitor brings to you 1 2 Package contents Check your package for the following items LCD monitor Monitor base Quick start guide Warranty card Power adapter Power cord VGA cable optional Audio cable optional HDMI cable optional If any of the above items is damaged or missing contac...

Страница 10: ...r enters standby mode or displays the NO SIGNAL message 2 button Exits the OSD menu item Displays the input selection bar when the monitor enters standby mode or displays the NO SIGNAL message Toggles the Key Lock function between on and off with a long press for 5 seconds 3 button GamePlus hotkey Move the button up down to select and press to confirm the function needed Displays the input selecti...

Страница 11: ... definition of the power indicator is as the below table Status Description White ON Amber Standby mode No signal OFF OFF 1 3 2 Back view 7 1 DC IN port This port connects the power cord 2 HDMI port This port is for connection with an HDMI compatible device 3 VGA port This 15 pin port is for PC VGA connection 4 Audio in port This port connects PC audio source by the bundled audio cable 5 Earphone ...

Страница 12: ...ay Alignment displays alignment lines on 4 sides of the screen serving as an easy and handy tool for you to line up multiple monitors perfectly To active GamePlus 1 Press the GamePlus hotkey 2 Move the button up down to select among different functions 3 Press the button or move the button right to confirm the function you choose and move the button up down to navigate through the settings Move th...

Страница 13: ...oice for Real Time Strategy RTS Role Playing Game RPG playing with GameVisualTM Video intelligence Technology FPS Mode This is the best choice for First Person Shooter game playing with GameVisualTM Video intelligence Technology sRGB Mode This is the best choice for viewing photos and graphics from PCs MOBA Mode This is the best choice for multiplayer online battle arena game playing with GameVisu...

Страница 14: ...1 6 Chapter 1 Product introduction ...

Страница 15: ... 1 Have the front of the monitor face down on a table 2 Attach the base into the arm making sure the tab on the arm fits into the groove on the base 3 Fix the base to the arm by fastening the bundled screw We recommend that you cover the table surface with soft cloth to prevent damage to the monitor ...

Страница 16: ...d adjusting angle is 33 to 5 for tilt 90 to 90 for swiveling 130 mm for height adjustment 90 for portrait view 130mm 90 90 0 5 33 It is normal that the monitor slightly shakes while you adjust the viewing angle Pivoting the monitor 1 Lift the monitor to the highest position 2 Tilt the monitor to its maximum angle 3 Pivot the monitor to the angle you need 0 90 0 90 5 33 130mm It is normal that the ...

Страница 17: ... the rubbers in the four screw holes Figure 1 3 Remove the base Figure 2 4 Use a screwdriver to remove the screw on the hinge Figure 3 then remove the hinge 2 1 2 1 We recommend that you cover the table surface with soft cloth to prevent damage to the monitor The VESA wall mount kit 100 x 100 mm is purchased separately Use only the UL Listed Wall Mount Bracket with minimum weight load 22 7kg Screw...

Страница 18: ...GA HDMI port b Connect the other end of the VGA HDMI cable to your computer s VGA HDMI port c Tighten the two screws to secure the VGA connector To connect the audio cable connect one end of the audio cable to the monitor s Audio in port the other end to the computer s audio out port To use the earphone connect the end with plug type to the monitor s earphone jack when an HDMI signal is fed 2 5 Tu...

Страница 19: ...sub menu move the button up down again to navigate through the sub menu functions Highlight the desired sub menu function and press the button or move the button right to activate it 3 Move the button up down to change the settings of the selected function 4 To exit and save the OSD menu press the button or move the left repeatedly until the OSD menu disappears To adjust other functions repeat ste...

Страница 20: ... following to alleviate eye strains Users should take some time away from the display if working for long hours It is advised to take short breaks at least 5 mins after around 1 hour of continuous working at the computer Taking short and frequent breaks is more effective than a single longer break To minimize eye strain and dryness in your eyes users should rest the eye periodically by focusing on...

Страница 21: ...mart View provides better display quality under big viewing angle 4 Image Set the image related setting from this menu Sharpness Trace Free Aspect Control VividPixel ASCR Position Focus Auto Adjust More Image ASUS VG255 Racing Mode VGA 1920x1080 60Hz Sharpness The adjusting range is from 0 to 100 Trace Free Adjusts the response time of the monitor Aspect Control Adjusts the aspect ratio to full 4 ...

Страница 22: ...Clock pixel frequency controls the number of pixels scanned by one horizontal sweep If the frequency is not correct the screen shows vertical stripes and the image is not proportional Auto Adjust Automatically adjusts the image to its optimized position clock and phase for VGA mode only 5 Sound Set the sound related setting from this menu Volume Mute Source Sound ASUS VG255 Racing Mode VGA 1920x10...

Страница 23: ...Language There are 21 languages for your selection including English French German Italian Spanish Dutch Portuguese Russian Czech Croatian Polish Romanian Hungarian Turkish Simplified Chinese Traditional Chinese Japanese Korean Thai Indonesia Persian Keylock To disable all function keys Press over 5 seconds to cancel the key lock function Information Shows the monitor information Power Indicator T...

Страница 24: ...rs Black Power LED White On Amber Standby Tilt 33 5 Swivel 90 90 Height adjustment 130 mm Pivot 90 90 VESA wall mount 100 x 100 mm Kensington lock Yes Voltage rating AC 100 240V DC 19V 2 1A AC adapter Power consumption Power On 40 W Standby 0 3 W Power Off 0 3 W Temperature Operating 0 C 40 C Temperature Non operating 20 C 60 C Dimensions W x H x D 562 5 x 486 6 x 221 4 mm highest 562 5 x 356 6 x ...

Страница 25: ... adapter power cord Quick start guide warranty card Compliance and Standards UL cUL CB CE ErP FCC CCC CU RCM BSMI VCCI RoHS J MOSS WEEE Windows 7 8 1 10 WHQL CEL MEPS PSE UkrSEPRO KCC E Standby TUV Flicker Free TUV Low Blue Light PC Recycle ICES 3 EPEAT Silver Specifications are subject to change without notice ...

Страница 26: ...ct the computer with another available monitor to check if the computer is properly working Screen image is too light or dark Adjust the Contrast and Brightness settings via OSD Screen image is not centered or sized properly Adjust the H Position or V Position settings via OSD Screen image bounces or a wave pattern is present in the image Make sure the signal cable is properly connected to the mon...

Страница 27: ...75 00 P 46 86 P 832x624 74 55 P N 49 72 P N 1024x768 60 00 N 48 36 N 1024x768 70 069 N 56 476 N 1024x768 75 00 N 60 02 N 1152x864 75 00 P N 67 5 P N 1280x720 60 00 N 45 00 P 1280x768 60 00 N 47 78 P 1280x800 60 00 N 49 7 P 1280x960 60 00 N 60 00 P 1280x1024 60 02 P 63 98 P 1280x1024 75 02 P 79 98 P 1360x768 59 79 P 47 712 P 1366x768 59 79 P 47 712 P 1440x900 59 89 P 55 94 N 1600x1200 60 00 P 75 00...

Страница 28: ...rd definition video Preset Timing Name Pixel Format Horizontal Frequency kHz Vertical Frequency Hz Pixel Rate MHz OSD Display 1 480p 720 x 480 31 469 60 27 480p 60Hz 2 720p60 1280 x 720 45 60 74 25 720p 60Hz 3 576p 720 x 576 31 25 50 27 576p 50Hz 4 720p50 1280 x 720 37 5 50 74 25 720p 50Hz 5 1080p60 1920 x 1080 67 5 60 148 5 1080p 60Hz 6 1080p50 1920 x 1080 56 25 50 148 5 1080p 50Hz ...

Отзывы: