


1 5
1 5
1 5
1 5
1 5
D r i v e r s a n d u t i l i t i e s i n s t a l l a t i o n g u i d e
D r i v e r s a n d u t i l i t i e s i n s t a l l a t i o n g u i d e
D r i v e r s a n d u t i l i t i e s i n s t a l l a t i o n g u i d e
D r i v e r s a n d u t i l i t i e s i n s t a l l a t i o n g u i d e
D r i v e r s a n d u t i l i t i e s i n s t a l l a t i o n g u i d e
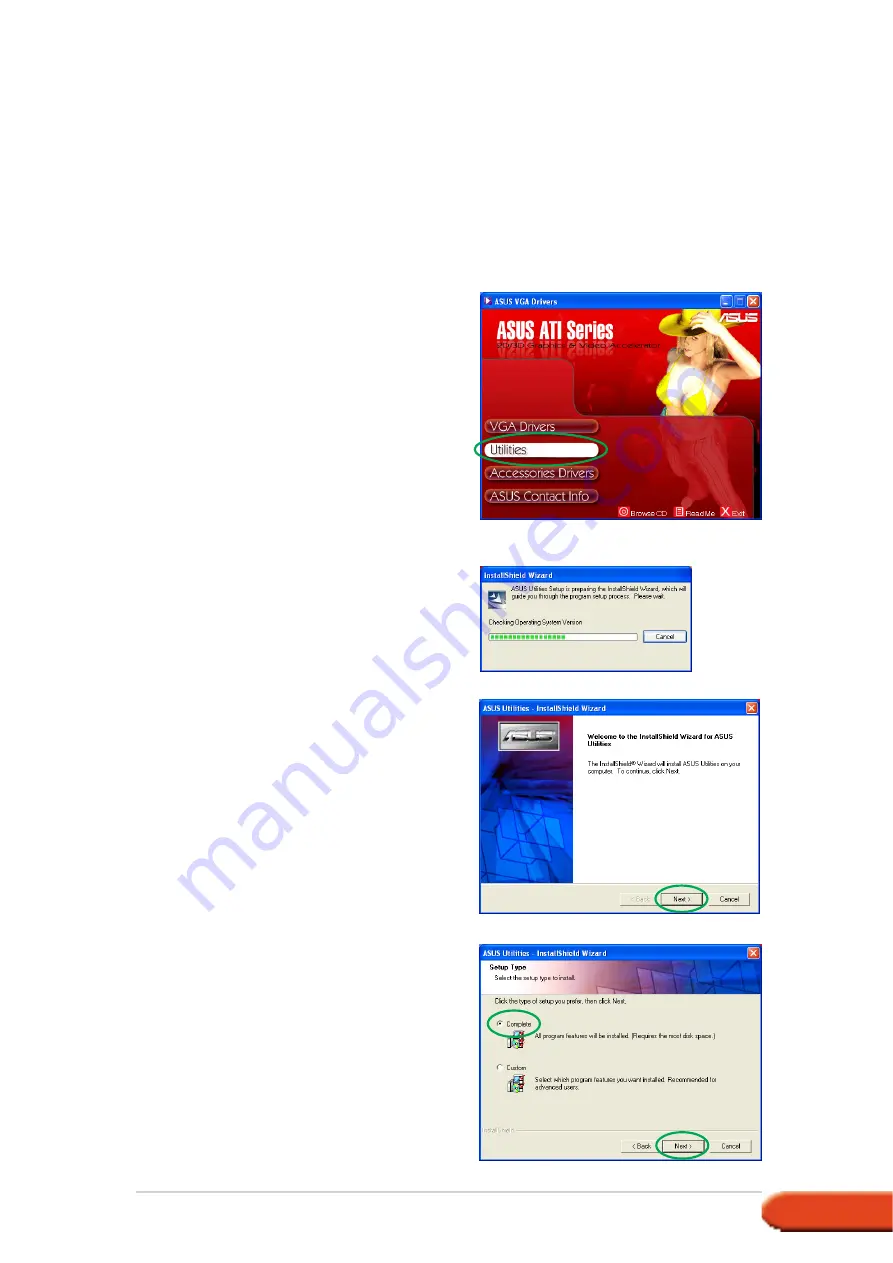
1.
Insert the support CD into your
CD-ROM drive.
2.
If autorun is enabled, the 2D/3D
Graphics & Video Accelerator
appears automatically.
If autorun is disabled, run
S e t u p . e x e
S e t u p . e x e
S e t u p . e x e
S e t u p . e x e
S e t u p . e x e from the root
directory of your support CD.
3.
From the 2D/3D Graphics &
Video Accelerator main menu,
click U t i l i t i e s
U t i l i t i e s
U t i l i t i e s
U t i l i t i e s
U t i l i t i e s.
The Setup prepares the Install
Shield Wizard which will guide
you through the program setup
process.
4.
Click N e x t
N e x t
N e x t
N e x t
N e x t from the Install Shield
Wizard welcome screen.
3 . 1
3 . 1
3 . 1
3 . 1
3 . 1
Utilities installation
Utilities installation
Utilities installation
Utilities installation
Utilities installation
To install the utilities:
Method 1: Complete installation
Method 1: Complete installation
Method 1: Complete installation
Method 1: Complete installation
Method 1: Complete installation
The Complete installation method installs all the available program features.
We recommend this method to most users.
5.
Select C o m p l e t e
C o m p l e t e
C o m p l e t e
C o m p l e t e
C o m p l e t e then click
N e x t
N e x t
N e x t
N e x t
N e x t.


