E
CHO
F
REE
®
EF IR 10 U
SER
M
ANUAL
2
EchoFree
®
and Vortex
®
are registered trademarks of ASPI Digital.
Copyright © 2001, All Rights Reserved
EF IR 10 S
ETUP
For the EF IR 10 Remote Control to operate properly with your ASPI EchoFree
Devices, you need follow the following setup procedure:
S
ET THE
D
EVICE
ID
ON YOUR
E
CHO
F
REE PRODUCT
For EF200s, Set
Device ID to 10 or
20.
If you are using an EF200 with a Vortex EF2280 or an EF1210 in your system, make
sure that the Device ID is set to 10. If you are using an EF200 with an EF400 (an
EF600), set the Device ID to 20. To check this, go to the back of the unit and look for
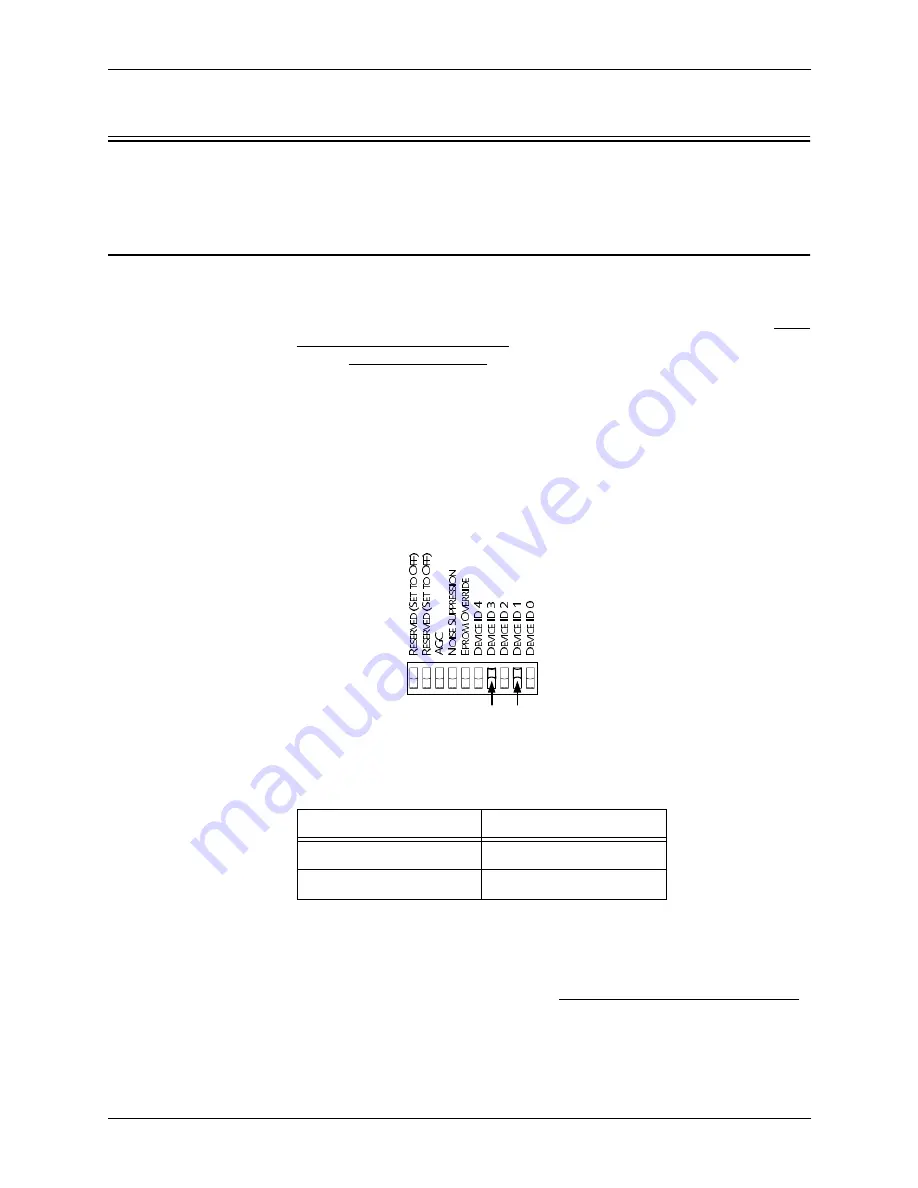
the DIP switches on the left side of the EF200. For a Device ID of 10, only the DIP
switches labeled D
EVICE
ID 3 and D
EVICE
ID 1 should be in the ON position. DIP
Switches labeled D
EVICE
ID 4, 2, and 0 should be in the OFF position. See Figure 1
below. For a Device ID of 20, DIP switches labeled D
EVICE
ID 4 and D
EVICE
ID 2
should be in the ON position, while DIP switches labeled D
EVICE
ID 3, 1, and 0
should be in the OFF position.
For EF1210s, Set
Device ID to 5.
If you are using an EF1210 in your system, make sure that the Device ID is set to 5.
To check this, go to the back of the unit and look for the DIP switches on the left side
of the EF1210. For a Device ID of 5, only Device ID 4 and Device ID 1 should be in
Figure 1. EF200 DIP switch configuration for the EF IR 10 Remote Control, for use with
the EF2280 or the EF1210. The Device ID is set to 10 in this figure.
2
1
2
))
21 21
A
N
EF200
WITH
:
S
ET
EF200 D
EVICE
ID
TO
:
EF2280 or EF1210
Device ID 10
EF400
Device ID 20
Table 1: Set EF200 Device ID according to ASPI unit it’s
being connected to.


