


13
EN
2) Remove the sponges and cartridges and dispose of them ac-
cording to local regulations.
3) Replace the sponges and cartridges at the specified intervals
(par. 6.1).
4) Close the filter cover.
The timer integrated in Askoll PURE
LED
aquariums activates a con-
venient light warning every 15 days (icon flashing) suggesting
the replacement of the CARBON and ZEO cartridges. To turn off the
RFT indication, simply press .
To turn off the RFT function, refer to par. 5.1.1. - E.
6.3. Cleaning and servicing the pump unit
1) After disconnecting the plug of each electric device, remove the
filter cover and extract the pump unit cable from the fairlead seat
and cable guide.
2) Extract the pump unit (fig. 21).
3) Detach the intake tube and delivery tube (with delivery) from the
volute
(fig. 22).
4) If necessary, replace the pump (dispose of it as indicated in
dispose of it as indicated in
Chap. 10)
Chap. 10), otherwise go to the next step.
5) Turn the pump volute counterclockwise to remove it, then ex-
tract the impeller
(fig. 23).
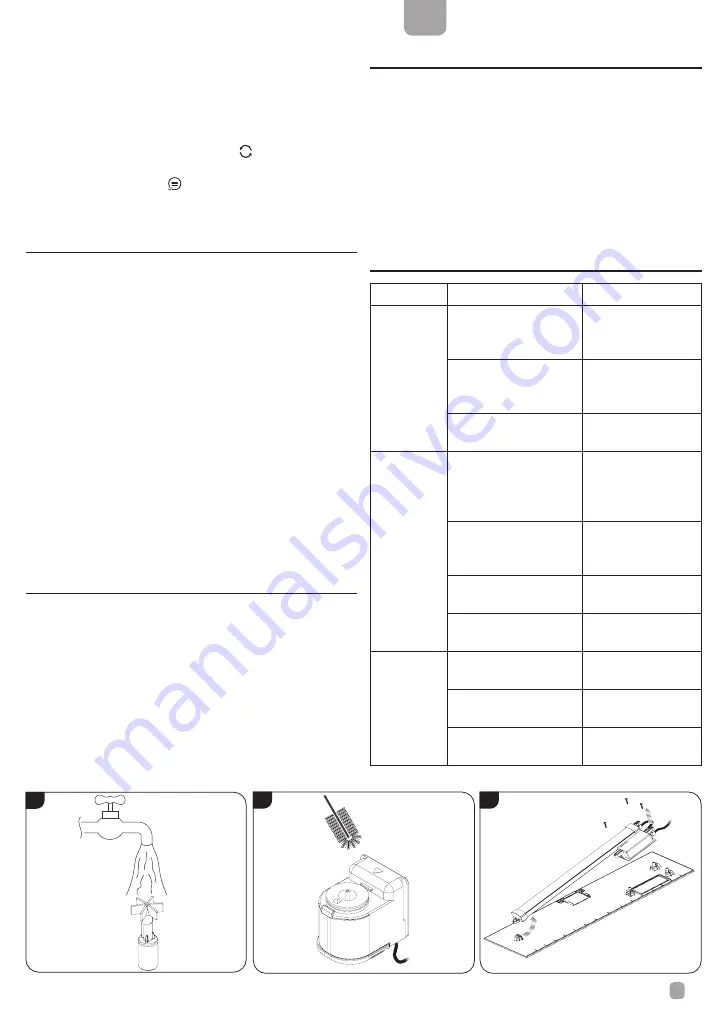
6) Rinse the impeller under running water (fig. 24).
7) Clean the impeller’s seat carefully with a non-abrasive brush
(fig. 25).
8) If necessary, also clean the intake tube, delivery tube and deliv-
ery under running water.
9) Reassemble and restore the pump carefully along with the other
components, proceeding in the reverse order to the disassembly
procedure.
6.4. Cleaning the lighting unit
1) After disconnecting the plug of the lighting unit, remove the filter
cover and the light cover.
2) Place the covers on a surface protected with a cloth so as not
to scratch them.
3) If the light cover or the lighting unit (with the timer) need re-
placing, disassemble the two elements by unscrewing the three
screws which keep them together using a suitable Phillips
screwdriver
(fig. 26).
4) Clean the lighting unit with a damp cloth.
5) Reassemble and reposition the components carefully repeating
the above described procedure in opposite order.
6.5. Cleaning the thermal heater
1) After disconnecting the plug of each electric device, let the hot
parts of the thermal heater cool down (about 30 minutes) before
handling the product.
2) Clean the glass tube to remove any scaling and deposits, which
may jeopardise the effectiveness of the heating and sensitivity
of the thermostat.
3) Reassemble and reposition the components carefully repeating
the above described procedure in opposite order.
4) Await about 30 minutes to allow the thermal heater to adapt to
water temperature and then connect the plug.
7.
7. TROUBLESHOOTING
TROUBLESHOOTING
PROBLEM
CAUSE
SOLUTION
The lighting
is not
working
Missing connection of
the led driver to the pow-
er outlet
Connect the led driver
to the power outlet
Missing connection of
the lighting unit to the led
driver
Connect the lighting
unit to the led driver
with its connector
Other
Contact your retailer
Water
temperature
low
The thermal heater is not
plugged into its power
outlet
Plug the thermal
heater into its power
outlet
The thermal heater ad-
justment knob is set too
low
Set the temperature
to the correct value
(par. 5.1.3)
The ambient tempera-
ture is too low
Add a supplementary
thermal heater
Other
Contact your retailer
No water
flow
The pump is not plugged
into its power outlet
Plug the pump into its
power outlet
The pump is jammed
Clean the impeller
(par. 6.3)
Other
Contact your retailer
24
25
26