


The projector does not display the computer image.
1.
Press the Computer button on the projector keypad, or the Source button on the remote control to select the active
computer source. You may need to press the button several times.
2.
Make sure the VGA cable is tightly connected to either of the blue VGA Computer ports on the projector. Or ensure
that the DVI cable tightly connected to the DVI connector. Check the connections to the computer. Make sure the
other end of the cable connects to the either the DVI or the Monitor connector on the computer.
3.
Verify that the power cable is correctly connected to the projector and that the power button on the keypad is solid
green (not blinking).
4.
Restart both the computer and projector. Turn on the projector first, then the computer.
5.
Reset the projector to the factory default settings. Press the Menu button. Then navigate to Basic > Advanced >
Service. Select Factory Reset. Note that if you have created special settings (for example, colors and sources), these
will be reset to the original defaults.
6.
Verify that the computer resolution is set to 1024x768 (XGA resolution).
7.
If you're using a laptop and the computer image still does not display on the projector, try activating the computer's
external video port with special keystrokes. Press and hold the FN key on the laptop and then press the appropriate
function key (F1, F2, F3, etc.) that's marked LCD/CRT or marked with a picture of a monitor. (Refer to the laptop
activation chart or your laptop documentation for further video port activation instructions.)
You may need to press the Function key more than once. Many laptops cycle through a series of configurations at
each key press, including image on the screen, but not on the laptop, image on both the screen and laptop, image
on laptop only. Be sure to wait five seconds or so after pressing the function key. Sometimes it takes the projector a
few seconds to communicate with the laptop.
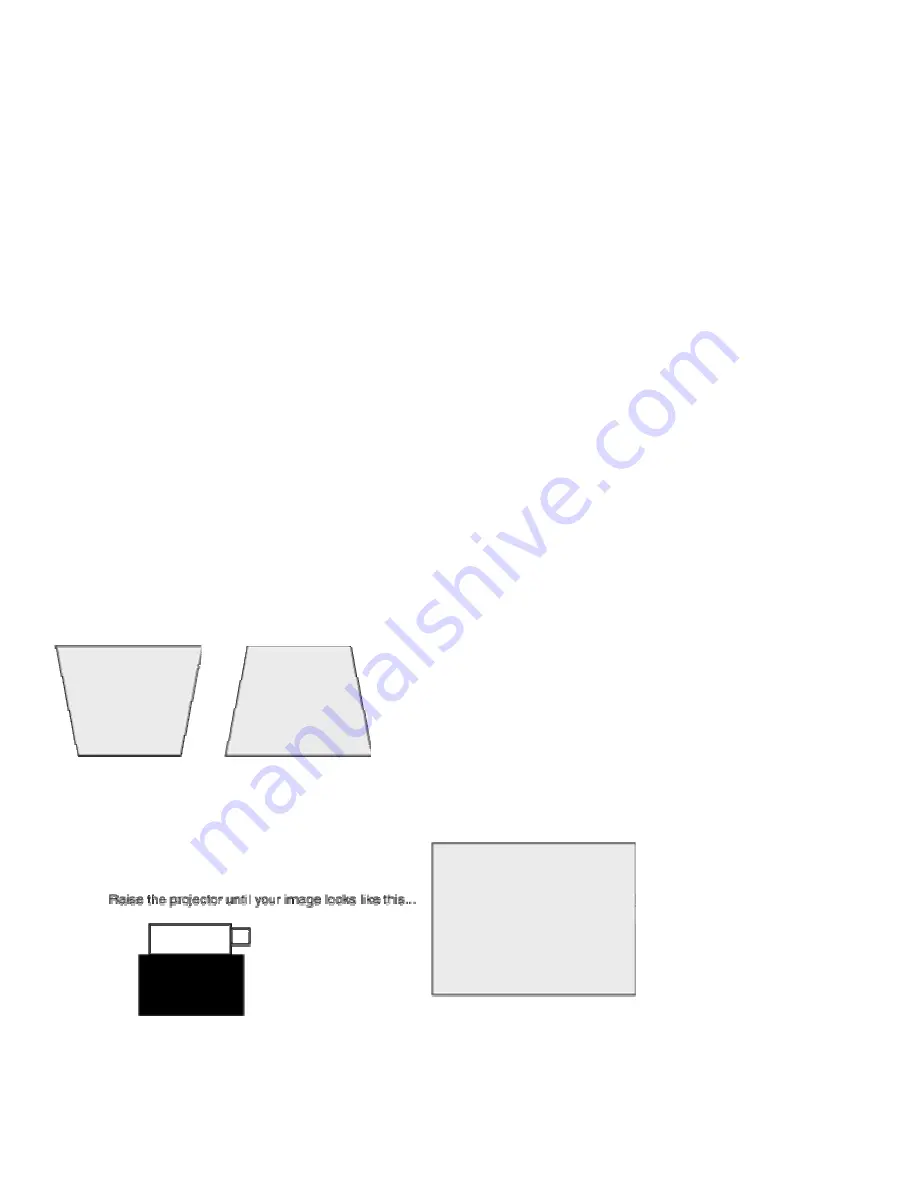
The image is not perfectly rectangular. ("Keystoning")
When a projected image is wider at the top or the bottom, or taller on the right or left side, we say that the image is
'keystoned'. Keystoning happens when your projector is not perpendicular to the screen, either in the vertical plane or the
horizontal plane.
Correcting vertical keystoning
If you use the elevator to tilt the front of the projector up so you can get the image higher on the wall, the image will suffer
from vertical keystoning. Likewise, if you mount the projector on the ceiling and need to tilt it to get the image on the
screen, you'll also get a keystoned image.
or
1.
Try raising or lowering the projector. You can correct for keystoning by making sure the projector is placed
perpendicular to the viewing screen. For example, it may be necessary to place the unit on a higher surface to
correct the image. Or you can add an extension to a ceiling mount that allows you to mount the projector lower.
Copyright © 1997-2004 InFocus Corporation.
All Rights Reserved.
2.
Finally, change the Keystone setting. For most models, you can use the Keystone function on the projector keypad
or in the menu of the projector to adjust the keystone digitally.


