background image

OPERATION:

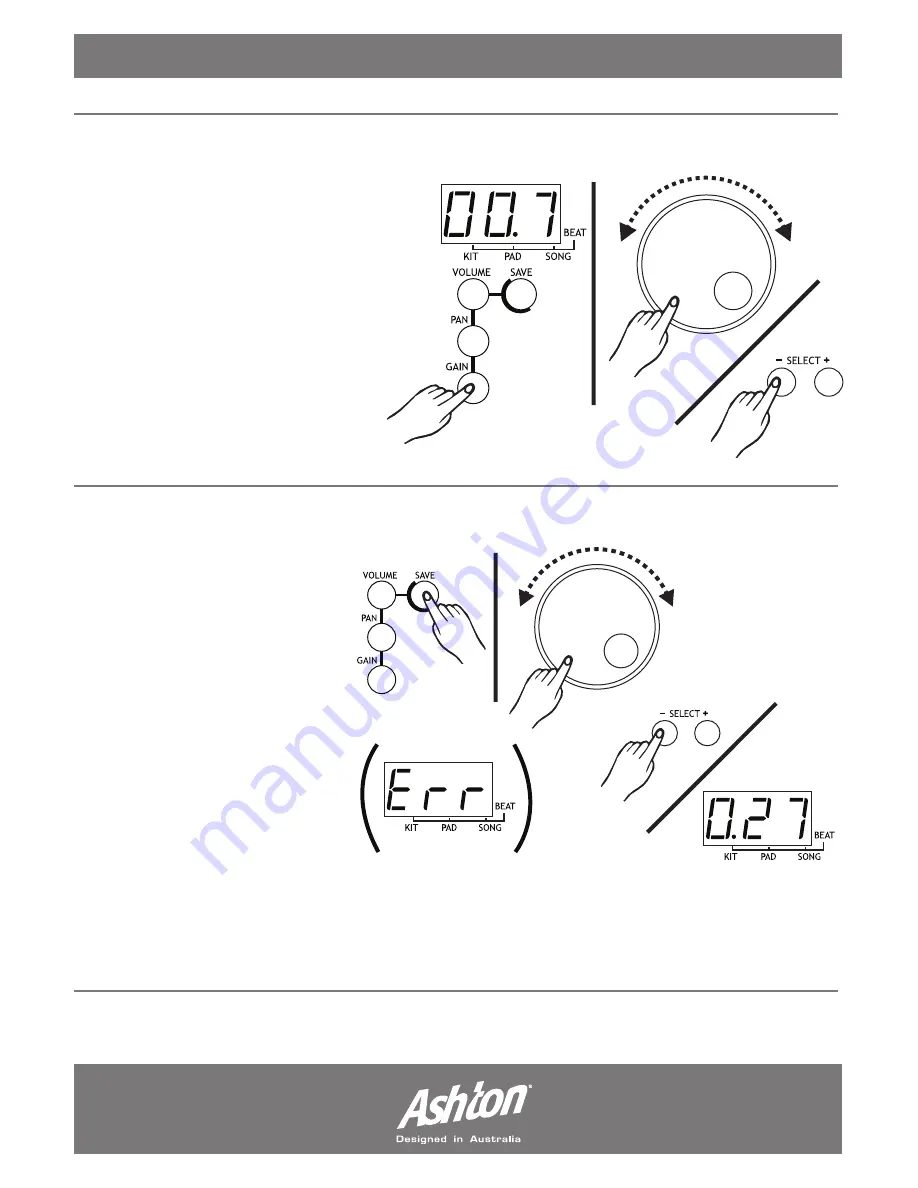
SET A  PAD GAIN:

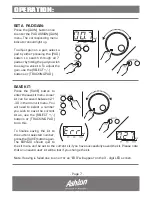
Press the (GAIN)  button once 
to enter the PAD ASSIGN (GAIN) 
menu. The corresponding menu 
indicator should light up.

To adjust gain on a pad, select a 
pad by either pressing the (PAD) 
button  to  search  through  all  7 
pads or by hitting the pad you wish 
to assign a voice to. To adjust the 
gain, use the (/-) 
buttons or (TRACKING PAD).. 

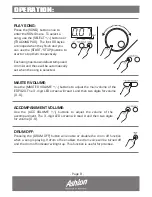
SAVE KIT:

Press  the  (SAVE)  button  to 
enter the save kit menu. A user 
kit can be saved between 21 
- 30 in the drum kit menu. You 
will  need  to  select  a  number 
you  wish  to  save  the  current 
kit  as,  use  the  (SELECT  +/-) 
buttons  or  (TRACKING  PAD) 
to do this.

To  finalise  saving  the  kit  to 
the current selected number, 
press the (SAVE) button again. 
The  EDP420  should  quit  to 
the kit menu and be set to the current kit if you have successfully saved the kit. Please note 
that an unsaved user kit will be lost if you change the kit. 

Note: If saving is failed due to an error an “ERR” will appear on the 3 - digit LED screen. 

- Page 7 -

Содержание EDP420

Страница 1: ...USER MANUAL EDP420...

Страница 2: ......

Страница 3: ...SELECT A DRUM KIT 5 SET PAD VOICE 5 SET PAD VOLUME 6 SET PAD PAN 6 SET PAD GAIN 7 SAVE KIT 7 PLAY SONG 8 MASTER VOLUME 8 ACCOMPANIMENT VOLUME 8 DRUM OFF 8 TEMPO 9 METRONOME 9 HAND PERCUSSION 9 DEMO 9...

Страница 4: ...with 2 different voices Weight 3 3kg Includes a pair of drumsticks Dimensions 50cm x 37cm x 15 7cm INTRODUCTION Ashton is designed in Australia by a team of industry experts that have years of experi...

Страница 5: ...ent cover on the underside of the unit 2 Insert 6 x alkaline C sized R 14 SUM 2 or equivalent batteries Use the polarity instructions negative and positive guide 3 Close the battery compartment Page 2...

Страница 6: ...rt or stop the metronome lights when on G LED Monitor 3 digit main display This will show all your current menu settings H HAND PERC LED Indicator Press once to engage hand percussion functions lights...

Страница 7: ...Press once to change the pan left and right balance of the pad R PLAY STOP Press once to start or stop a recording replay S REVERB Press once to engage and subsequently increase the level of reverb T...

Страница 8: ...D screen will show the current kit number with the corresponding menu indicator lit up The button SELECT or TRACKING PAD can be used to select any kit 1 30 loop as the current kit SET A PAD VOICE Pres...

Страница 9: ...pads or by hitting the pad you wish to assign a voice to To adjust the volume use the SELECT buttons or TRACKING PAD SET A PAD PAN Press the PAN button once to enter the PAD ASSIGN PAN menu The corre...

Страница 10: ...E button to enterthesavekitmenu Auser kit can be saved between 21 30 in the drum kit menu You will need to select a number you wish to save the current kit as use the SELECT buttons or TRACKING PAD to...

Страница 11: ...R VOLUME Use the MASTER VOLUME buttons to adjust the main volume of the EDP420 The 3 digit LED screen will read L and then two digits for volume 0 9 ACCOMPANIMENT VOLUME Use the ACC VOLUME buttons to...

Страница 12: ...nting twice for metronome sound and again to turn the metronome function off HAND PERCUSSION Press the HAND PERC button to enter the hand percussion mode This will automatically take you to SONG 5 and...

Страница 13: ...t or stop recording 3 If FL appears on the screen the memory is full and you have been recording for too long INPUT OUTPUT PEDALS The two pedals you can attach have been provided There is a kick and a...

Страница 14: ...Tom 002 051 Room Tom 003 052 Room Tom 004 053 Room Tom 005 054 Room Tom 006 055 Electronic Tom 001 056 Electronic Tom 002 057 Electronic Tom 003 058 Electronic Tom 004 059 Electronic Tom 005 060 Elec...

Страница 15: ...T continued 153 SFX 008 154 SFX 009 155 SFX 010 156 SFX 011 157 SFX 012 158 SFX 013 159 SFX 014 160 SFX 015 161 SFX 016 162 SFX 017 163 SFX 018 164 SFX 019 165 SFX 020 166 SFX 021 167 SFX 022 168 SFX...

Страница 16: ...t Funk 2 DANCE 31 07 Dance 1 32 07 Dance 2 33 01 Dance 3 34 06 Dance 4 35 04 Dance 5 36 07 Dance 6 RAP 37 03 Rap 1 38 01 Rap 2 39 03 Rap 3 BOUNCE 40 04 Bounce 1 41 03 Bounce 2 42 01 Bounce 3 SHUFFLE 4...

Страница 17: ...aring loss Do not operate for a long period of time at a high volume level or at a level that is uncomfortable 6 This product should be installed in a location that provides adequate ventilation 7 Thi...

Страница 18: ...info ashtonmusic com au...

Отзывы: