Aruba Instant On 1930 Series Скачать руководство пользователя страница 3

CAUTION: 
• Do not ship any switch in a rack without checking for restrictions in the latest Aruba Instant On 1930

Switches Installation and Getting Started Guide. Otherwise, you may void the switch warranty.

• Ensure that the power source circuits are properly grounded. Then connect the switch to the AC

power source by using the power cord supplied with the switch. For more information on power

cords, see Power cords.

• Ensure that the power cord and network cables at the switch mounting location do not create a

tripping hazard.

• When installing the switch, the AC outlet must be near the switch and easily accessible in case the

switch must be powered off.

• Ensure that the switch does not overload the power circuits, wiring, and over-current protection. To

determine the possibility of overloading the supply circuits:
1. Add the ampere ratings of all devices installed on the same circuit as the switch.
2. Compare the total with the rating limit for the circuit.

The maximum ampere ratings are usually printed on the devices near the AC power connectors.

• Avoid blocking any ventilation openings on the top, sides, rear, or front of the switch.
• Ensure that the air flow around the switch is not restricted. Leave at least 7.6 cm (3 inches) for

cooling. For air flow direction, see the latest Aruba Instant On 1930 Switches Installation and Getting

Started Guide.

• Do not install the switch in an environment where the operating ambient temperature exceeds its

specification. See the environmental operating temperature information in the latest Aruba Instant

On 1930 Switches Installation and Getting Started Guide.

NOTE: The following Aruba Instant On 1930 switch models have a fan-free design, making


them 

quiet for office deployments.
• Aruba Instant On 1930 8G 2SFP Switch (JL680A)
• Aruba Instant On 1930 8G PoE 2SFP Switch (JL681A)
• Aruba Instant On 1930 24G 4SFP+ Switch (JL682A)
• Aruba Instant On 1930 48G 4SFP+ Switch (JL685A)

A warmer than normal enclosure is a standard state of operation for a fan-free switch. Although the top

of the switch enclosure may feel warm to the touch, it has no effect on functionality or performance of

the product. For rack-mounted Aruba Instant On 1930 fanless switches, ensure that a 1U (44.45 mm /

1.75-inch) vertical space is maintained between the switch and the device above it.
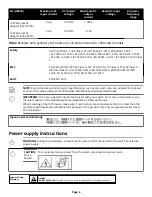
Power cords

Aruba includes the power cord intended for use with your Aruba switch. Different countries/regions may require

different power cords. For a list of the power cords that apply to your Aruba Instant On 1930 switch, see the section

that lists power cords in the latest edition of the Aruba Instant On 1930 Switches Installation and Getting Started Guide.

Page 3

Содержание Instant On 1930 Series

Страница 1: ...r 1 13W External AC Adapter 5066 5562 13W External AC Adapter 5184 5864 13W External AC Adapter 5300 1005 15W External AC Adapter 5066 5563 Aruba Instant On 1930 8G Class4 PoE 2SFP 124W Switch JL681A Aruba Instant On 1930 24G 4SFP SFP Switch JL682A Aruba Instant On 1930 24G Class4 PoE 4SFP SFP 195W Switch JL683A Aruba Instant On 1930 24G Class4 PoE 4SFP SFP 370W Switch JL684A Aruba Instant On 1930...

Страница 2: ...red position for the fanless Aruba Instant On 1930 switches is at the base of the rack or cabinet for optimal cooling or below as many of the other products as can be accommodated If you wall mount the switch the network ports must face upward or downward that is toward or away from the floor Do not wall mount the switch with the side ventilation holes facing up or down This section provides preca...

Страница 3: ...or cooling For air flow direction see the latest Aruba Instant On 1930 Switches Installation and Getting Started Guide Do not install the switch in an environment where the operating ambient temperature exceeds its specification See the environmental operating temperature information in the latest Aruba Instant On 1930 Switches Installation and Getting Started Guide NOTE The following Aruba Instan...

Страница 4: ...ou have a power cord approved for use with your switch model contact your authorized Aruba dealer or sales representative for assistance WARNING Remove the power cord from the switch before mounting or dismounting the switch Environmental specifications Table 1 Environmental specifications for all 1930 switch models Requirement Value Operating temperature 32 F to 104 F 0 C to 40 C Operating relati...

Страница 5: ...ency range JL681A Aruba Instant On 1930 8G Class4 PoE 2SFP 124W Switch 1 7 0 9 A 100 127 200 240 50 60 Hz JL682A Aruba Instant On 1930 24G 4SFP SFP Switch 0 5 0 4 A JL683A Aruba Instant On 1930 24G Class4 PoE 4SFP SFP 195W Switch 2 6 1 3 A JL684A Aruba Instant On 1930 24G Class4 PoE 4SFP SFP 370W Switch 4 9 2 4 A JL685A Aruba Instant On 1930 48G 4SFP SFP Switch 0 8 0 5 A JL686A Aruba Instant On 19...

Страница 6: ...onmental and other switch specifications such as acoustics data are included in the latest version of the Aruba Instant On 1930 Switches Installation and Getting Started Guide IMPORTANT Use only supported Aruba transceivers with your switch For more on transceivers see the latest edition of the ArubaOS Switch and ArubaOS CX Transceiver Guide When selecting a fiber SFP device make sure it can funct...

Страница 7: ...EU relating to electrical equipment designed for use within certain voltage limits Directive 2014 30 EU relating to electromagnetic compatibility Directive 2011 65 EU on the restriction of the use of certain hazardous substances in electrical and electronic equipment and carries the CE marking accordingly Belarus Kazakhstan Russia marking For manufacturer and local representative information see S...

Страница 8: ... the switch 4 Mount the switch WARNING Mounting restrictions apply See the Warning under Installation precautions and guidelines 5 Connect the switch to a power source 6 Optional Install transceivers 7 Connect the network cables 8 Configure the switch for network operation Documentation feedback Send any errors suggestions or comments to Documentation Feedback docsfeedback hpe com Page 8 ...

Отзывы: