background image

Aruba AP-120 Series Indoor Access Point

| Installation Guide

5


2. Align the mounting slots on the rear of the AP over the screws and slide the unit into place (see 

Figure 2

).

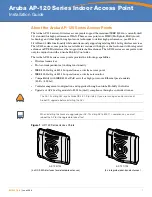
Figure 2  

Installing the AP-120 series Access Point on a Wall

3. On the AP-121 or AP-125, orient the antennas. For best performance, swivel the antennas so that 

they are oriented vertically, preferably in the same plane, parallel to the wall (see 

Figure 3

).

Figure 3  

Antenna Orientation on a Wall-Mounted AP-121/AP-125

On the AP-120 or AP-124, install the external antennas according to the manufacturer’s instructions, 
and connect the antennas to the antenna interfaces on the AP (see 

Figure 4

).

Figure 4  

Antenna Interfaces on the AP-120/AP-124

ap

Содержание AP-120 Series

Страница 1: ...ba AP 120 series access points provide the following capabilities z Wireless transceiver z Protocol independent networking functionality z IEEE 802 11a b g or 802 11n operation as a wireless access po...

Страница 2: ...f the Mobility Controller refer to the ArubaOS Quick Start Guide for the software version installed on your controller Pre Installation Checklist Before installing your AP 120 series access point be s...

Страница 3: ...Checklist before you attempt to set up and install an AP 120 series AP N O T E Aruba Networks in compliance with governmental requirements has designed the AP 120 series access points so that only aut...

Страница 4: ...s water fountains ponds and trees z Brick RF reflectors include z Metal Objects Metal pans between floors rebar fire doors air conditioning heating ducts mesh windows blinds chain link fences dependin...

Страница 5: ...125 orient the antennas For best performance swivel the antennas so that they are oriented vertically preferably in the same plane parallel to the wall see Figure 3 Figure 3 Antenna Orientation on a...

Страница 6: ...ure that any cable slack is above the ceiling tile Figure 5 Orienting the Ceiling Tile Rail Mounting Slots 4 Pushing toward the ceiling tile rotate the AP clockwise until the device clicks into place...

Страница 7: ...ular adapter to convert the RJ 45 female connector on the AP to a DB 9 male connector and connect the adapter to a laptop using an RS 232 cable See Figure 7 for connector details of the adapter N O T...

Страница 8: ...fully see Table 3 Refer to the ArubaOS Quick Start Guide for further details on verifying post installation network connectivity Table 3 AP 120 Series LED Meanings LED Color State Meaning PWR Green st...

Страница 9: ...a Mobility Management System User Guide Product Specifications Mechanical z Dimensions antenna stowed HxWxD 4 9 inches x 5 13 inches x 2 inches 12 4 cm x 13 cm x 5 1 cm z Weight 15 oz 0 42 kg z Shippi...

Страница 10: ...t POE sourcing devices POE 56 V 350 mA Wireless LAN z Network Standards IEEE 802 11b IEEE 802 11g IEEE 802 11a and IEEE 802 11n draft z Antenna Type Integrated 802 11a b g n omni directional high gain...

Страница 11: ...tzerland and therefore are marked with the symbol shown at the left crossed out wheelie bin The treatment applied at end of life of these products in these countries shall comply with the applicable n...

Страница 12: ...mance to this Directive China RoHS Aruba products also comply with China environmental declaration requirements and are labeled with the EFUP e label shown at the left Battery Replacement CAUTION Batt...

Отзывы: