downtown
8
DOWNTOWN CONNECTION
Installation guide
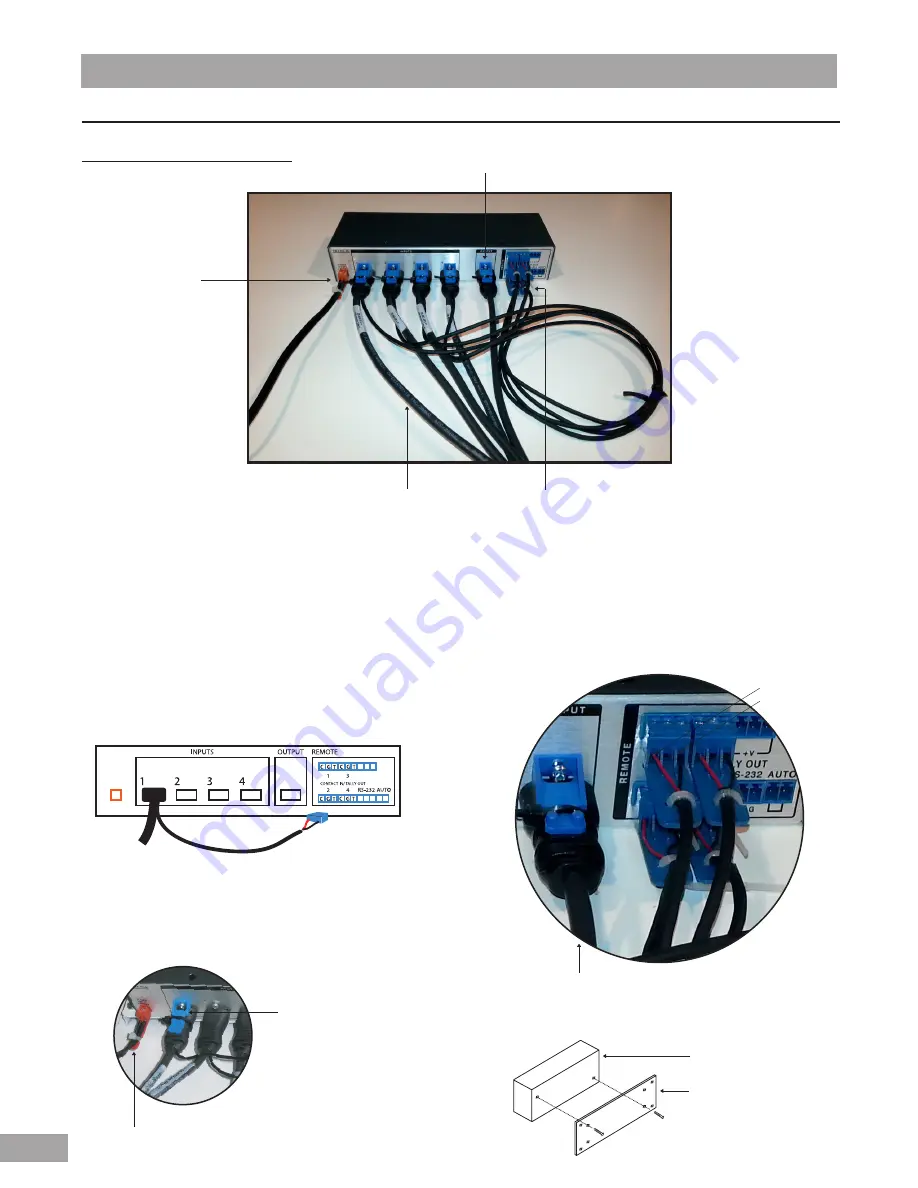
Connections of the electronic box
Step 1 :
Connect the four HDMI data sharing cables. Refer to the instructions
included with the Downtown Connection system.
IMPORTANT
- The connections (black and red cables) of the HDMI cable #1 must be
inserted into one of the blue connectors. Than plug the connector into
the reserved space #1.
Repeat the same procedure for the HDMI data sharing cables
#2, 3, 4.
Step 2 :
Secure the 4 HDMI data sharing cables with the blue plastic locks
included. Refer to the Downtown Connection installation guide
included with the system and refer to the picture below.
Blue plastic lock
Screw the blue lock in the electronic box
and fix it with a tie wrap.
Step 3 :
Connect the electrical cable (orange) to the electronic box.
This cable is linked with the transformer. Once the installation is
complete, connect the transformer to the power bar.
Electrical cable (orange)
Step 4 :
Connect the HDMI cable for monitor to the electronic box.
Once the installation is complete, connect this cable to the monitor.
Step 5 :
Screw the black metal plate provided by Artopex to the eletronic box.
Under the electronic box
''ARTOPEX'' metal plate
Electrical cable (orange)
4 x HDMI data sharing cables
HDMI cable for monitor (output)
Connectors (black and red wires)
Blue plastic connectors
Black wires : tally output
Red wires : contact
Monitor cable
Содержание downtown
Страница 1: ...Installation guide Update August 2016...
Страница 2: ...downtown 2 Installation guide...


