Rail-Demux User Guide
Page 7
Page 7
Rail-Demux User Guide
Configuration
Rail-Demux uses one channel to control each output, requiring 16 channels in total.
There are various configuration options (including start address programming). These are
accessed using RDM, which requires a suitable programming interface.
One option is Commissioner rdmx, a handheld RDM programming tool available from Artistic
Licence.
Alternatively, Rail-Demux can be connected to an Art-Net network using an interface product
such as artLynx or netLynx. Configuration is then achieved using DMX-Workshop, a PC software
application for managing Art-Net networks (available as a free-of-charge download from the
Artistic Licence website, www.artisticlicence.com).
DMX-Workshop
This windows-based application provides
a convenient means of accessing the Rail-
Demux configuration menus. DMX-Workshop
can also be used for product firmware uploads.
Start address programming
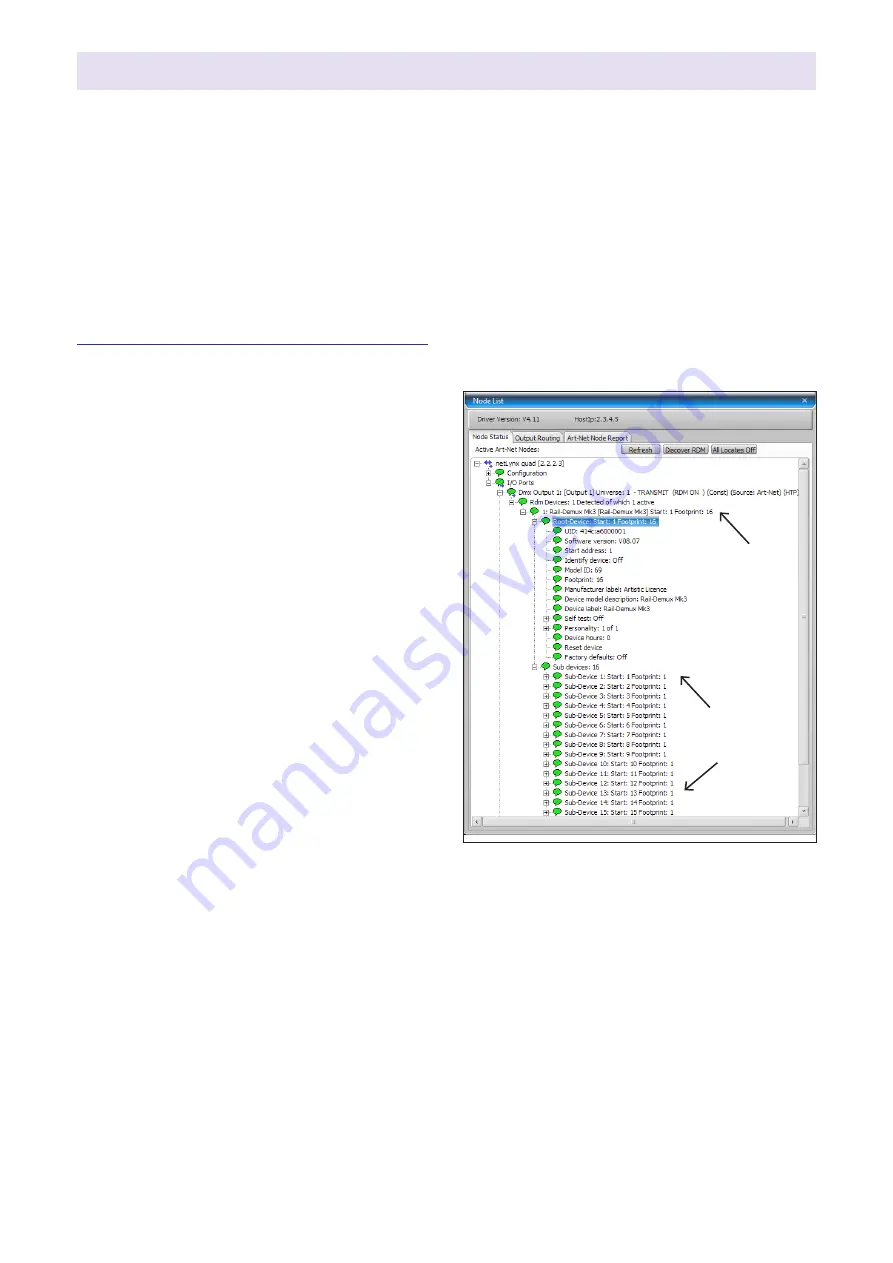
In the DMX-Workshop ‘Node List’ screen,
Rail-Demux appears as an RDM device,
with each output listed as a sub-device (see
screenshot opposite).
If the user wishes all 16 output channels to be
consecutively addressed, this is achieved by
setting the RDM device start address (right-
click on the RDM device entry). Alternatively, if
the user wishes to individually set the address
of each channel, this is achieved by setting
the start address of each sub-device (right-
click on the desired RDM sub-device).
Generally, right-clicking on any entry brings
up a menu of the available options.
RDM device
RDM
sub-devices
The priority of output is as follows (highest at
the top):
1.
Test pattern
2.
DMX512
Test mode
Output priority
Rail-Demux offers two test patterns:
Test 1 = all outputs on
Test 2 = all outputs off
DMX-Workshop (or suitable RDM tool) can be
used to put the product in test mode, which
can be useful during show commissioning or
rehearsals.
To access the data test mode selections,
right-click the Rail-Demux RDM device, then
go to ‘Self test’.


