background image

7

www.art-tech.com

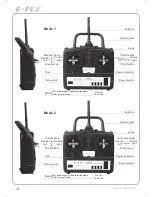
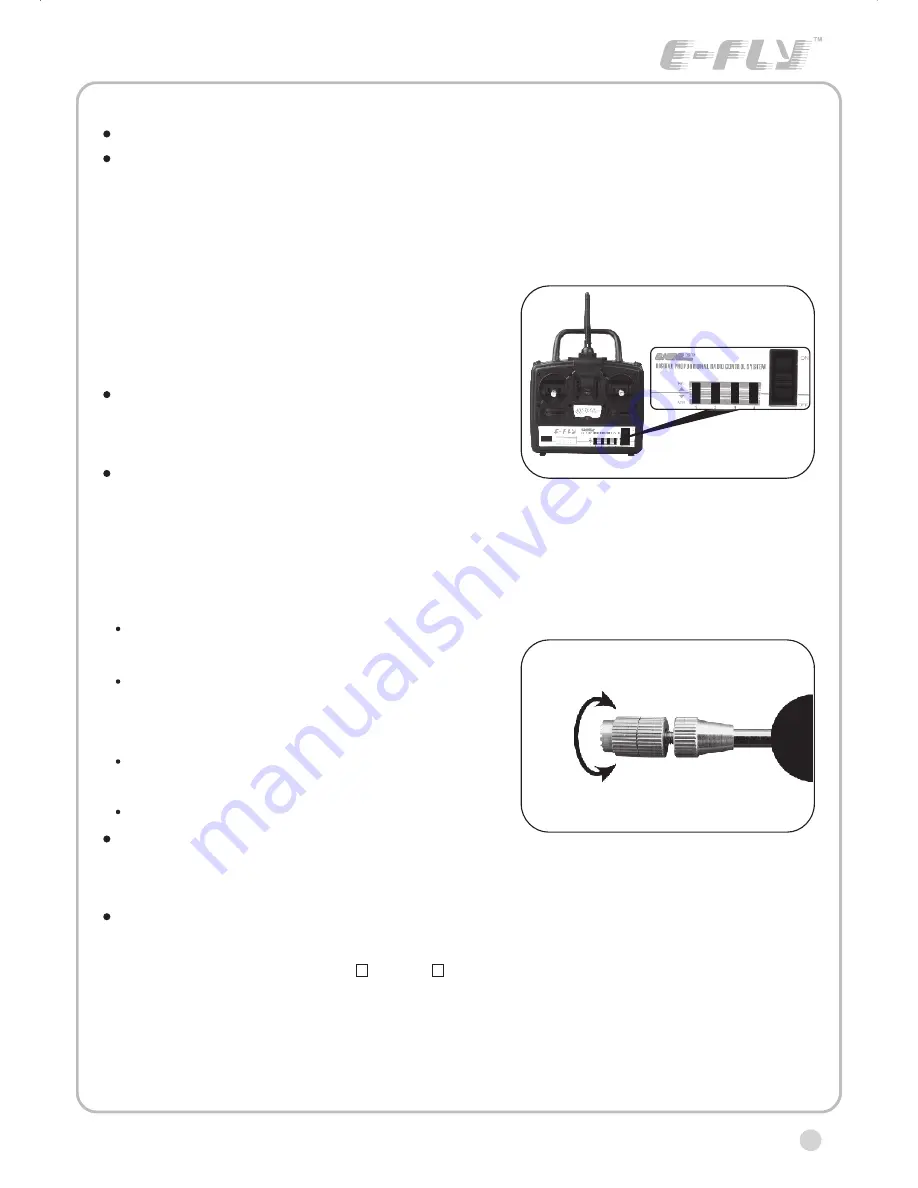
 Channel display

    Ail.: Aileron          (CH1)

   ELE.: Elevator      (Ch2)

   THR.: Throttle      (CH3)

   RUD.: Rudder      (CH4)

Working modes' option

   MIX: delta-wing or V type tail-wing mode

   NOR: normal mode

Operating direction display

   REV.: Reverse setting

   NOR.: Normal setting

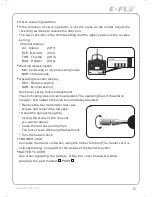
Stick lever spring tension adjustment

The stick spring tension can be adjusted. The operating feel of the aileron, 

elevator, and rudder sticks can be individually adjusted.

   Remove the four transmitter rear case

   screws and remove the rea case.

   Adjust the spring strength by

   turning the screw of  the channel

   you want to adjust.

   Close the rear case and tighten 

   The four screws.Stick length adjustment.

   Turn the head of stick.

TRAINER JACK

Connects the trainer cord when using the trainer function (The trainer cord  is 

sold separately), see part 8 for the details of the trainer function.

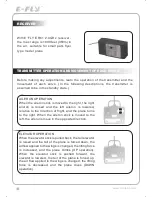
BATTERY COVER

Use


when


replacing


the


battery

Slide


the


cover


downward


while 

pressing


the


part


marked      PUSH

Servo reversing switches

If  the  direction  of  servo  operation  is  not  the  same  as  the  model,  adjust  the 

reversing switches to reverse the direction.

The lower position is the normal setting and the upper position is the reverse 

setting.

CERTIFICATION

We  offer  35Mhz, 

41Mhz  and  72Mhz  transmitter.  The 

40Mhz  or  41Mhz  transmitter  has  CE  certification  and  the  72Mhz  transmitter  has  FCC 

certification.

36Mhz,  40Mhz, 

35Mhz,  36Mhz, 

CERTIFICATION

1.

2.

3.

4.

5.

6.

Pitch
Undercarriage
Rudder
Throttle

Servos

Black

Red

White

Elevator
Aileron

Operating voltage: 4.5V-6.5V

Current drain: 10mA

Number of channels: 6CH

System: FM(PPM) Single conversion

Sensitivity: 1V

Weight: 15g

Size(L x W x H): 47mm x 24mm x 12mm

Range(Height): 500m

Range(Distance): 400m

Adjacent channel rejection: -65dBm 16kHz

Available  35MHz  receiver  is  compatible  with  JR  transmitter,  40  Mhz 
receiver  is  compatible  with  JR  transmitter  72  Mhz  receiver  is  compatible 
Futaba transmitter.

Caution: When you plug the servo cable into the receiver, the black wire of 
the servo cable should be nearest to the outside of the receiver box.

SERVO

We offer 6gram, 9gram and 17gram servos for selection. We offer 3 servos 
in one package.

CRYSTAL

The crystal is located on the side of  the receiver.

Output / battery connector

Aileron servo (Ch1)    Elevator servo (Ch2)

Throttle servo (Ch3)   Rudder servo (Ch4)

MANUAL FOR BRUSHED ESC

Features

   Can control the motor run deasil and anti-clockwise.

   Full proportional liner.

   Auto cut-off for low voltage.

   Signal loss protection: while no signal received, the ESC will auto cut-off

   In order not to hurt anyone due to out of control.

Assembling

1.Turn the transmitter on and push the throttle into minimum.

2.Plug the signal wire to the receiver and make sure all is correct.

3.Connect  the  battery  and  ESC  and  pay  attention  to  the  polarity,  or  that  can 

cause  the  damage  to  ESC.  If  there  is  the  sound  like 

beep

,  that  means 

everything  is  ok.  If  not,  please  check  whether  is  ok,  like  the  wire  connection, 

battery and the position of throttle.

4.After  the  Beep  sound  is  over,  you  can  start  the  motor  by  moving  the  throttle.

5.If  the  motor  runs  in  the  opposite  direction  as  what  you  want,  you  can  change 

the connector of motor.

6.The connections between motor and ESC should be well protected, or that can 

cause the damage to ESC

7.Please use this ESC under the working currency.

8.When the battery voltage is under the safety level or there is signal received, 

ESC will auto cut off the supply for motor.

Signal connector for receiver

white

Signal wire

Red: positive
Black: negative

Battery connector

Connector

 for motor

Specifications


30A

     Input voltage:5V~14.4V

     Output currency:30A/50A (Max)   

     BEC:5V/1A

     Auto cut-off voltage:5V

     Starting: throttle in min
               (Starting point:1.0-1.5ms)

     Dimension:21 x 32 x 10mm

     Weight:15g

Содержание E-Fly ETB41-2.4GHz

Страница 1: ...R C SYSTEM OPERATING MANUAL DIGITAL PROPORTIONAL RADIO CONTROL SYSTEM 4 CHANNEL ETB41 2 4GHz ...

Страница 2: ...cautions for Keeping Meaning of Special Markings Precautions During Flight Warning Mandatory Items Transmitter Receiver Transmitter Operation and Movement of each Servo Adjustments Glossary Flight simulation system instruction 3 3 4 4 5 5 8 8 10 11 17 2 ...

Страница 3: ...ortional High quality joystick Servo reverse function Low voltage alarm Trainer port available FM modulation Do not store the radio system in the damp dusty and vibratory place o temperature over 40 C or under 10 C and direct sunlight for long time If there is a long time not for use please take the battery out from the transmitter and keep it in the dry place Forbid to wipe the radio system with ...

Страница 4: ... there is a danger of injury or physical damage if not carried out properly Symbol Prohibited Mandatory MARK DANGER WARNING MEANING Procedures which may lead to a dangerous condition and cause death or serious injury to theuser if not carried out properly Procedures which may lead to dangerous condition or cause death or serious injury to the user if not carried out properly or procedures where th...

Страница 5: ...al proportional R C set or model may cause a crash Before starting the engine check that the direction of operation of each servo matches the operation of its control stick If a servo does not move in the proper direction or operation is abnormal do not fly the plane Do not fly the plane near the house road electrical wire and airport We offer Mode I and Mode II two types of transmitter for select...

Страница 6: ...n right Throttle Min Mode 1 Antenna Carrying bar NOR normal mode MIX delta wing or V type tail wing mode Model Trim Hook Trainer port Servo reverse Power switch Power indicator Antenna Carrying bar NOR normal mode MIX delta wing or V type tail wing mode Model Mode 2 Rudder left Rudder right Throttle Max Throttle Min Elevator down Elevator up Aileron left Aileron right ...

Страница 7: ... case Adjust the spring strength by turning the screw of the channel you want to adjust Close the rear case and tighten The four screws Stick length adjustment Turn the head of stick TRAINER JACK Connects the trainer cord when using the trainer function The trainer cord is sold separately see part 8 for the details of the trainer function BATTERY COVER Use when replacing the battery Slide the cove...

Страница 8: ...t aileron is raised and the left aileron is lowered relative to the direction of flight and the plane turns to the right When the aileron stick is moved to the left the ailerons move in the opposite direction ELEVATOR OPERATION When the elevator stick is pulled back the tail elevator is raised and the tail of the plane is forced down the airflow applied to the wings is changed the lifting force is...

Страница 9: ...orward the throttle lever arm moves to the HIGH high speed position RUDDER OPERATION When the rudder stick is moved to the right the rudder moves to the right and the nose points to the right relative to the direction of flight When the rudder stick is moved to the left the rudder moves to the left and the nose points to the left and the direction of travel of the plane changes ...

Страница 10: ...endicular to the servo and check the neutral position of the fuselage control surfaces aileron elevator rudder etc If the neutral position has changed reset it by adjusting the length of the rod with the linkage rod adjuster When the throw is unsuitable different from steering angle specified by the kit instruction manual adjust it by changing the servo horn and each control surface horn rod 3 Che...

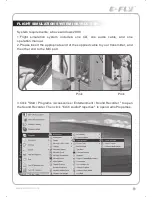
Страница 11: ...udio cable and one operation manual 2 Please insert the appropriate end of the supplied cable to your transmitter and the other end to the MIC port 3 Click Start Programs Accessories Entertainment Sound Recorder to open the Sound Recorder Then click Edit Audio Properties to open Audio Properties Pink Pink 11 www art tech com ...

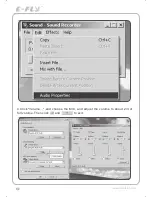
Страница 12: ...4 Click Volume and choose the MIC and adjust the volume to about 2 3 of full volume Then click and to exit www art tech com 12 ...

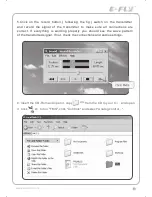
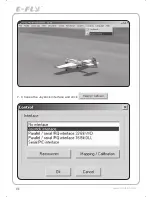
Страница 13: ... sure all connections are correct If everything is wording properly you should see the wave pattern of the transmitted signal If not check the connections and audio settings 6 Insert the CD Rom and open it copy from the CD to your C and open it Click to run FMS click Controls and select Analog control 13 www art tech com ...

Страница 14: ...7 Choose the Joystick interface and click www art tech com 14 ...

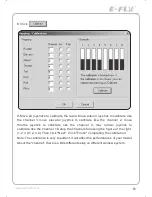
Страница 15: ...e like the channel 4 mov rudder joystick to calibrate like the channel 1 Setup the channels following the figure of the right 1 2 3 4 1 2 3 4 Then click Next Click Finish completing the calibration Note The calibration is very important it will affect the performances of your model About the channel there is a little different setup on different window system 8 Click 15 www art tech com ...

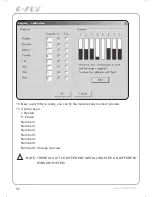
Страница 16: ...the model at any moment you like 11 Control keys I Restart P Pause Number 2 Number 3 Number 4 Number 5 Number 6 Number 8 Number 9 Change the view NOTE THERE IS A LITTLE DIFFERENT INSTALLING STEP ON DIFFERENT WINDOW SYSTEM www art tech com 16 ...

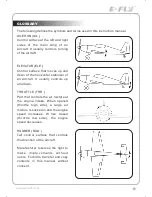
Страница 17: ...raft It usually controls up and down THROTTLE THR Part that controls the air mixture at the engine intake When opened throttle high side a large air mixture is sucked in and the engine speed increases W hen closed throttle low side the engine speed decreases RUDDER RUD Tail control surface that controls the direction of the aircraft Manufacturer reserves the right to m a k e i m p r o v e m e n t ...

Страница 18: ...SHENZHEN ART TECH R C HOBBY CO LTD ...

Отзывы: