


R74020 | Rev A | 11/22/2021 | Copyright 2011 Armored Works, LLC
Page 11 of 17
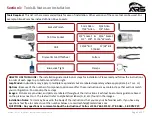
Section 3:
Installation Instructions
Step 2:
Front Hoop Mounting Base Installation
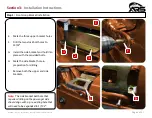
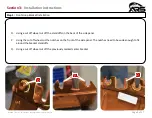
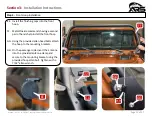
Z.
Place the larger provided spacers into the top T40 bolt locations.
AA. Loosely install the hoop mounting base into the top spacers using the
provided longer allen bolts.
BB. Place the provided smaller spacers into the stock T40 bolt locations.
CC. Loosely install the mounting base into the side spacers using the provided
longer allen bolts.
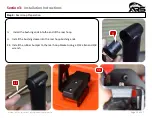
DD. Using a 5mm allen wrench tighten the 4 allen bolts. Repeat on other side.
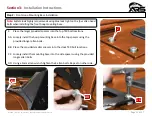
Note:
MetalCloak highly recommends using blue lock tight on the four allen head
bolts when installing the front hoop mounting base.
Z
AA
BB
DD


