DL210 Operation Manual V3.2
13
7.4.
The Administrator first gains access to the system per Section 5
above.
7.5.
Immediately after successfully unlocking the door (before time out of
the power), press and hold the
STOR
button for 3 seconds (long beep
will sound)
7.6.
Press the
Z
Select
button repeatedly to select the desired ID for the
new person. The display will show the next available IDs in each of
the three groups. Remember that IDs 1 thru 5 are
Administrators
,
IDs 6 thru 10 are
Supervisors
and IDs 11 thru 50 are
Users
. (Ref.
Section 2.6 above)
For example, if only two Administrators have been registered, they
will have used up 01 and 02. Upon registering a third person,
pressing repeatedly on the Select button will display: 11 – 06 – 03.
These are the next available IDs in the three categories. If you wish
this person to be at the
Supervisor
level, for example, you would
cycle the three available choices to 06, the next available ID number
in the
Supervisor
category.
Note: The ID number must be selected at this time. A fingerprint
image cannot have its management level changed after registering.
7.7.
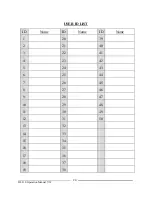
Make a record of ID numbers for each individual. This is needed a
user ID later if you wish to delete an individual— it will be by ID
number. A user ID list from is provided at the end of this manual for
your convenience.
7.8.
Press
STOR
for about 3 seconds again, and have new registrant place
finger firmly and properly in scanning window. You will hear a
long beep and see the scanning of the finger. At the short beep,
remove and replace finger onto window for a second scan.


