5.
Remove the Pump cylinder (Part No.13) at regular
intervals for cleaning. Lightly oil the piston (part no. 14)
with regular machine oil, before fitting it back into the
cylinder. The cylinder can be removed in the following
manner:
a)
Unplug the unit from the electric socket.
b)
Unscrew the nozzle (part no. 20 or 20A) and
remove it. Also remove the Delivery valve set
(part No.17,18,19) and keep safely for later
usage. Change the Delivery Valve set if it is
worn out.
c)
Unscrew the solvent jar (part no.21) and loosen
the suction pipe (part no.22) by turning it
anticlockwise.
d)
Unscrew the brass Conical screw (part no.23) at
the top of the unit.
e)
Pull out the pump cylinder (part no.13) from the
housing.
f)
Remove the Piston spring (part no.15) and the
Piston (part no.14) and clean all the parts
removed.
g)
If the Piston spring (part no.15) is worn
out/broken, replace the same with the spare
provided.
h)
Assemble back the components in the manner
they have been removed.
6.
If any parts are worn out due to wear and tear, the same
can be ordered from the nearest service center. Please
refer to the enclosed parts list for ordering the required
items.
User Safety Instructions
1.
Use the unit in well ventilated area. The solvents used
could cause breathing hazards and irritation to the eyes in
the event of improper ventilation. Usage of breathing
masks/protection goggles/ear plugs/proper exhaust
equipment is recommended.
2.
Proper clothing should be used and the solvent spray
should never be sprayed on to a person’s body. This can
cause serious injury and skin irritations. If skin irritation
occurs, clean with warm water and soap. If the problem
persists, consult a doctor.
3.
The unit generates vibrations during use. Usage of
protective padded hand gloves is recommended for user
safety and comfort.
4.
The unit generates heat during use. Usage of protective
padded hand gloves is recommended for user safety and
comfort.
Packing
Contents
This pack contains the following:
1.
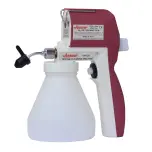
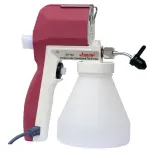
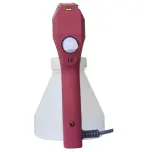
1 no. Textile Cleaning Spray Gun (CM11 / CM11A /
CM16 / CM16A), fully fitted and ready for use.
2.
1 no. 1.5mm Allen key for maintenance (only in CM11
and CM11A- to unscrew the Allen grub screw (part
no.28) to enable the Front body to be removed)
3.
1 no. Piston Spring spare. (part No.15)
4.
1 no. Delivery Valve Set spare.(part No.17,18,19)
5.
1 no. Replaceable Glass Fuse 5x20mm, 800mA rating.
6.
1 no. Nozzle Cleaner
7.
1 copy of User’s Manual.
Page 9 of 18
Page 10 of 18


