background image

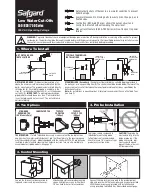
Important:

1. Electrical connection:  

mains electric powered version of this 

     product must be connected to a continuous permanent power supply.


2. Sensor protector:  

this black-out lens cover should only be removed from

    the sensor after completing installation & at least 20 seconds after powering up.

See page 3 for more details.

Sensorflow 21 compact spout

A4851AA, A4852AA & A4853AA

INSTALLER:


After installation please pass this instruction booklet to user

IMPORTANT

BEFORE CONNECTION, FLUSH WATER THROUGH PIPEWORK TO REMOVE

ALL DEBRIS ETC. WHICH COULD DAMAGE THE VALVE MECHANISM

INSTALLATION

INSTRUCTIONS

Ø15

Ø15

67

40

61

103

86

116

Ø8

max.50

Ø48

M28 x 1.5

350

650

131

94

45°

112

Ø15

Ø15

Содержание A4851AA

Страница 1: ...ing installation at least 20 seconds after powering up See page 3 for more details Sensorflow 21 compact spout A4851AA A4852AA A4853AA INSTALLER After installation please pass this instruction booklet to user IMPORTANT BEFORE CONNECTION FLUSH WATER THROUGH PIPEWORK TO REMOVE ALL DEBRIS ETC WHICH COULD DAMAGE THE VALVE MECHANISM INSTALLATION INSTRUCTIONS Ø15 Ø15 67 40 61 103 86 116 Ø8 max 50 Ø48 M2...

Страница 2: ...sensor This compact angled basin mount Sensorflow 21 electronic product is designed for water economy hygienic no touch operation The spout is operated by the integral infrared sensor which is triggered by hand movement in the sensing region When the hands are moved away the water will stop automatically within a couple of seconds This product is designed to be supplied with pre mixed or cold wate...

Страница 3: ...nd electrical energy and will shut down in the event of a sensor being obstructed SENSOR PROTECTIVE COVER This product is supplied with the sensor lens covered over with a black out material DO NOT REMOVE this lens cover until the product installation has been completed then wait for at least 20 seconds after powering up The lens cover prevents the sensor from being unintentionally reprogrammed du...

Страница 4: ...htener moulding 2x wall panel stickers Regulated PCA outlet pre fitted See section 8 1x Sensorflow 21 compact angled basin spout with integral sensor 2x Couplers G 1 2 female thread to 15 mm compression Each type of PSU is identified by this coloured dot system RED DOT BLUE DOT GREEN DOT MAINS LINK Supplied with link cable BATTERY Supplied with battery 1x Velcro pad set Copper inlet pipe ...

Страница 5: ... recommend that these fittings are installed by a professional installer A guide to the Water Supply Water Fittings Regulations 1999 and the Water Byelaws 2000 Scotland is published by WRAS Water Regulations Advisory Scheme Unit 13 Willow Road Pen y Fan Industrial Estate Crumlin Gwent NP11 4EG ISBN 0 9539708 0 9 These products are factory fitted with a regulated PCA outlet this outlet will functio...

Страница 6: ...l as shown 3 Hand tighten the nut against the brass washer until the rubber washer makes con tact with the underside of the basin Ensure the spout is positioned correctly then tighten the back nut securely with a basin wrench 36mm A F CABLE COLOURS The cables emerging from the spout are connected to the integral sensor BLACK RED cables will connect to the solenoid valve GREY cable will connect ont...

Страница 7: ...shown here The water is being supplied from below but can be from any direction Short lengths of Ø15mm copper pipe not supplied have been used between the components Copper pipe lengths should be cut to suit the suit the installation Note the Ø8mm inlet pipe fitted to spout can be trimmed if necessary Observe arrow markings on the valves as shown here Ensure water flows in the direction indicated ...

Страница 8: ...n adjustable spanner 25mm A F 7 9 Slip the compression nuts olives onto the pipes Fit the solenoid valve into the pipe work make good the joints Observe flow direction Make sure the solenoid valve is orientated such that the electrical connectors are easily accessible 10 11 To fit service valve Slip the compression nuts olives onto the pipes Fit the service valve into the pipe work make good the j...

Страница 9: ...symbols marked on the solenoid valves connect the red cable to black to Refer to the diagram on the next page for PSU connection options 12 red black Power 6W Approval EU EN 60950 EN 60335 Approval UL UL 1310 Input voltage 100V 240V 50 60Hz Protection class II DIN EN 60730 1 Type 1 Each type of PSU is identified by this coloured dot system RED DOT BLUE DOT GREEN DOT MAINS LINK BATTERY 9 5 3 Electr...

Страница 10: ...le in the base of the PSU Feed the power supply flexible cable through this grommet make connections to terminal block on the PCB Refer to 28 19 For link version feed the link cable through the side wall grommet in the PSU plug it onto one of the sockets on the PCB Refer to 28 20 Slide the PCB back into the PSU ensuring cables are not trapped 21 For link version plug the other end of the link cabl...

Страница 11: ...m RED DOT BLUE DOT GREEN DOT MAINS LINK BATTERY 24 Remove the pre split grommet from the PSU lid Slide the grey sensor cable into this grommet 25 Slide the sensor cable terminal through the PSU lid plug into one of the sockets on the PCB Press grommet securely into the lid 26 Mate the PSU lid to the PSU case ensuring seal is in place Avoid trapping any cables 27 Refit the 4 lid screws securely ...

Страница 12: ...solenoid valve GREY cable with black line will plug into one of the sockets on the PCB inside the PSU Link cable is also GREY with black line length is 1 5M supplied with link product only SEE SECTION 7 FOR CABLE EXTENSION DETAILS FURTHER CABLE NOTES lid screw grommet for sensor cable lid PCB terminal block for mains connection Enlarged view showing connection block on mains PCB transformers with ...

Страница 13: ...does not stretch stress the cables Consideration should also be given to keeping the PSU case within easy reach access for maintenance staff IMPORTANT Leave the sensor protective sticker in place for at least 20 seconds after powering on the product See section 7 regarding sensor ranging Example above of an installation where PSUs are all battery versions Example of an installation where 1st PSU i...

Страница 14: ...something reflective normally hand movement in the Sens ing Region 75 mm Move hands towards the spout Water will flow Move hands away from the spout Water will continue to flow for a second or two and then turn off Sensor is factory set to Proximity Mode is designed to trigger the water flow only when a hand or similar is in the Sensing Region just in front of the sensor outlet For this range of p...

Страница 15: ...eave hand in place for 7 seconds Move hand away from Sensor Tap 7 Wait 5 seconds for sensor to store data 8 Sensor Range is now set 9 Check tap works properly by bringing hand towards tap Total range is from 50mm to 250mm B Remote sensor programming unit is a hand held unit which can be used to change sensor range other functions if required Detailed instructions for using this unit are provided w...

Страница 16: ...e secure the housing with the key ensuring the seal is in place Ensure the outlet housing is adequately tightened to prevent leaks run back If water continues to flow when the tap should be off and if the sensor is correctly ranged then the solenoid valve may have debris lodged in the diaphragm pilot hole or on the valve seat Locate the solenoid valve Isolate the water supplies Disconnect the sole...

Страница 17: ...utomatic The programming unit should be held pointing towards the sen sor at distance of approx 100mm Once enabled this function will automatically turn the water on for a duration of 1 to 240 seconds if the product has not been used for a period of 6 12 24 48 or 72 hours This hygiene flush is an important optional function of these products which can be enabled by the in staller or maintenance st...

Страница 18: ...h BACKUP FUNCTION previous settings are Remembered just point at next Tap Sensor and press ENTER to repeat l Handunit turns itself off after 2 minutes of non use A brief summary of how to navigate the programming unit is as follows 9 3 Isolating valve strainer cap strainer screen isolating valve direction of flow Isolation valve supplied with this product MUST be fitted to permit future maintenanc...

Страница 19: ... NU PCB AC A 960 704 NU Velcro pads B 960 859 AA Areator complete with AV key A 961 182 NU O ring only x2 A 962 499 NU A 962 499 NU A 963 311 NU A 962 881 NU PSU AC complete A 960 531 NU PSU Link complete A 960 551 NU PSU Battery complete F 960 970 NU B 960 773 AT E 960 086 NU A 963 049 NU FOR LONGER CABLE OPTIONS REFER TO SECTION 7 For more information on spare parts why not visit our spare websi...

Страница 20: ...such as a kettle de scaling solvent but it is important to follow the manufacturer s guidelines After de scaling it is important to rinse the parts thoroughly in clean water Clean carefully and do not use abrasive materials or scrapers Ideal Standard International NV Corporate Village Gent Building Da Vincilaan 2 1935 Zaventem Belgium Armitage Shanks is a division of Ideal Standard UK Ltd Armitage...

Отзывы: