7
EN
Preparation before using for the first time
Remove all protective packaging and wrapping.
• Check for the completeness of the product. In
case of incomplete delivery and damages. Please
contact supplier (See == > Warranty).
• Clean all components as described (See == >
Cleaning and Maintenance).
• Place all the racks inside the appliance.
Note:
Due to manufacturing residues, the appli-
ance may emit a slight odor in the first few cycles.
This is normal and does not indicate any defect or
hazard. Make sure the appliance is well ventilated.
Operation
• Connect the power plug with a suitable electrical
outlet. Leaving the appliance for running some
hours to reach the cooling temperature before
placing the beverage or food inside the appliance.
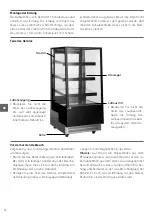
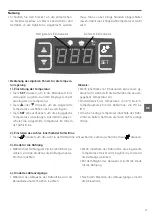
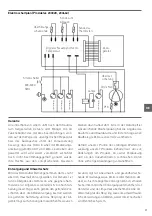
C
SET
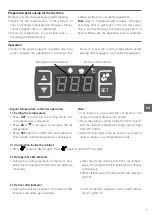
Refrigerant LED indicator
Defrost LED indicator
•
Digital temperature controller operation
1). Setting the temperature
• Press
SET
to enter into the setting mode. The
set temperature is displayed.
• Press or to increase or decrease the set
temperature.
• Press
SET
again to confirm the setting and exit.
Then, inside cabinet temperature is displayed.
2). Illumination inside the cabinet
Note:
• If no button is pressed within 10 seconds. The
newly set temperature will be stored.
• The temperature setting range from 2°C to 6°C.
And the cabinet temperature range can be kept
from 2°C to 8°C.
• Keep the door open time as short as possible in
order to keep a cool temperature inside.
• Press
to switch ON the light. Press
again to switch OFF the light.
3). Refrigerant LED indicator
• During the cooling operation (compressor ena-
bled), this refrigerant LED indicator will lights up
constantly.
• After the inside cabinet reach the set temper-
ature, the refrigerant LED indicator will flashes
continuously.
• When defrost start, the refrigerant LED indicator
light off.
4). Defrost LED indicator
• During the defrost operation, this defrost LED
indicator will lights up constantly.
• After the defrost operation, defrost LED indica-
tor will lights off.

