background image

   Home Station                                                                                                 User Guide 

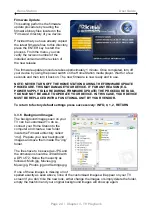
2.4  TV Connection 

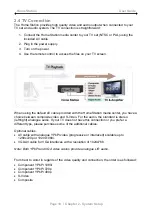
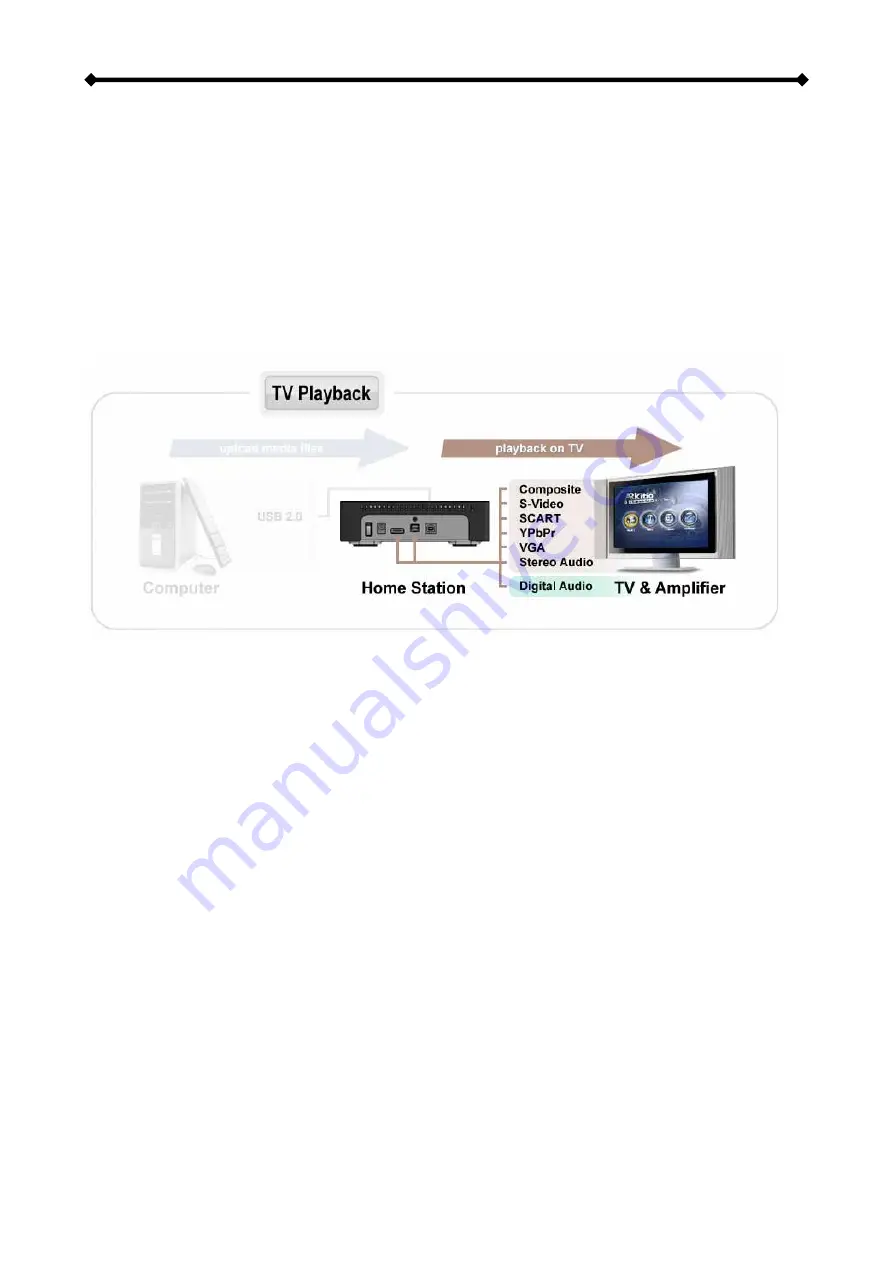
The Home Station provides high quality video and audio output when connected to your 
TV set and audio system. The TV connection is straightforward: 
 

1.  Connect the Home Station media center to your TV set (NTSC or PAL) using the 

included AV cable. 

2.  Plug in the power supply. 
3.  Turn on the power. 
4.  Use the remote control to access the files on your TV screen.  


When using the default AV cable provided with the Home Station media center, you have a 
choice between composite video and S-Video. For the audio, the standard is stereo 
(left/right) analogue audio. If your TV does not have this connection or you prefer a 
different type, please purchase some of the additional cables.  
 
Optional cables:  

  AV cable with analogue YPbPr video (progressive or interlaced) scalable up to 

1280x720p or 1920x1080i. 

  VGA AV cable for VGA interfaces with a resolution of 1024x768. 


Note: Both YPbPr and VGA video cables provide analogue L/R audio. 


From best to worst in regards of the video quality and connection, the order is as followed:  

 Component YPbPr 1080i 

 Component YPbPr 720p 

 Component YPbPr 480p 

 S-Video 

 Composite  

Page 10  /  Chapter 2 - System Setup 

Содержание HS1-U2UJS

Страница 1: ...imedia Center Date July 10 2008 v1 0 Firmware v2 0 20 77 Models HS1 U2UJS HS2 U2UJS HS3 U2UJS The diagrams and images contained in this manual may not fully represent the product that you are using and are there for illustration purposes only ...

Страница 2: ... 2 1 Formatting on a PC 8 2 2 2 Formatting on a Mac 8 2 3 CREATING THE DIRECTORIES 9 2 3 1 Font Support 9 2 4 TV CONNECTION 10 2 4 1 Analogue Audio Setup 11 2 4 2 Digital Audio Setup 11 2 5 USB CONNECTION 12 2 5 1 Safe Removal 13 2 6 UPLOADING FILES 14 3 TV PLAYBACK 15 3 1 THE REMOTE CONTROL 15 3 2 UNIQUE CONTROL KEYS 18 3 3 MENU FUNCTIONS 19 3 3 1 Main Menu 19 3 3 2 Movies 19 3 3 3 Music 20 3 3 4...

Страница 3: ...SB 2 0 cable Standard AV cable Composite RCA S Video Manual Note Package contents may vary depending on vendor product version 1 2 System Requirements Computer with USB connection for setup and file transfer One 3 5 IDE Home Station 1 and 2 or SATA Home Station 3 hard drive to be installed into the Home Station media player 1 2 1 Supported Operating Systems PC running Win2000 WinXP or Windows Vist...

Страница 4: ...ion 1 Designed for 3 5 IDE hard drives with standard video output including Composite and S Video Home Station 2 Designed for 3 5 IDE hard drives with high definition video output including Composite S Video Component and VGA Home Station 3 Designed for 3 5 SATA hard drives with high definition video output including Composite S Video Component and VGA The media player is not designed or intended ...

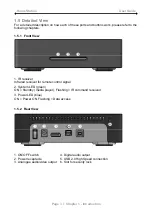
Страница 5: ...1 IR receiver Infrared receiver for remote control signal 2 System LED green ON Standby media player Flashing IR command received 3 Power LED blue ON Power ON Flashing Data access 1 5 2 Rear View X Y Z 1 ON OFF switch 4 Digital audio output 2 Power receptacle 5 USB 2 0 High Speed connection 3 Analogue audio video output 6 Slot for security lock Page 3 Chapter 1 Introduction ...

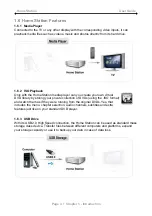
Страница 6: ...y storing your private collection of DVDs using the ISO format and watch them as if they were running from the original DVDs Yes that includes the menu chapter selection audio channels subtitles and extra features just like on your standard DVD player 1 6 3 USB Drive With its USB 2 0 High Speed connection the Home Station can be used as standard mass storage class device Transfer files between dif...

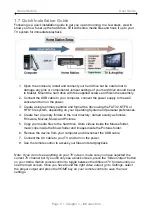
Страница 7: ...ding on your Operating System and personal preferences 4 Create four 4 empty folders in the root directory named exactly as follows Firmware Movies Music and Pictures 5 Copy your media files to the hard drive Store videos inside the Movies folder music clips inside the Music folder and images inside the Pictures folder 6 Remove the device from your computer and disconnect the USB cable 7 Connect t...

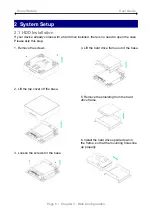
Страница 8: ...n the case Please skip this step 1 Remove the screws 2 Lift the top cover off the base 3 Loosen the screws for the base 4 Lift the hard drive frame out of the base 5 Remove the shielding from the hard drive frame 6 Install the hard drive upside down in the frame so that the mounting holes line up properly Page 6 Chapter 3 Web Configuration ...

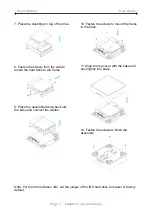
Страница 9: ...he assembled drive back into the base and connect the cables 10 Fasten the screws to mount the frame to the base 11 Align the top cover with the base and push lightly into place 12 Fasten the screws to finish the assembly Note For the Home Station 1 2 set the jumper of the IDE hard drive to master or factory default Page 7 Chapter 2 System Setup ...
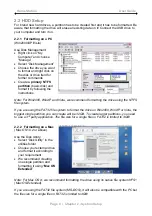
Страница 10: ...ing the NTFS file system If you are using the FAT32 file system to format the drive on Win2000 WinXP or Vista the biggest single partition you can create will be 32GB To create larger partitions you need to use a 3rd party application The file size for a single file on FAT32 is limited to 4GB 2 2 2 Formatting on a Mac Mac OS 10 2 or above Use the Disk Utility Select Disk Utility in the utilities f...

Страница 11: ...ing used for the screen saver This string is user editable but should not contain more than 16 letters Movies This folder will contain your video files Music This folder will contain your music files Pictures This folder will contain your image files AutoBoot Optional folder for video files AVI MPG to be played automatically at boot up Only create this folder when you are actually using this funct...

Страница 12: ...ave a choice between composite video and S Video For the audio the standard is stereo left right analogue audio If your TV does not have this connection or you prefer a different type please purchase some of the additional cables Optional cables AV cable with analogue YPbPr video progressive or interlaced scalable up to 1280x720p or 1920x1080i VGA AV cable for VGA interfaces with a resolution of 1...

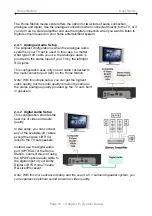
Страница 13: ...e AV cable connected to the multi connector port A V on the Home Station Note With this simple setup you can get the highest video quality but the audio quality remains the same as the stereo analogue quality provided by the TV set s built in speakers 2 4 2 Digital Audio Setup This configuration provides the best mix of video and audio quality In this setup you can connect any of the available AV ...

Страница 14: ... will always need the external power adapter when connected to the computer NONE of the prerequisite folders should ever be deleted or renamed because your Home Station uses these exact names as a reference to locate the respective files Inside these folders you can have any sub directories that are convenient for you Firmware This is the folder in which you can copy the latest firmware files when...

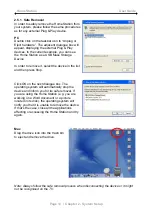
Страница 15: ...ist and then press Stop Click OK on the next dialogue box The operating system will automatically stop the device and inform you for its safe removal If you are using the Home Station e g you are working on a Word document or a picture located in its disk the operating system will notify you that it is unable to remove the device If that s the case close all the applications affecting or accessing...

Страница 16: ... Note You can only use one interface at the time To upload new files set the switch to PC and use either the USB or the Ethernet connection but not both at the same time 1 Connect the USB cable to your computer and the Home Station 2 Turn on the power 3 Erase old files and upload new ones to the media player 4 Eject the drive remove the USB cable and turn it off 5 Connect it to your TV and turn it...

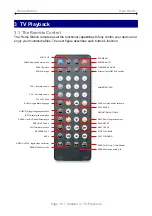
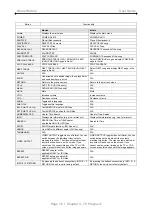
Страница 17: ...ition ZOOM to image NUMERICAL PAD VOL increase volume SHUFFLE play all files randomly DVD TITLE VOL decrease volume PLAY ENTER SLOW forward function SEARCH for Time or Title Chapter PREVIOUS TRACK REPEAT between points A B AUDIO toggle audio language FAST FORWARD PLAY ALL Files NEXT TRACK ANGLE view DVD with different angle HOME displays the main menu INFO displays file information VIDEO OUTPUT to...

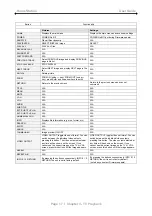
Страница 18: ...files N A EXT SUBTITLE cd Text SUBTITLE position for XviD files N A NUMERICAL PAD Use for Time Search Used for Time Search INFO Displays file information e g size format etc Displays file information e g size format etc SEARCH SEARCH for Time or Title Chapter applicable ONLY for ISO files Search for Time SLOW SLOW forward function ISO files only N A ANGLE View DVD with different angle ISO files on...

Страница 19: ...N A EXT SUBTITLE cd N A N A NUMERICAL PAD N A N A INFO Displays file information e g size format etc N A SEARCH N A N A SLOW N A N A ANGLE N A N A THUMBNAILS Image preview ON OFF N A VIDEO OUTPUT VIDEO OUTPUT toggle video out format You can switch between the individual video outputs pressing this button The video output selected at any time will be shown on the screen If you cannot see the correc...

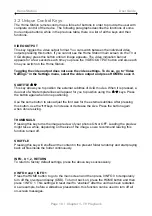
Страница 20: ...ual set of white template lines will appear for you to position using the c d keys Press the button again when done positioning Use the same button to also adjust the font size for the external subtitles After pressing this button use the efkeys to increase or decrease the size Press the button again when done resizing THUMBNAILS Pressing this key turns the image preview of your photos ON or OFF L...

Страница 21: ...ist of the video clips that are stored in the Movies folder on your hard drive Each directory is named under left right brackets For example in the directory XviD we have stored various XviD video clips You can create any directory you want with your desired name and store any movie you want in it use your computer to create and change directories Please note that every directory can contain one o...

Страница 22: ...ck for further details of your present song or see the progress bar on the left side Music Playlist Inside a folder you can select certain individual songs you like and create a playlist 1 Use the up down keys to highlight the song 2 Press the right arrow key to add or remove the file from the playlist 3 Add as many songs in the same folder as you like 4 When finished press the PLAY ALL or SHUFFLE...

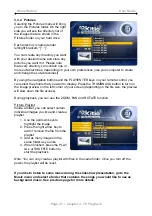
Страница 23: ... turn on the image preview on the left corner of your screen depending on the file size the preview will slow down the file access During playback you can use the ZOOM PAN and ROTATE function Picture Playlist Inside a folder you can select certain individual images you like and create a playlist 1 Use the up down keys to highlight the image 2 Press the right arrow key to add or remove the file fro...

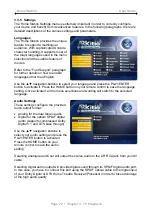
Страница 24: ...remote control to save the language setting Once activated all the menu selections and wording will switch to the selected language Audio Settings These settings configure the provided audio output format Analog for the dual Stereo audio Digital for the optical SPDIF digital audio supports compressed Dolby Digital 5 1 and DTS pass through Use the navigation buttons to select your audio setting and...

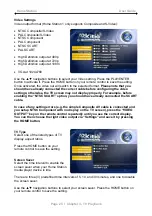
Страница 25: ...fore enabling the NTSC SCART option you should have already connected the SCART cable In case of any setting errors e g the simple Composite AV cable is connected and you setup NTSC Component with no display on the TV screen press the VIDEO OUTPUT key on the remote control repeatedly until you see the correct display You can then choose the right video output via Settings and save it by pressing t...

Страница 26: ...SON E G POWER SUPPLY FAILURE DURING FIRMWARE UPDATE THE PROCEDURE FAILS YOU MAY NOT BE ABLE TO OPERATE YOUR DEVICE IN THIS CASE YOUR DEVICE MUST BE REPLACED WITH A FUNCTIONAL UNIT BY YOUR VENDOR To return to factory default settings press successively INFO 0 1 2 RETURN 3 3 6 Background Images The background images seen on your TV can be customised To do so connect your Home Station to the computer...

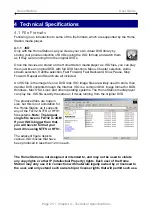
Страница 27: ... contents through the Internet ISO is a common DVD image format for DOS Windows Mac OSX Linux and other operating systems The Home Station media player can play the ISO file exactly the same as if it was running from the original DVD The produced files are huge in size but this is not a limitation for the Home Station as it supports any of the FAT32 NTFS or HFS file systems Note The largest single...

Страница 28: ...C or Qpel If you want to use external text subtitles we recommend saving them as srt SubRIP format text files Please pay attention that in order for the Home Station to display the subtitles both movie avi and movie srt should be placed in the same directory In order for the Home Station to display the subtitles the subtitle file should also be an Unicode file To do so open the sub smi or srt file...

Страница 29: ...ai require an external font Supported Interfaces USB 2 0 High Speed AV multi connector supporting three 3 cables Composite RCA left audio RCA right audio RCA S Video Mini DIN RGB Colour Component Video 3 RCA left audio RCA right audio RCA Home Station 2 3 only VGA at 1024x768 Home Station 2 3 only USB 2 0 for data transfer to and from computer Output Ports Transmitter Fiber Optic 8MBps USB 2 0 for...

Страница 30: ...y vary depending on vendor version The diagrams may also not fully represent the product that you are using and are there for illustration purposes only Optional Cables and Accessories 6 YPbPr AV cable YPbPr color Component video 3 RCA left audio RCA right audio RCA 7 VGA AV cable 15 pin female VGA left audio RCA right audio RCA 8 SCART to Composite RCA adapter 9 SPDIF optical audio cable Note The...

Страница 31: ...void positioning your Home Station in the following places Locations with direct sunlight next to radiators other sources of heat or in vehicles that are parked directly in the sun with the windows and doors closed Locations with very high temperature more than 35 C or humidity more than 90 Very dusty or sandy locations Locations subject to vibration shock or with a sloping base 4 4 3 Electricity ...

Страница 32: ...o display on the TV set and that the switch on the Home Station is set to TV If this does not solve the problem use VIDEO OUTPUT on your remote control of your Home Station and toggle through the different video output formats until an image appears on the TV set Toggling VIDEO OUTPUT does not save the video settings To do so go to Video Settings in the Settings menu choose the correct output and ...

Страница 33: ...ct your vendor read through the FAQ on the previous page and make sure you are using the latest firmware 5 3 About this Manual This manual was written for the Home Station series and the firmware version v2 0 20 77 Images and descriptions might slightly vary between this manual and the actual product you have Copyright 2008 by Macpower Tytech Technology Co Ltd all Rights Reserved The information c...

Отзывы: