11
GB
Start-up and use
Using the hob
Lighting the burners
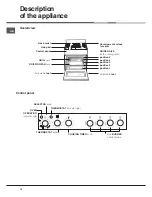
For each BURNER knob there is a complete ring
showing the strength of the flame for the relevant burner.
To light one of the burners on the hob:
1. Bring a flame or gas lighter close to the burner.
2. Press the BURNER knob and turn it in an
anticlockwise direction so that it is pointing to the
maximum flame setting
.
3. Adjust the intensity of the flame to the desired level
by turning the BURNER knob in an anticlockwise
direction. This may be the minimum setting
, the
maximum setting
or any position in between the two.
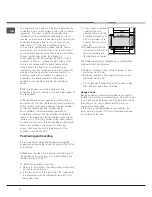
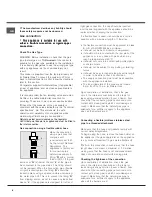
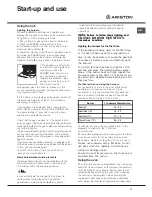
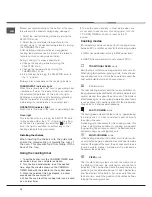
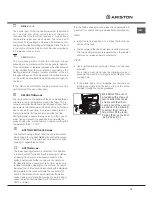
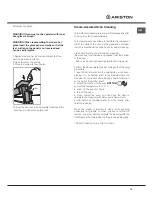
If the appliance is fitted with
an electronic lighting device*
(
see figure), press the
BURNER knob and turn it in
an anticlockwise direction,
towards the maximum flame
setting, until the burner is lit.
The burner may be
extinguished when the knob is released. If this
occurs, repeat the operation, holding the knob down
for a longer period of time.
!
If the flame is accidentally extinguished, switch off
the burner and wait for at least 1 minute before
attempting to relight it.
If the appliance is equipped with a flame failure
safety device*, press and hold the BURNER knob
for approximately3-7 seconds to keep the flame
alight and to activate the device.
Check that the gas has been lit. If the burner fails to
ignite try again. If the burner fails to ignite after 3 attempts,
wait a few minutes for the gas to disperse before making
any further attempts.
If the burner still fails to ignite, a match or lighting device
can be used, but care must be taken. If the problem
persists, contact place of purchase or their appointed
agent for service.
If the flame has excessive yellowing, or appears to lift
off the burner ports, or makes a loud noise, turn the burner
off and call your service agent.
To switch the burner off, turn the knob until it
reaches the stop position •.
NOTE: Failure to follow these lighting and
NOTE: Failure to follow these lighting and
NOTE: Failure to follow these lighting and
NOTE: Failure to follow these lighting and
NOTE: Failure to follow these lighting and
shut down procedures might lead to a
shut down procedures might lead to a
shut down procedures might lead to a
shut down procedures might lead to a
shut down procedures might lead to a
hazardous condition
hazardous condition
hazardous condition
hazardous condition
hazardous condition
Lighting the burners for the first time
If the appliance is being used for the first time,
or if it has not been used for a long period of
time, it may be necessary to purge the gas lines
of excess air before you can successfully light
the burners.
To do this, turn each burner to High for 10-15
seconds and press the ignition button several
times. If the burner does not light, repeat this
procedure twice more. Wait 1-2 minutes for any
gas build up to disperse before allowing any fur-
ther gas flow.
Practical advice on using the burners
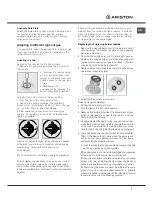
For the burners to work in the most efficient way
possible and to save on the amount of gas
consumed, it is recommended that only pans that
have a lid and a flat base are used. They should
also be suited to the size of the burner:
Burner
ř
Cookware Diameter (cm)
Fast (R)
24 - 26
Semi Fast (S)
16 - 20
Auxiliary (A)
10 - 14
Triple Crown (TC)
24 - 26
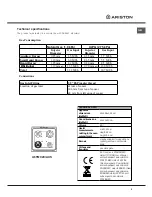
To identify the type of burner, please refer to the
diagrams contained in the “Technical
specifications”.
!
For models equipped with a reducer grid, the latter
must be used only for the auxiliary burner, when
pans with a diameter of less than 12 cm are used.
Always use cookware with a flat base. Do not
use pans which are unstable or which have a
warped or damaged base.
Ensure the pot sits securely on the trivet and is
centred above the burner.
Using the oven
!
The first time you use your appliance, heat the empty
oven with its door closed at its maximum temperature
for at least half an hour. Ensure that the room is well
ventilated before switching the oven off and opening
the oven door. The appliance may emit a slightly
unpleasant odour caused by protective substances
used during the manufacturing process burning away.
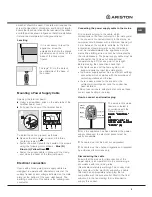
Flame adjustment according to levels
the burner flame intensity can be adjusted with the
knob according to 6 power levels, from maximum
to minimum with 4 intermediate positions:
a click will indicate the change from one level to
another when turning the knob. The system
guarantees a more precise adjustment, allows
to replicate the flame intensity and to identify
easily the preferred level for different cooking
operations.

