background image

C-120 | 4 - Install the C-120 | 9

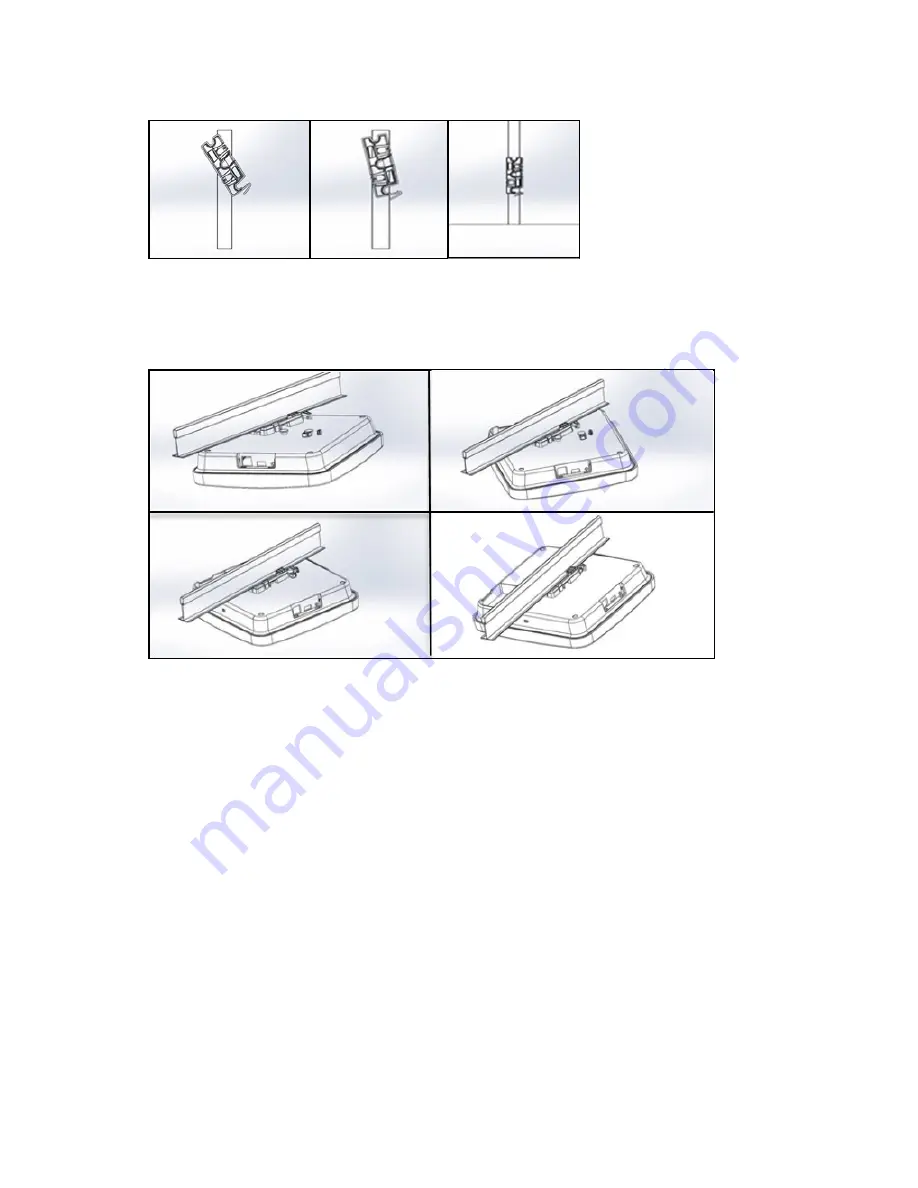
2. Mounting C-120 on the bracket: Place the first mounting post on the rear-side of the device on to the lower notch of

the bracket. Rotate the device such that the center mounting post fits in to the center notch on the bracket. Ensure that all
the mounting posts on the rear-side of the device are snapped in to the respective notches on the bracket.

The mounting posts on the rear-side of the device are now properly fit in the respective notches of the bracket and
device is mounted properly.

Mounting Instructions using the Silhouette/Interlude Bracket Mount

The Silhouette/Interlude mounting bracket is not a part of the standard package and must be procured separately. The
mounting instructions for the Silhouette/Interlude Bracket Mount are very similar to the Standard Package Content's
mounting instructions. Refer to the instructions mentioned in  Mounting Instructions using the Standard Package Contents
(page 

) .

Содержание C-120

Страница 1: ...Quick Start Guide C 120 Access Point Arista Networks DOC 03482 01 ...

Страница 2: ... 866476 0000 support wifi arista com sales arista com Copyright 2019 Arista Networks Inc The information contained herein is subject to change without notice Arista Networks and the Arista logo are trademarks of Arista Networks Inc in the United States and other countries Other product or service names may be trademarks or service marks of others ...

Страница 3: ...C 120 8 Mount the C 120 8 Mounting Instructions using the Standard Package Contents 8 Mounting Instructions using the Silhouette Interlude Bracket Mount 9 Mounting Instructions using the Wall Mount Bracket 10 Power on the C 120 10 Using C 120 with Power Adapter 11 Connect C 120 to the Network 11 Chapter 5 C 120 Troubleshooting 12 Chapter 6 Appendix A AP Server Mutual Authentication 13 ...

Страница 4: ...ve in this document Intended Audience This guide can be referred by anyone who wants to install and configure the C 120 access point Document Overview This guide contains the following chapters Package Content page 4 C 120 Overview page 5 Install the C 120 page 8 C 120 Troubleshooting page 12 Note All instances of the term server in this document refer to the Wireless Manager unless the server nam...

Страница 5: ...he bottom of the product and the packaging box Note down the MAC address before mounting the device on the ceiling or at a location that is difficult to access If the package is not complete please contact Arista Networks Technical Support Team at support wifi arista com or return the package to the vendor or dealer where you purchased the product ...

Страница 6: ... Wi Fi 2 4GHz Wi Fi 5GHz What does it mean Solid Orange Any Any The AP does not have an active ethernet link Fast Blink Green Any Any The AP did not receive a valid IP address via DHCP Slow Blink Green Any Any The AP is unable to connect to the Wireless Manager Slow Blink Orange Any Any The AP is being upgraded For basic troubleshooting of the issues based on the LED status refer to the C 120 Trou...

Страница 7: ...disabled Top Side Ports on C 120 Port Description Connector Type Speed Protocol Ethernet To establish Config Shell terminal session via serial connection RJ45 RS 232 Serial Bits per second 115200 Data Bits 8 Stop Bits 1 Parity None Flow Control None USB USB 2 0 port Not in use Not in use Reset Pinhole Reset to factory default settings Pin hole push button Hold down and power cycle the device to re...

Страница 8: ...r discovery value is erased and changed to the default wifi security server All the VLAN configurations are lost If static IP is configured on the device the IP address is erased and DHCP mode is set If DHCP fails the factory default IP address of the device is set to 169 254 11 74 The USB port on the C 120 is currently not in use ...

Страница 9: ...ess of the device is printed on a label at the bottom of the product The steps to install the device with no configuration zero configuration are as follows Mount the C 120 page 8 Power on the C 120 page 10 Connect C 120 to the network page 11 Mount the C 120 The steps to mount the C 120 involve Mounting Instructions using the Standard Package Contents page 8 Mounting Instructions using the Silhou...

Страница 10: ...acket The mounting posts on the rear side of the device are now properly fit in the respective notches of the bracket and device is mounted properly Mounting Instructions using the Silhouette Interlude Bracket Mount The Silhouette Interlude mounting bracket is not a part of the standard package and must be procured separately The mounting instructions for the Silhouette Interlude Bracket Mount are...

Страница 11: ...ffix the device firmly with the screw Power on the C 120 The C 120 device can be powered on by plugging one end of the Ethernet cable into the PoE 802 3at switch or injector and the other end into the Ethernet PoE port on the C 120 Ensure the PoE source you are using is turned ON Note You can also use regular PoE 802 3af However there are certain drawbacks to it The USB is disabled The other ether...

Страница 12: ...etwork you should meet the following prerequisites Ensure that a DHCP server is already available on the network to enable network configuration of the C 120 DNS should be able to resolve the server discovery primary redirector online spectraguard net secondary wifi security server AP with valid IP address from DHCP server or a valid static IP address1 to communicate with Wireless Manager Check th...

Страница 13: ...Unable to connect to the server Ensure that the server is running and is reachable from the network to which the device is attached If there is a firewall or a router with ACLs enabled between the device and the server ensure that the traffic is allowed on UDP port 3851 Use the server IP based discovery and ensure that you have correctly entered the DNS name wifi security server on the DNS server ...

Страница 14: ...sion key The AP and server are shipped with the same default value of the shared secret The CLI commands are provided on both server and AP for changing the shared secret Note After the shared secret communication key is changed on the server all APs connected to the server will automatically be set up to use the new communication key APs that are not connected to the server at this time must be m...

Отзывы: