background image

Preparing to Fly & Pairing

1. 

The Shadow 240 is designed for indoor and outdoor flight.

2. 

Recommended minimum flying area is 12’ x 12’ x 9’.

3.  Make sure the LiPo battery is fully charged.

4.  With the transmitter OFF and the throttle stick in its lowest    

  position, place the transmitter near the quadcopter.

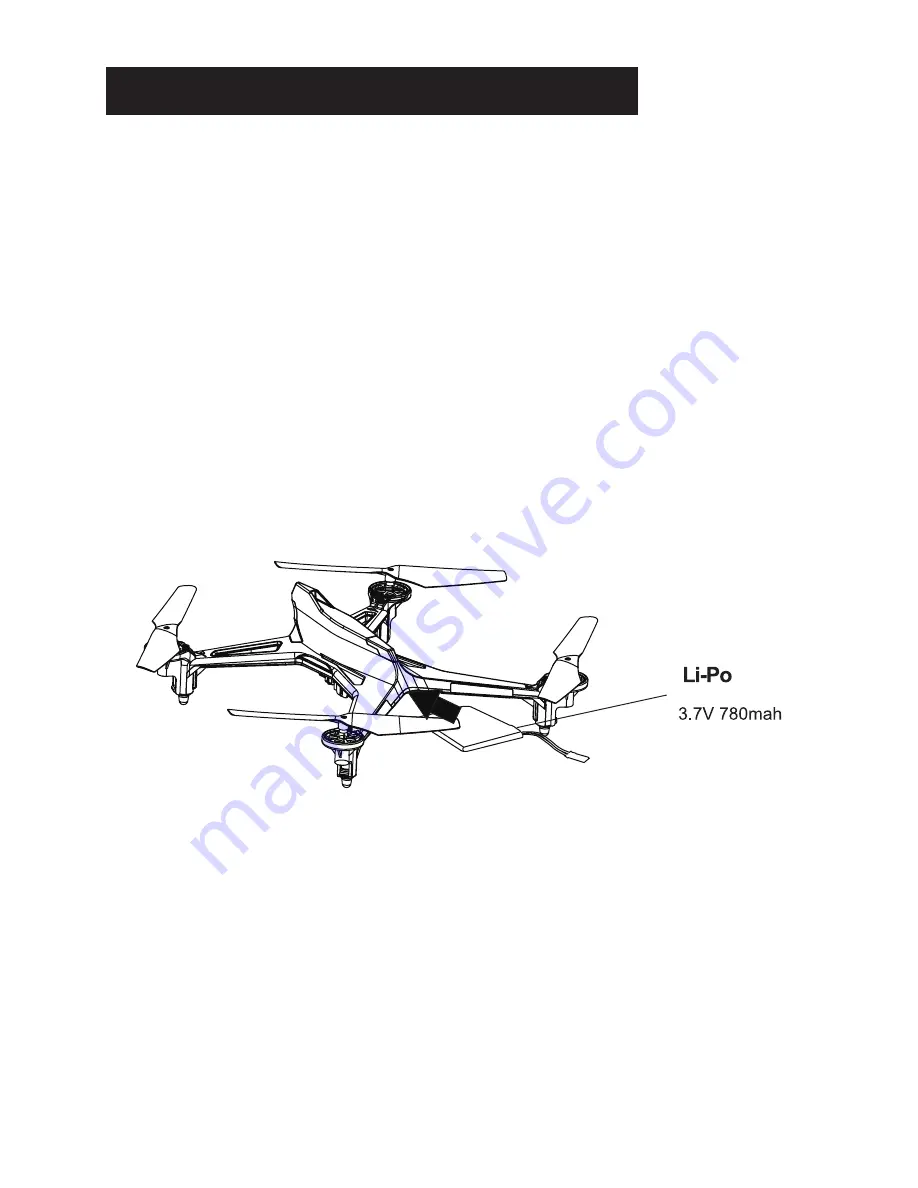
5.  Insert the charged LiPo battery into the battery box and plug  

 in.

6. 

Place the quadcopter on a flat surface and Do Not Move the  

  quadcopter after this point. LEDs on the Shadow 240 will    

 blink.

7.  Switch ON the transmitter. The pairing process begins.

8.  When the LEDs on the quadcopter remains solid the           

  quadcopter is paired and ready to fly.

9. 

Advance the throttle slowly to rise off the ground.

Insert the LiPo battery from the front

10. When the flight battery power gets low, the LEDs on the  

      quad will begin to blink indicating that it’s getting close to  

      time to land and recharge.

11. If the quadcopter is not responding quickly enough to stick    

      movements, switch to high rates by pressing the rate 

      button. It is located in the top right on the transmitter. 

12. After becoming familiar with the flight controls of the

      quadcopter and gaining confidence you will be ready to     

      move on to flips and faster forward flight.

5

Содержание shadow 240

Страница 1: ...ations are subject to change without notice Due to ongoing development the actual product may vary from images shown This product contains chemicals known to the State of California to cause cancer bi...

Страница 2: ...ations Rotor diameter 140mm 5 1 2 Height 65mm 2 1 2 Weight 110g 3 9 oz Motors 8520 Coreless 4 Battery 1S 3 7V 780mAh 20C Lithium Polymer Charger 110 220V AC wall charger Transmitter 4 channel 2 4GHz O...

Страница 3: ...ons 3 Auto Flip Button FPV Screen Mount Throttle Trim Elevator Trim Throttle Rudder Stick Elevator Aileron Stick Rudder Trim Aileron Trim Mode 1 Mode 2 Switch LEDs ON and OFF Accessory Functions Power...

Страница 4: ...f batteries in the trash Only recycle in an environmentally safe and approved fashion 9 Never subject the quadcopter to wet conditions this can lead to malfunctions and parts failure not covered under...

Страница 5: ...transmitter The pairing process begins 8 When the LEDs on the quadcopter remains solid the quadcopter is paired and ready to fly 9 Advance the throttle slowly to rise off the ground Insert the LiPo b...

Страница 6: ...ll hear a series of beeps the flip function is active Move the aileron elevator stick in the direction that you want the Shadow 240 to flip There is a programmed momentary power increase at the beginn...

Страница 7: ...Exploded View 7 NOTE Exploded view provided for general layout only...

Страница 8: ...lug is not used 3 WiFi camera plugs in here 4 Winch Water Blaster and Bubble Blower plug in here To remove replace a propeller unscrew the single screw on the top of the propeller and pull propeller u...

Страница 9: ...akes a still photo with each push Water Blaster Accessory C button Press repeatedly for water blast Bubble Blower Accessory C button Press repeatedly to create bubbles Winch Accessory Not compatible w...

Страница 10: ...ZSQ1822GR Bearing Set 8 AZSQ1816 Prop Shaft 4 AZSQ1815 Body Airframe AZSQ1820OR AZSQ1820GR Bottom Covers AZSQ1821 Main Gear Set 4 AZSQ1817 5 in 1 Control Unit AZSQ1806 Prop Set 4 AZSQ1818 Ext Landing...

Страница 11: ...Set 2 White 2 Black AZSQ1819 Screw Set 16 AZSQ1820OR Body Airframe Orange Print AZSQ1820GR Body Airframe Green Print AZSQ1821 Bottom Covers 3 AZSQ1822OR Light Covers Orange 3 White 2pcs AZSQ1822GR Li...

Страница 12: ...www Ares RC com 2015 Rev 1 1 1 16...

Отзывы: