


KL-3 Quick Installation Guide
7
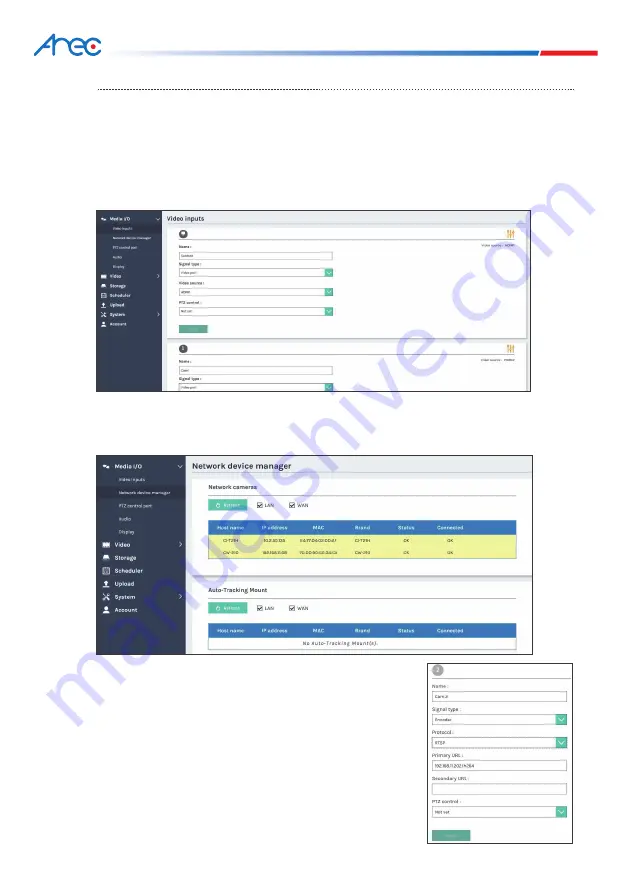
The system automatically scans and lists the network
cameras connected to the Media Station once entering the
[
Network device manager
] page. You may click Refresh
button to scan again. Click Login button and the login
authentication dialog pop out. Enter the username and
password of the camera to complete the authentication and
change the status to [
OK
]. Then the camera is ready for
video input selection. Assign the camera by selecting its IP
address. For signal type of encoder, enter RTSP or RTP
connection URL.
Setup
Step 1: Set up video input name, signal type, video source, PTZ control in [
Video inputs
] of
[
Media I/O
]. While choosing “video port” as the [
Signal type
], there will be an option of
“VGA” or“HDMI” as the [
Video source
]. If only one port of either VGA or HDMI in the back
of the media station is connected, the system would detect and recognize automatically
and only display the connected signal source. If both ports are connected, please select
“VGA” or “HDMI” in [
Video source
] to be the higher priority.
While assigning the “network camera” as the [
Video source
], an authentication process
from the camera may be needed in [
Network device manager
] setting up tab of
[
Media I/O
].