Instruction manual – AQ 110 arc protection unit
11 (80
)
3
O
PERATION AND CONFIGURATION
3.1
LED
INDICATOR FUNCTIONS
AQ 110 contains 20 indication LEDs. A user definable text pocket can be slid in
for identifying each LED function (except Power and Error LEDs). LEDs are
located at the front plate of the unit for clear viewing without a need for opening
doors.
During power up the unit performs a LED-test. All LEDs are turned on for 2
seconds and then back off. Only the blue power LED will remain on. When
powered up, the unit goes in 50ms into protection mode even while the LED test
is being performed.
In normal operation only the blue power LED is ON.
All current measuring channels (IL1, IL2, IL3 and Io) have indication LEDs. When
any channel exceeds the set threshold value the indication LED is turned on until
manual reset is performed. In an open CT condition a corresponding current
channel indicator and Error LED are blinking.
The sensor LEDs in inactive condition are off. If arc sensor is activated the
corresponding sensor channel LED will turn on if the activation is longer than
1.5ms. The sensor LED activation function is latched (steady light). To clear the
LED the “SET” button should be pressed.
In case of loose sensor wire or configuration mismatch (new sensor attached
without running auto-configuration system setup, see chapter 3.3.1) situation the
corresponding LED will start flashing and ERROR LED will activate.
The Binary I/O LEDs are indicating the I/O-line status. If any of the lines become
active for more than 1.5ms the corresponding LED will turn on (latch).
In trip situation the corresponding trip LED will turn on. Trip outputs are controlled
by dipswitch settings, see chapter 3.6.
All activation and trip indication LEDs are latched, even if the dipswitch setting is
in non-latched mode. They have to be cleared by pushing the “SET”-button.
LED indications are stored in non-volatile EPROM memory for identifying the trip
information in case the auxiliary power is lost. When re-powering the unit after
Содержание AQ 110 Series
Страница 1: ...INSTRUCTION MANUAL AQ 110 Arc Protection Unit ...
Страница 10: ...Instruction manual AQ 110 arc protection unit 10 80 Figure 2 3 AQ 110F simplified block diagram ...
Страница 60: ...Instruction manual AQ 110 arc protection unit 60 80 7 CONNECTIONS Figure 7 1 AQ 110P terminals at rear plate ...
Страница 61: ...Instruction manual AQ 110 arc protection unit 61 80 Figure 7 2 AQ 110F terminals at rear plate ...
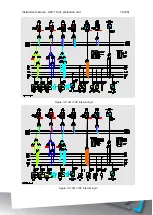
Страница 65: ...Instruction manual AQ 110 arc protection unit 65 80 8 WIRING DIAGRAMS Figure 8 1 AQ 110P Wiring diagram ...
Страница 66: ...Instruction manual AQ 110 arc protection unit 66 80 Figure 8 2 AQ 110F Wiring diagram ...
Страница 68: ...Instruction manual AQ 110 arc protection unit 68 80 Figure 9 2 AQ 110 dimensions in millimeters 3D view ...
Страница 69: ...Instruction manual AQ 110 arc protection unit 69 80 Figure 9 3 AQ 110 cut out for panel mounting millimeters ...
Страница 74: ...Instruction manual AQ 110 arc protection unit 74 80 Tested by Approved by ...


