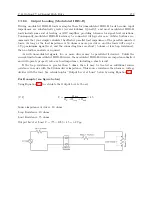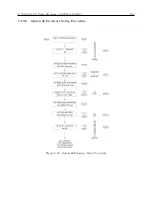
C.19 Option 28: Time, Frequency and Phase Monitor
187
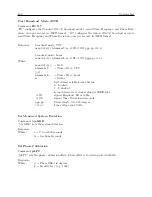
89nnn.nn
C
System Magnitude
55ddd
C
Day of Year
<
BEL
>
<
BEL
>
= hex 07
The decimal points shown above are not actually transmitted in the data stream, but their position
is implied. The displays are configured to show the decimal point in this position.
*Time Deviation is output in two formats in the same data stream: 33
±
s.ss and 34
±
sss.sss.
Output for the 33
±
s.ss format will be +9.bb when the measured value e9.99 (b = blank).
It will be -9.bb when the measured value is less than -9.99.
Output for the 34
±
sss.sss format will observe the following conventions for out-of-range values and
leading blanks. Decimal points are implicit and do not appear in the data stream.
Time Deviation Range
Format (b=blank)
Below -999.99
-bbb.bbb
-999.99 to -100.00
-sss.sss
-99.99 to -10.00
-bss.sss
-9.99 to -0.01
-bbs.sss
+0.00 to +9.99
+bbs.sss
+10.00 to +99.99
+bss.sss
+100.00 to +999.99
+sss.sss
Above +999.99
+bbb.bbb
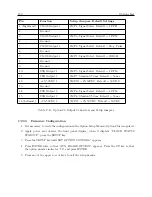
Table C.11: Option 28 B2 Broadcast, Time Deviation Values
Содержание 1088A
Страница 4: ...iv ...
Страница 6: ...vi ...
Страница 18: ...xviii LIST OF FIGURES ...
Страница 23: ...1 4 Attaching Rack Mount Ears to 1088A B Series Clocks 3 Figure 1 2 Attaching Rack Mount Ears ...
Страница 24: ...4 Unpacking the Clock ...
Страница 32: ...12 Front and Rear Panels ...
Страница 38: ...18 Connecting Inlet Power Input and Output Signals ...
Страница 41: ...4 1 GPS Antenna Installation 21 Figure 4 2 Antenna Mounting Bracket Figure 4 3 Antenna Mounting with AS0044600 ...
Страница 46: ...26 GPS Antenna and Cable Information ...
Страница 48: ...28 Setting Internal Jumpers Figure 5 1 Model 1088B Main Board ...
Страница 76: ...56 The Setup Menus ...
Страница 112: ...92 Serial Communication and Command Set ...
Страница 127: ...B 4 Physical Dimensions 107 Figure B 1 Suggested Mounting of the AS0094500 Surge Arrester ...
Страница 128: ...108 Using Surge Arresters ...
Страница 137: ...C 5 Option 04 Parallel BCD Output 117 C 5 2 Option 04 Firmware Setup Figure C 2 Option 04 Firmware Setup ...
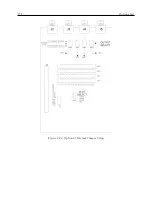
Страница 145: ...C 5 Option 04 Parallel BCD Output 125 Figure C 4 Option 04 Output Jumper Settings ...
Страница 146: ...126 Options List Figure C 5 Option 04 Board Layout and Jumper Locations ...
Страница 165: ...C 12 Option 17 Parallel BCD Output and Second RS 232 Port 145 Figure C 11 Option 17 Output Jumper Settings ...
Страница 166: ...146 Options List Figure C 12 Option 17 Board Layout and Jumper Locations ...
Страница 176: ...156 Options List C 14 5 Typical Network Configuration Figure C 15 Option 18 Network Configuration ...
Страница 187: ...C 16 Option 20A Four Fiber Optic Outputs 167 Figure C 22 Option 20A Jumper Locations ...
Страница 194: ...174 Options List Figure C 24 Option 23 Internal Jumper Setup ...
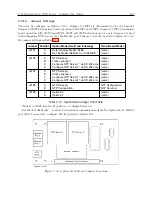
Страница 196: ...176 Options List Figure C 25 Option 27 Jumper Locations ...
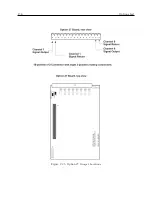
Страница 214: ...194 Options List Figure C 28 Option 29 Connector Signal Locations ...
Страница 270: ...250 Options List ...


