Aram ASM 300 Скачать руководство пользователя страница 37

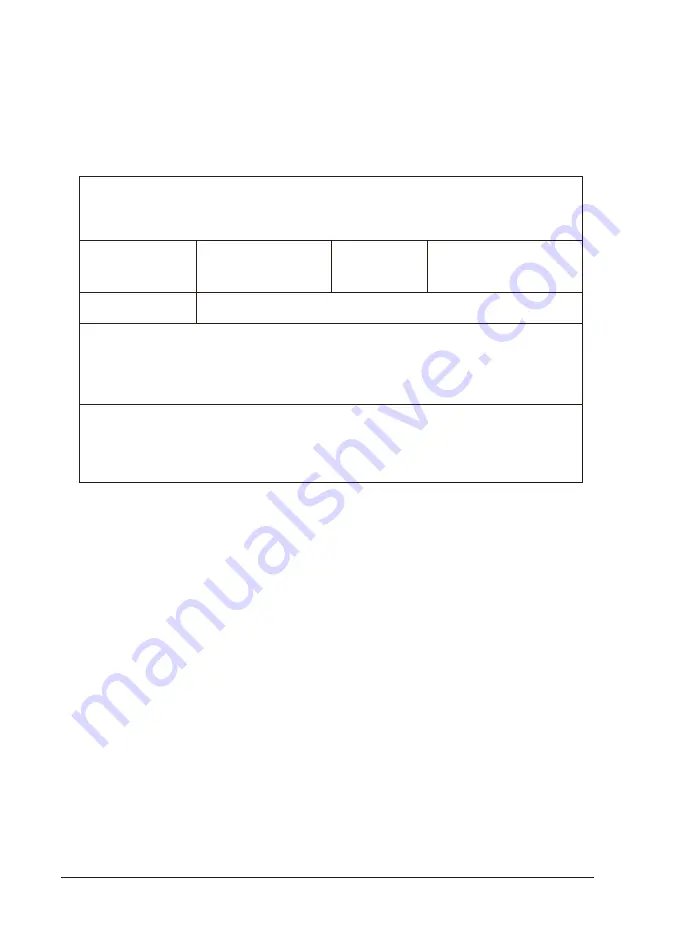
Service request form

Warranty

Date of 

purchase

Contact person

Address :

Tel :

Product name, serial No : 

Problems : 

Company 

/               / 

SHIPPING ADDRESS :

#801 Byucksan Technopia, 560, Dunchon-daero, Jungwon-gu, Seongnam-si, 
Gyeonggi-do, 13230 Republic of Korea

Tel: 070-4687-1712  /  Fax: 031-732-6330  /  Email: [email protected]
http://www.aramhuvis.com 

37

Содержание ASM 300

Страница 1: ...User Manual 300 ...

Страница 2: ...Keratin of Scalp Scalp Sensitivity ⅴ Hair Analysis ASM 203 Lens Hair Thickness Hair Pore Status ⅵ Hair Analysis ASM 204 Lens Cuticle Status Summary ⅶ Send Result Email ⅷ Mirroring ⅸ View Mode H W Parts System Settings Application 4 5 6 8 9 10 11 12 13 14 15 16 17 18 19 20 21 22 23 24 25 26 27 28 29 30 31 32 33 35 36 Warranty 3 Components Date Time Wi Fi Device Functions Device Settings Contents ...

Страница 3: ... with skin lens ASM 100 Skin lens ASM 100 Charger Cleaning cloth Manual USB cable Air blower Cradle Sebum paper 100ea Components 3 Components Hair lens ASM 202 Hair lens ASM 203 Hair lens ASM 204 Total 4 lenses ...

Страница 4: ...ASM lens LED Indicator Lens module change button USB slot DC 5V 3A On off button X1 lens Volume up down button 4 H W Parts Device Functions ...

Страница 5: ...to white 1 2 Charger can be used for American type European type The default is European type 1 Push the plug up 1 Then European type is disassembled and you can see the American type inside of the charger 2 3 Choose the one you want to use and connect USB cable in adaptor Device Settings 2 H W Parts ...

Страница 6: ...6 Date Time System Settings 4 5 6 1 2 3 Touch button Touch button Go to Date time Go to Set date Check if the setting is correctly applied Select the date and touch OK button ...

Страница 7: ...e zone Check if the setting is correctly applied Touch Set time Select proper time zone Change into the current time and touch OK button Check if the setting is correctly applied System Settings Date Time 10 11 12 7 8 9 ...

Страница 8: ...Fi 4 5 6 Wi Fi list will appear Among the lists select the Wi Fi connection you could use Wait until the device is connected to Wi Fi Touch Wi Fi Turn on toggle switch Touch button 1 2 3 System Settings 8 ...

Страница 9: ...1 4 5 6 9 Go to General Settings Available to change Language Version and Email setting Touch button Application Application Settings 2 3 ...

Страница 10: ...nformation User s profile is created on the list Then touch user s profile to start analyzing Application Touch to register new customer Touch button to start analyzing After putting all information touch Customer 4 5 6 1 2 3 10 ...

Страница 11: ...ule change button which is located left below of the lens part 1 Rotate the lens anticlockwise the lens will be able to pull out 2 After fitting the lens rotate the lens clockwise while pushing in Reverse order for inserting lens 3 Application 11 ...

Страница 12: ...ation and elasticity Touch the button Please wait until vibration and sound Never put the sensorontheskinbefore the message Touchtoskinplease Aftercheckingthemessage Touchto skinplease pushthesensorcompletely tomarkedareaoftheface All surface of the sensor should be pushed completely 1 2 Moisture 4 1 2 3 ...

Страница 13: ... it for 2 3 seconds Take a picture of pink area of the sebum paper Put the sebum paper on T zone of forehead then press it for 2 3 seconds Sebum result will appear Take a picture of pink area of the sebum paper Then touch button to analyze U zone T zone Sebum 1 2 3 4 5 ...

Страница 14: ...th 3 sample images Good Normal Bad Application Touch button to convert taken pore image in 3D Touch screen to bring a camera into focus and then touch to take a picture Touch to activate camera and put the camera onto the marked area of the face zoom out zoom in Pore 4 5 6 1 2 3 14 ...

Страница 15: ... compare taken image with 3 sample images Good Normal Bad Touch screen to bring a camera into focus and then touch to take a picture Touch to activate camera and put the camera onto the marked area of the face zoom out zoom in Melanin 1 2 3 4 5 15 Application ...

Страница 16: ...to compare taken image with 3 sample images Good Normal Bad Touch screen to bring a camera into focus and then touch to take a picture Touch to activate camera and put the camera onto the marked area of the face 16 Application zoom out zoom in Acne 1 2 3 4 5 ...

Страница 17: ...waysto checkcrow sfeet 17 Result will appear Touch button to compare taken image with 3 sample images Good Normal Bad Touch button to convert taken pore image in 3D Touch button to analyze Touch to activate camera and put the camera onto the marked area of the face Application zoom out zoom in Wrinkle 1 2 3 4 5 6 ...

Страница 18: ...ompare taken image with 3 sample images Good Normal Bad Touch screen to bring a camera into focus and then touch to take a picture Touch to activate camera and put the camera onto the marked area of the face 18 Application zoom out zoom in Sensitivity 1 2 3 4 5 ...

Страница 19: ...19 Application Available to check the result The worst results will be marked in red Touch button or Show All Result to see overall result Summary 1 2 ...

Страница 20: ...ss the lens module change button which is located left below of the lens part 1 Rotate the lens anticlockwise the lens will be able to pull out 2 After fitting the lens rotate the lens clockwise while pushing in Reverse order for inserting lens 3 ...

Страница 21: ...21 Application Hair Loss Status Touch button to activate camera mode 4 5 3 1 2 Touch button Then select the type which is similar with your hair loss shape ...

Страница 22: ...lp Status Touch Analysis to check analysis result Among the samples choose the one which is similar with your image Touch button to activate camera mode Putthecameraontothe hairandtouch buttonto capturetheimage 4 5 3 1 2 ...

Страница 23: ...23 Hair Density Touch Analysis to check analysis result Count the hair number in the image Check the result And swipe to next step 2 1 3 Application ...

Страница 24: ...on Keratin of Scalp Put the camera onto the scalp and touch button to capture the image Touch Analysis to check analysis result 3 Touch Analysis to check analysis result 4 1 2 2 Touch button to activate camera mode ...

Страница 25: ...Put the camera onto the scalp and touch button to capture the image Touch Analysis to check analysis result 3 Touch Analysis to check analysis result 4 1 2 Scalp Sensitivity Touch button to activate camera mode 25 ...

Страница 26: ...the lens module change button which is located left below of the lens part 1 Rotate the lens anticlockwise the lens will be able to pull out 2 After fitting the lens rotate the lens clockwise while pushing in Reverse order for inserting lens 3 26 ...

Страница 27: ...sis to check analysis result Touch button to activate camera mode 3 4 1 2 Choose one hair and touch little bit downside of the hair Thentouchlittlebitupsideof the hair It will make a green linetomeasurethethickness Ifthelineisnotcorrect pleasetryagain Hair Thickness Application 27 ...

Страница 28: ...Status Among the samples choose the one which is similar with your image 3 4 Touch button to activate camera mode 1 2 Check the result And swipe to next step Touch Analysis to check analysis result Application 28 ...

Страница 29: ...the lens module change button which is located left below of the lens part 1 Rotate the lens anticlockwise the lens will be able to pull out 2 After fitting the lens rotate the lens clockwise while pushing in Reverse order for inserting lens 3 29 ...

Страница 30: ...on to activate camera mode Application Cuticle Status 3 4 1 2 2 Among the samples choose the one which is similar with your image Check the result And swipe to next step Touch Analysis to check analysis result 30 ...

Страница 31: ... Available to check product image The results will be shown in two pages On second page the description of each parameter would be available by clicking icon 4 Once you select Show Recommended Product product image will pop up as 3 ...

Страница 32: ...mail address put receiver s mail address Then touch Send button Select the mail account to register on the list Touch Before sending Email the device shall be connected to Wi Fi Reference page 8 Go to Send Email Select Gmail 1 2 3 4 5 6 Application ...

Страница 33: ...33 Go to General Settings Set the mirroring option On Capture QR code using QR code reader app Automatically moved to App store Touch button 1 2 3 4 Mirroring Application ...

Страница 34: ...34 8 5 6 7 Install Aram VIEWER Then go to Wi Fi Setting Mirroring will be started In your mobile device go to Wi Fi setting Then find SSID and connect it Mirroring Application ...

Страница 35: ...t is able to take pictures with capture button The user can select analysis parameter to take pictures in proper mode The user can mark the defect or concern according to the image with note function 4 1 2 3 View Mode Application ...

Страница 36: ...lease keep the warranty card when you ask for repair service 4 Customer needs to pay repair charge after warranty runs out 5 For this product warranty period is 14 months from the Invoice date 6 Cost Within warranty Sending delivery Buyer repair cost and returning delivery Aram If the product is broken by user s fault repair cost could be charged After warranty Sending delivery and repair cost Buy...

Страница 37: ...on Address Tel Product name serial No Problems Company SHIPPING ADDRESS 801 Byucksan Technopia 560 Dunchon daero Jungwon gu Seongnam si Gyeonggi do 13230 Republic of Korea Tel 070 4687 1712 Fax 031 732 6330 Email support aramhuvis com http www aramhuvis com 37 ...

Страница 38: ...Memo ...

Страница 39: ...Memo ...

Страница 40: ...Park 172 Dolma ro Bundang gu Seongnam si Gyeonggi do 13605 Republic of Korea PRODUCTION DIVISION FACTORY 909 Byucksan Technopia 560 Dunchon daero Jungwon gu Seongnam si Gyeonggi do 13230 Republic of Korea Tel 070 4687 1712 Fax 031 732 6330 Email info aramhuvis com http www aramhuvis com ...

Отзывы: