background image

 Before returning to your retailer, call our customer service department at  
1-888-314-2588, 8 a.m.-6 p.m., EST, Monday-Friday.   


8.  Place the cover (with the o-ring attached) over the top of the tank.  

Fig. 8 


Fig. 8 


9.  Screw the lid onto the top of the tank.  Make sure that it is secure, 

or the filter will leak.  Fig. 9 


Fig. 9


10. Connect the UV clarifier plug into a properly grounded electrical  

outlet.  Fig. 10 


                                                                                                                                            Fig. 10 

11. Wait several seconds for the light to turn on then check the 

indicator light to verify if the light is functioning correctly.   
Fig. 11 


NOTE:  This clarifier has a safety feature that only allows the 

UV light to turn on if the lamp holder is fully seated into 
the lamp housing. 


Fig. 11 


GFCI 


Indicator light 

Содержание QPF1200UV

Страница 1: ...t unplug the appliance immediately Do not operate any appliance if it has a damaged cord or plug or if it is malfunctioning or if it is damaged in any manner Always unplug the appliance from the outle...

Страница 2: ...s or other heat sources Do not lift the light or the transformer by its power cord This light assembly has not been investigated for use in swimming pools or hot tubs IMPORTANT NOTES This product is d...

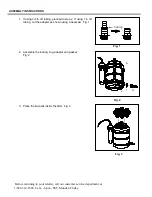
Страница 3: ...p m EST Monday Friday ASSEMBLY INSTRUCTIONS 1 If using 3 4 in ID tubing proceed to step 2 If using 1 in ID tubing cut the adapter as shown using a hacksaw Fig 1 Fig 1 2 Assemble the locking ring adap...

Страница 4: ...small adapter to the adapter using the locking ring Be sure to place the gasket between adapter and tank place the small gasket between the small adapter and adapter Fig 5 Fig 5 6 Connect tubing to th...

Страница 5: ...that it is secure or the filter will leak Fig 9 Fig 9 10 Connect the UV clarifier plug into a properly grounded electrical outlet Fig 10 Fig 10 11 Wait several seconds for the light to turn on then c...

Страница 6: ...t of the filter lower hole to a water feature Fig 12 NOTE Pump and tubing is NOT INCLUDED The adapter is compatible with 1 in or 3 4 in tubing Fig 12 ASSEMBLY INSTRUCTIONS Replacing the bulb 1 Disconn...

Страница 7: ...Carefully install the new bulb Fig 15 Fig 15 4 Reinstall the lamp holder and locking ring Fig 16 NOTE This clarifier has a safety feature that only allows the UV light to turn on if the lamp holder i...

Страница 8: ...est time of the year to breakdown your system is in early spring before the water temperatures begin to rise This is also the ideal time to replace the filter pads CARE AND MAINTENANCE UV Clarifier To...

Страница 9: ...customer service department at 1 888 314 2588 8 a m 6 p m EST Monday Friday Part Description B O ring C Cover D Lid H Adapter I Gasket J Locking ring K Small adapter L Small gasket M Tank N Lamp hous...

Страница 10: ...iated with the shipping handling installation or removal of products or parts subject to this warranty For products damaged in transit a claim should be filed with the carrier Disclaimer Any oral stat...

Отзывы: