


Page - 32
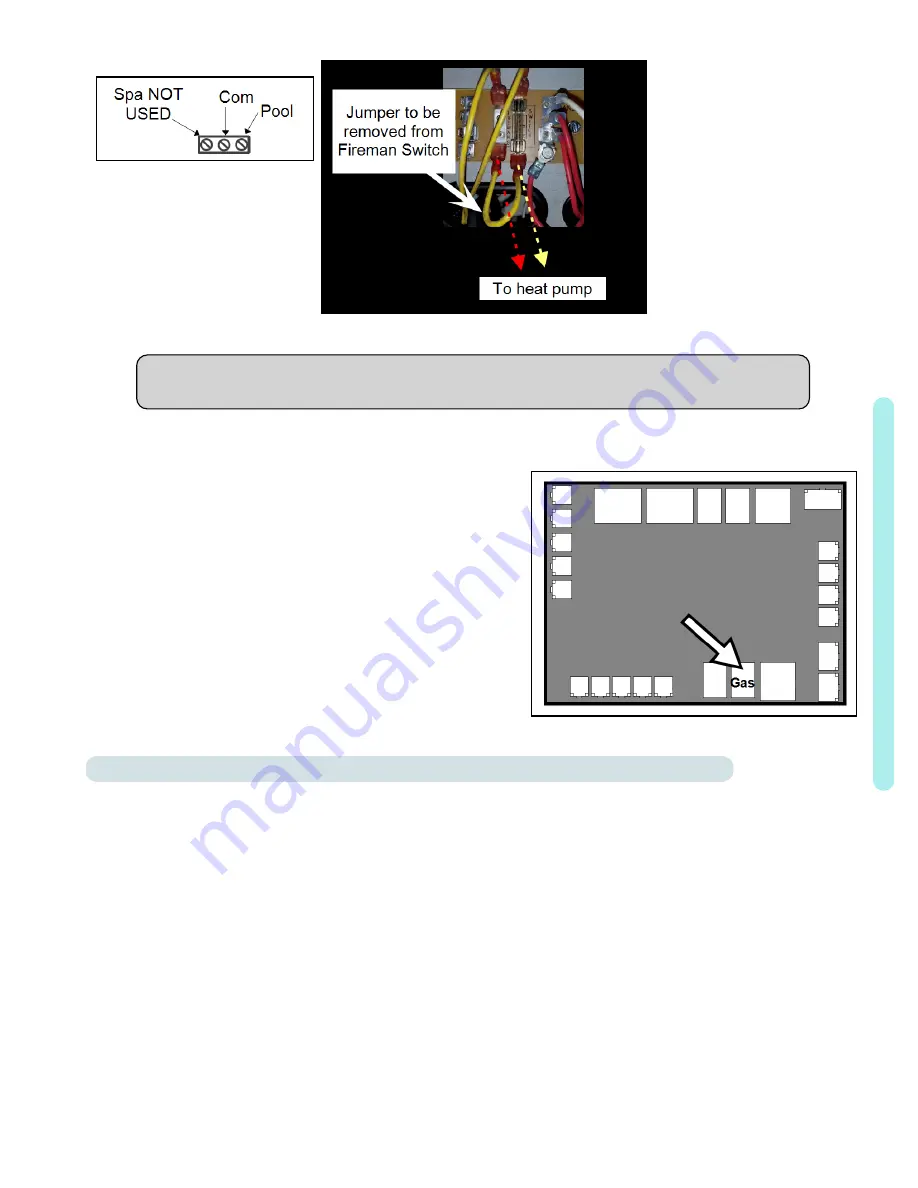
Gas Heater's Pool and
Common Connection
Figure 5
Gas Heater's Fireman Switch
Figure 6
If the Gas Heater requires a
fireman (cool down) switch,
it is the installer's
responsibility to ensure this
requirement is met.
Failure to follow the
manufacturer's installation
requirements may result in
damage to the gas heater.
PLEASE NOTE
Do not use a smart connection data comm port from the gas heater.
Dry Contact Connection Points to the
Microprocessor
4. Connect the controller wires to the port labeled "Gas" on the
microprocessor as indicated.
5. Reattach heat pump and gas heater access panels.
6. Apply power to heat pump and gas heater.
7. Configure gas heater to accept a two-wire remote control
signal. See gas heater's manual for specifics on this
procedure.
8. Configure gas backup mode on heat pump. See "
Configuring Gas Backup
There are two different ways the gas backup heater can be configured.
l
24-hour mode
- commonly used for commercial applications
n
The circulation pump operates continuously.
n
The gas heater will activate if the water temperature falls two degrees below the set temperature. When the set
temperature is reached, the gas heater will be deactivated.
n
The Heat Pump will continue to maintain the set temperature.
l
Scheduled mode
- commonly used for residential applications
n
The circulation pump operates on the circulation pumps regular on-off schedule.
n
The gas heater will activate as needed to ensure that the desired temperature will be reached within the
circulation pumps schedule. The gas heater will deactivate when the water is warm enough to allow the heat
pump to finish within schedule. The heat pump will then continue to heat the water till the set temperature is
reached.
1
-
Ins
ta
lla
tion
Содержание Leisure Temp LT1000
Страница 2: ......
Страница 9: ...Page 6 1 3 Dimensions Leisure Temp LT55 Leisure Temp LT400 1 Installation...
Страница 10: ...Page 7 Leisure Temp LT600 Leisure Temp LT700 LT800 1 Installation...
Страница 15: ...Page 12 Leisure Temp LT55 Leisure Temp LT400 and LT600 Leisure Temp LT700 LT800 and LT1000 1 Installation...
Страница 26: ...Page 23 Configure Call Flex Enter Installer Menus then proceed 1 Installation...
Страница 30: ...Page 27 1 Installation...
Страница 33: ...Page 30 1 Installation...
Страница 36: ...Page 33 Configure for 24 Hour Mode Enter Installer Menus then proceed 1 Installation...
Страница 37: ...Page 34 Configure for Scheduled Mode Enter Installer Menus then proceed 1 Installation...
Страница 38: ...Page 35 1 Installation...
Страница 41: ...Page 38 1 Installation...
Страница 43: ...Page 40 1 Installation...
Страница 46: ...Page 43 1 Installation...
Страница 50: ...Page 47 1 Installation...
Страница 53: ...Page 50 1 Installation...
Страница 55: ...Page 52 1 Installation...
Страница 72: ......


