background image


23 

ART-NTU-XUNIMPN000 

 Instructions for use and use Unikart Classic Motorized 

UNIKART trolley for a 
maximum of 136 kg.


8 – DOCUMENTATION EMERGENCY PROCEDURE:


EMERGENCY PROCEDURE: 

Preamble: Be sure to check the battery charge before each use! 

The safety winch is an emergency device. It is only expected in case of motor failure to 
overcome the electric cylinder problem. 

Refer to the user manual for further explanation and prior to handling if necessary. 

Important Steps: 

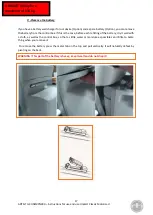
1. Get off the seat if possible, otherwise make sure that the person in the seat is safe (A) 

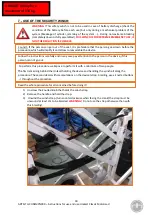
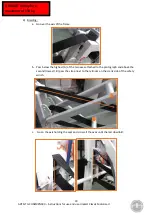
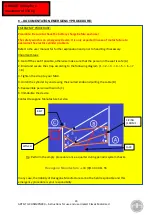
2. Braid and secure the strap according to the following diagram (1 -> 2 -> 3 -> 4 -> 5 -> 6 -> 7 
-> 8) 

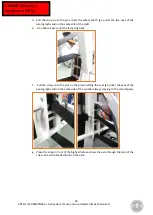
3. Tighten the strap to your MAX. 

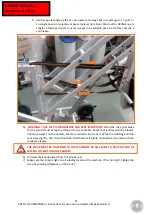
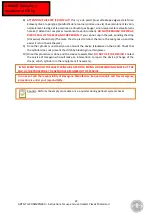
4. Unroll the cylinder by unscrewing the knurled knob and pulling the cable (B) 

5. Reassemble person with winch (C) 

6. Immobilize the device. 

Contact Hexagone Manufacture Service. 


Tip: Perform the empty procedure once a quarter during periodic system checks. 


Hexagone Manufacture


- +33 (0)1 34 34 11 55 


In any case, the liability of Hexagone Manufacture cannot be held responsible and this 
emergency procedure is your responsibility. 


WINCH 

BELT 

FIXING 
(FROM 1 -
> 8) 

JACK 

Содержание Unikart Classic Motorized

Страница 1: ...ctions for use and use Unikart Classic Motorized UNIKART trolley for a maximum of 136 kg Instructions for maintenance and use of the Unikart Classic Motorized Date of commissioning __________________ Device No __________________ ...

Страница 2: ...ssary for the proper use By renewing our thanks we wish you a good use of your new cart Yoann Chouraqui President Director General Owner Information The rating plate is on the left side of the unit with the following indications All this data is for informational purposes We reserve the right to make changes or additions to the products described in this manual at any time without notice Product D...

Страница 3: ...our hands on the moving parts pantograph seat during the phase of putting or leaving water Never unroll the straps completely always keep a minimum turn red mark on maximum unwinding strap Keep hands out of the system of straps and winches Under no circumstances should you pull the strap it is to be used only with the winch When handling pay attention to the forces position yourself sideways and u...

Страница 4: ...of person 7 2 Bassin approach 7 3 Descent into the water 7 4 Daily use of water outlet 8 5 Distance from the pool 8 6 Transfer of person 8 3 Your guarantee 9 A Conditions 9 B Duration of the guarantee 9 C Purpose of the guarantee 9 D Transport damage 9 E Conformity 9 4 Exploded and nomenclatures 10 A General view 10 B Details 11 C BOM 12 5 Montage de démarrage de l Unikart Motorisé 13 6 PROCEDURE ...

Страница 5: ...re utilisé avec le respect de quelques notions importantes et que nous indiquons ici regroupées The device must always be put in place with the brake pad unless there is a step of more than 35mm high and at least 50mm from the edge of the basin justifying a sufficient stop The brake pad should be placed in alignment with the pond wall Before any use with a person check that the battery is sufficie...

Страница 6: ...e greater than 2 The seat can not be placed above the vacuum no more than 50cm an empty basin or more than 50cm from the surface of the water Unless specific conditions to report us UNI KART is designed to transfer users from the beach around the pool to the water and vice versa It is not designed to transport people from one place to another Public pouvant profiter de l UNI KART The user should h...

Страница 7: ... sure his body is centered on the seat Swivel down the stabilizer arms armrests Fasten the belt If the user has a wheelchair keep it nearby for easy retrieval 2 Bassin approach Go to the place of launching after placing the brake pad Do not skirt the pool within 1m of the edge of the pool and the beach does not exceed 2 inclination Position the Unikart on the brake pad arriving directly on Lock th...

Страница 8: ... the desired transfer height Keep your fingers and hands away from the 2 masts of the lift during use 5 Distance from the pool Fasten the belt Release the 2 brakes and pull the carriage backwards Go to the place of recovery of the chair or removal of the person Do not skirt the pool less than 1m from the edge and a beach that does not exceed 2 inclination Keep your fingers and hands away from the ...

Страница 9: ...e original parts Problems with non compliance with the instructions in the user s manual The battery is guaranteed for 3 months then between 3 months and 12 months in proportion to the time elapsed Under no circumstances may repair or replacement under the warranty extend or renew the warranty period of the device B Duration of the guarantee The warranty period is 2 years or 4 000 cycles from the ...

Страница 10: ...10 ART NTU XUNIMPN000 Instructions for use and use Unikart Classic Motorized UNIKART trolley for a maximum of 136 kg 4 Exploded and nomenclatures A General view ...

Страница 11: ...11 ART NTU XUNIMPN000 Instructions for use and use Unikart Classic Motorized UNIKART trolley for a maximum of 136 kg B Details ...

Страница 12: ...12 ART NTU XUNIMPN000 Instructions for use and use Unikart Classic Motorized UNIKART trolley for a maximum of 136 kg C BOM ...

Страница 13: ...the ground 4 To fix the cylinder go down with the remote control this one and to center the second hole of the pantograph with the hole of the jack ATTENTION to the friction or fall of these parts 5 Once the two pieces center pass the handle with the two largest stainless steel spacers outside the cylinder and the thinnest in the middle of the cylinder Screw the knurled knob 6 Raise the cylinder a...

Страница 14: ...o up and down If the battery is not charged beep sound do not use the device may block the person on the device Note When the device beeps the battery is discharged do not use the device before it is fully charged about 10 hours of charge 2 Position the device in front of the carpet basin side seat 3 Place the person on the device Remember to raise the armrests to facilitate the transfer of the pe...

Страница 15: ... 8 For the exit of the person and the device to think well to check that the device is sufficiently raised to not hurt the feet of the person with the wall of the swimming pool the ground or the apparatus Check in the same way as for the input that the battery is sufficiently charged to handle the device 9 Council Plan to charge the device before each use At least 10h The battery that is not used ...

Страница 16: ... and connect directly to the mains WARNING Do not throw the battery or control box in the water Do not drop water on it The remote control is waterproof to a depth of 1 meter CAUTION not to exceed this depth to keep the seal on the remote control Council Keep the cylinder as dry as possible if splashes reach the cylinder try to wipe it as much as possible The cylinder is made of marine grade stain...

Страница 17: ...ove the battery from the control box If this is the case before each refitting of the battery dry it well with a cloth as well as the control box so that as little water or moisture as possible can infiltrate Same thing when you remove it To remove the battery press the metal tab on the top and pull vertically It will naturally defeat by pivoting on the back WARNING This part of the battery is hea...

Страница 18: ...which will simplify it and allow to reassemble the device Follow the instructions carefully and in any case pay attention to the person in the device if this person can not go out To perform this procedure we impose to perform it with a minimum of two people The first remaining behind the Unikart holding the device and handling the winch all along the procedure The second deals with manipulations ...

Страница 19: ... of 136 kg 4 Braiding a Go over the axis of the frame b Pass below the highest A of the two axes attached to the pantograph and above the second lowest B pass the strap next to the cylinder on the crank side of the safety winch c Go on the axis holding the seat and cross all the axes until the last downhill ...

Страница 20: ...f the pantographs and on the same side of the jack e Go under all axes until the last going back f Pull the strap up to the pins on the piece holding the seat go under the axes of the pantographs and on the same side of the cylinder always staying on the second pass g Place the strap in front of the highest hole and pass the axle through the loop of the strap Screw the knurled knob on the axle ...

Страница 21: ...ORTANT Wind the strap clockwise for the winch crank Wrap the strap as much as possible Check that it slides well on all levels The more weight on the Unikart the more resistant the crank is Wrap the webbing until the seat rises slightly The strap should be stretched at all levels untangled and remain at their respective levels THE STRAP MUST BE TIGHTENED TO THE MAXIMUM AT ALL LEVELS TO HAVE NO RIS...

Страница 22: ...ched the more the seat goes up and the easier it is to unhook the jack 9 Once the cylinder is unpinned you can mount the device clockwise on the crank Check that the cylinder does not prevent the climb by blocking in certain places 10 Once this procedure is done and the device reassembled DO NOT USE THE DEVICE Contact the service of Hexagon who will make an intervention to repair the device Change...

Страница 23: ... Steps 1 Get off the seat if possible otherwise make sure that the person in the seat is safe A 2 Braid and secure the strap according to the following diagram 1 2 3 4 5 6 7 8 3 Tighten the strap to your MAX 4 Unroll the cylinder by unscrewing the knurled knob and pulling the cable B 5 Reassemble person with winch C 6 Immobilize the device Contact Hexagone Manufacture Service Tip Perform the empty...

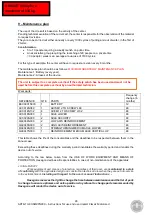
Страница 24: ...y change in months EEV0001N000 1 BATTERY 12 AC0014N089 1 AXIS M12 TO SCREW L89 48 AC0014N132 4 AXE M12 TO SCREW L132 48 AC0018N000 1 AXLE LOWER 48 AC0020N000 2 AXLE SECURITY 48 QA0044N000 2 LOW AXIS REINFORCEMENT 48 QA0045N000 2 HIGH AXIS REINFORCEMENT 48 QA0046N000 1 STRENGTHENING MEDIUM AXLE LOWER 48 QA0047N000 1 REINFORCEMENT MEDIUM AXLE VERTICAL UP 48 This table shows the life of the consumabl...

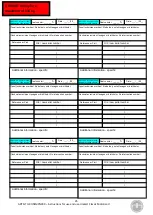
Страница 25: ...n overhaul No delivery note Hexagon or distributor If technician revision Hexagon or distributor No intervention number Reference or Part Old new serial number Additional information specific SERVICE 4 Annual or 4000 made water 4000 outputs Real counter _____ h Date ___ __ 20__ If pool technician overhaul No delivery note Hexagon or distributor If technician revision Hexagon or distributor No inte...

Страница 26: ...nikart Classic Motorized UNIKART trolley for a maximum of 136 kg 10 PRACTICAL INFORMATIONS HEXAGONE MANUFACTURE 1 5 rue Michel Carré 95104 Argenteuil FRANCE Tél 33 0 1 34 34 11 55 Fax 33 0 1 34 34 11 50 Web www myhexagone com www facebook com myhexagone ...

Отзывы: