14
1. Tightly screw the light attachment screws into the holes located near the lamp edge on the top of the
fixture (Fig. 1, No. 1). The rubber stoppers used must first be removed using a needle.
2. Unscrew the bottom of the ceiling mount adapter and insert the mounting screw into the top. Using the screw,
securely attach the adapter to a hard surface which is attached securely to a solid beam or stud. Mounting the
light directly into drywall, particle board or similar material may cause the fixture to come unsecured and fall.
If attaching directly to drywall without using a stud, using a heavy duty drywall anchor is highly recommended
(Fig. 1, No. 2).
3. Feed the hanging wire, thin end first, through the bottom of the ceiling mount adapter until the lamp is fixed
against the bottom. Screw the bottom into the fastened ceiling mount adapter until it is safely tightened (Fig.
1, No. 2).
4. Unscrew the bottom of the hanging kit adapter and feed the hanging wire into the slot. Screw the bottom back
into the hanging kit adapter until it is secure. If adjustments are needed, partially unscrew the bottom, adjust
as desired, then re-tighten the screw. Fix the hanging wire on the cover of the lamp body (Fig. 1, No. 3).
5. While pressing down on the thin shaft at the top of the hanging kit adapter, feed the hanging kit wire through
until it is set to the desired length. Releasing the shaft will lock the wire in place. If adjustments are needed,
depress the locking shaft and raise or lower the light as desired (Fig. 1, No. 3).
6. Once the light is securely mounted and all desired adjustments are made, connect the light to the power
adapter and plug it into a power source. Make sure to make a drip loop before the plug in the wall (Fig. 1, No.
4).
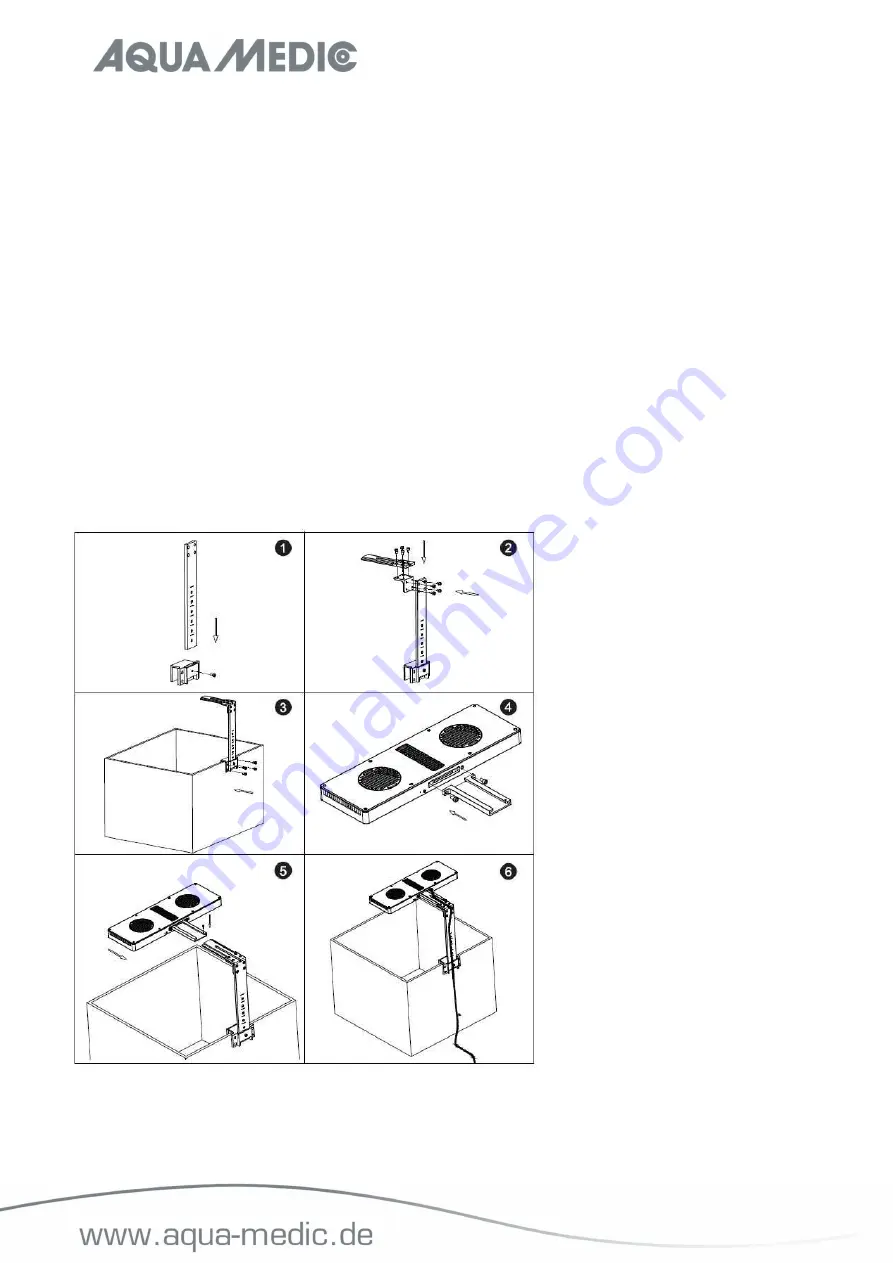
4. Mounting the lamp holder
Fig. 2: spectrus holder


