7
- 63
3$57(&,&/2
&+$66,63$576
7.4.2 CONTROL
LLANTA
Antes de controlar la llanta elimine todos los residuos de
goma u óxido.
Sustituya la llanta con otra nueva si encuentra uno solo
de los defectos mencionados a continuación.
X
Deformaciones o fisuras.
X
Estrías o defectos.
NEUMATICO
Controle con atención el neumático tras haberlo desmon-
tado. En caso de que encuentre uno solo de los defectos
mencionados a continuación, no repare el neumático,
sino que sustitúyalo con otro nuevo.
X
Agujero o fisura de diámetro o longitud superior a 5 mm.
X
Estrías o fisuras del flanco.
X
Profundidad de la banda de rodamiento inferior a 2 mm.
X
Telas despegadas.
X
Banda de rodamiento separada.
X
Deformación o desgaste no uniforme de la banda de
rodamiento.
X
Estrías en el talón.
X
Cables interrumpidos.
X
Daños provocados por patinajes (zonas aplastadas).
X
Anomalías de la estabilidad interior.
Cuando repare un neumático pinchado, siga
las instrucciones para la reparación y utilice
sólo los componentes aconsejados para la
misma.
Si la excentricidad axial y radial de la rueda su-
pera los 2 mm, ajuste la tensión de los radios
hasta restablecer las condiciones normales de uso.
CAMARA DE AIRE
Controle cuidadosamente la cámara de aire buscando el
posible agujero o corte y luego repárela. Si presenta in-
cluso uno solo de los defectos indicados, no repare la cá-
mara de aire sino que sustitúyala con una nueva.
X
Agujero o fisura con un diámetro o longitud superior a
5 mm.
X
Grietas evidentes alrededor de la base de la válvula.
X
Burbujas e hinchazones anormales cuando se infla
para localizar agujeros.
Cuando repare una cámara de aire agujerea-
da, siga las instrucciones para la reparación y
utilice sólo los componentes aconsejados
para la reparación.
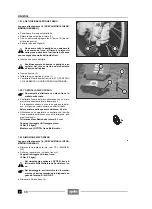
7.4.3 MONTAJE CAMARA DE AIRE
Elimine la suciedad u óxido del asiento de la válvula.
7.4.4 MONTAJE NEUMATICO
X
Aplique un lubricante especial para neumáticos o agua
jabonosa en los talones del neumático.
Nunca y por ningún motivo aplique grasa,
aceite o gasolina en los talones del neumáti-
co.
X
Si se monta nuevamente el neumático que había sido
desmontado, controle que la flecha impresa sobre
éste quede orientada en el sentido de rotación de la
rueda y haga coincidir la referencia sobre el neumático
en el momento del desmontaje con la marca sobre la
llanta.
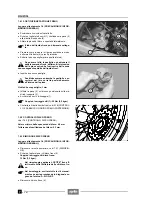
7.4.2 CHECKING
RIM
Before checking the rim, eliminate all rubber or rust resi-
dues.
If one or more of the listed defects are present, change
the rim.
X
Deformation or cracking.
X
Marks/lines or defects.
TYRE
Thoroughly check the tyre after removing it. If one or
more of the listed defects are present, do not repair the
tyre, but change it.
X
Hole or crack exceeding 5 mm in diameter or length.
X
Mark or cracking on the side.
X
Tread depth less than 2 mm.
X
Ply unglued.
X
Separated tread.
X
Deformation or wear of tread not uniform.
X
Marks/lines on the bead.
X
Damage due to skidding (flattened areas).
X
Anomalies in the inner seal.
When repairing a punctured tyre, follow the in-
structions and use only the components rec-
ommended for repairing.
In case the axial and radial eccentricity ex-
ceed 2 mm, adjust the tension of the spokes
until the normal conditions are reestablished.
INNER TUBE
Carefully check the inner tube, trying to find possible
holes or cuts, then proceed to the repair.
If one or more of the listed defects are present, do not re-
pair the inner tube, but replace it with a new one.
X
Hole or crack exceeding 5 mm in diameter or length.
X
Evident cracking around the base of the valve.
X
Bubbles or anomalous swelling when the tube is inflat-
ed in order to find out any hole.
When repairing a punctured inner tube, follow
the instructions and use only the components
recommended for repairing.
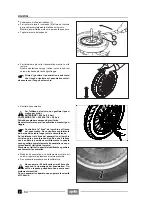
7.4.3 ASSEMBLING THE INNER TUBE
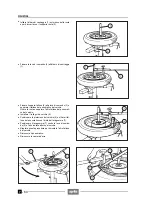
Eliminate any trace of dirt or rust from the valve seat.
7.4.4 ASSEMBLING THE TYRE
X
Apply the special lubricant for tyres, or soapy water, to
the beads of the tyre.
Never apply grease, oil or petrol to the beads
of the tyre for any reason whatsoever.
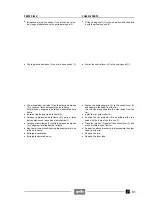
X
If a disassembled tyre is to be reassembled, make
sure that the arrow stamped on it is pointed in the
wheel rotation direction and make the chalk mark
made on the tyre upon disassembly coincide with the
mark on the rim.
Содержание Pegaso 650
Страница 1: ......
Страница 3: ...0 4 NOTE NOTES ANMERKUNGEN ...
Страница 4: ...1 1 1 2 3 4 5 6 7 8 INFORMAZIONI GENERALI INFORMACIONES GENERALES GENERAL INFORMATION ...
Страница 42: ......
Страница 69: ...3 1 1 2 3 4 5 6 7 8 MOTORE MOTOR ENGINE ...
Страница 90: ...3 22 MOTORE NOTE NOTAS NOTES ...
Страница 91: ...4 1 1 2 3 4 5 SISTEMA DI ALIMENTAZIONE SISTEMA DE ALIMENTACIÓN FUEL SYSTEM ...
Страница 116: ...4 26 SISTEMA DI ALIMENTAZIONE NOTE NOTAS NOTES ...
Страница 117: ...5 1 1 2 3 4 5 6 7 8 IMPIANTO DI RAFFREDDAMENTO SISTEMA DE REFRIGERACIÓN COOLING SYSTEM ...
Страница 130: ...5 14 IMPIANTO DI RAFFREDDAMENTO SISTEMA DE REFRIGERACIÓN COOLING SYSTEM NOTE NOTAS NOTES ...
Страница 131: ...6 1 6 1 2 3 4 5 6 7 8 IMPIANTO ELETTRICO INSTALACIÓN ELÉCTRICA ELECTRICAL SYSTEM ...
Страница 176: ...IMPIANTO ELETTRICO INSTALACIÓN ELÉCTRICA ELECTRICAL SYSTEM 6 46 NOTE NOTAS NOTES ...
Страница 177: ...7 1 1 2 3 4 5 6 7 8 CICLISTICA PARTE CICLO CHASSIS PARTS ...
Страница 226: ... 67 3 57 2 66 6 3 576 7 50 5827 3267 5 25 58 75 6 5 5 5 ...
Страница 242: ... 67 3 57 2 66 6 3 576 7 66 5 12 17 5 25 5 12 17 52 5217 5 ...
Страница 246: ... 67 3 57 2 66 6 3 576 7 70 5 12 3267 5 25 5 12 75 6 52 5 5 5 ...
Страница 272: ... 67 3 57 2 66 6 3 576 7 96 NOTE NOTAS NOTES ...
Страница 273: ...8 1 1 2 3 4 5 6 7 8 INFORMAZIONI PER LE RIPARAZIONI INFORMACIONES PARA LAS REPARACIONES REPAIRS ...
Страница 301: ...INFORMAZIONI PER LE RIPARAZIONI INFORMACIONES PARA LAS REPARACIONES REPAIRS 8 29 E F E F G H G H ...
Страница 302: ...INFORMAZIONI PER LE RIPARAZIONI INFORMACIONES PARA LAS REPARACIONES REPAIRS 8 30 I L I M L N M N ...
Страница 303: ...INFORMAZIONI PER LE RIPARAZIONI INFORMACIONES PARA LAS REPARACIONES REPAIRS 8 31 O P Q P O R Q R ...
Страница 310: ...INFORMAZIONI PER LE RIPARAZIONI INFORMACIONES PARA LAS REPARACIONES REPAIRS 8 38 NOTE NOTAS NOTES ...
Страница 311: ...INFORMAZIONI PER LE RIPARAZIONI INFORMACIONES PARA LAS REPARACIONES REPAIRS 8 39 ...

