Installation and Service Manual – Under-the-Counter 6 Stage Reverse Osmosis System with UV
Systems and Components
Membranes
,
Filters
,
Chemicals
2325 Cousteau Ct., Vista, CA 92081 USA • www.appliedmembranes.com • E-mail: [email protected]
Page 4
Copyright © 2008 Applied Membranes, Inc. All Rights Reserved.
Preparing
For
Installation
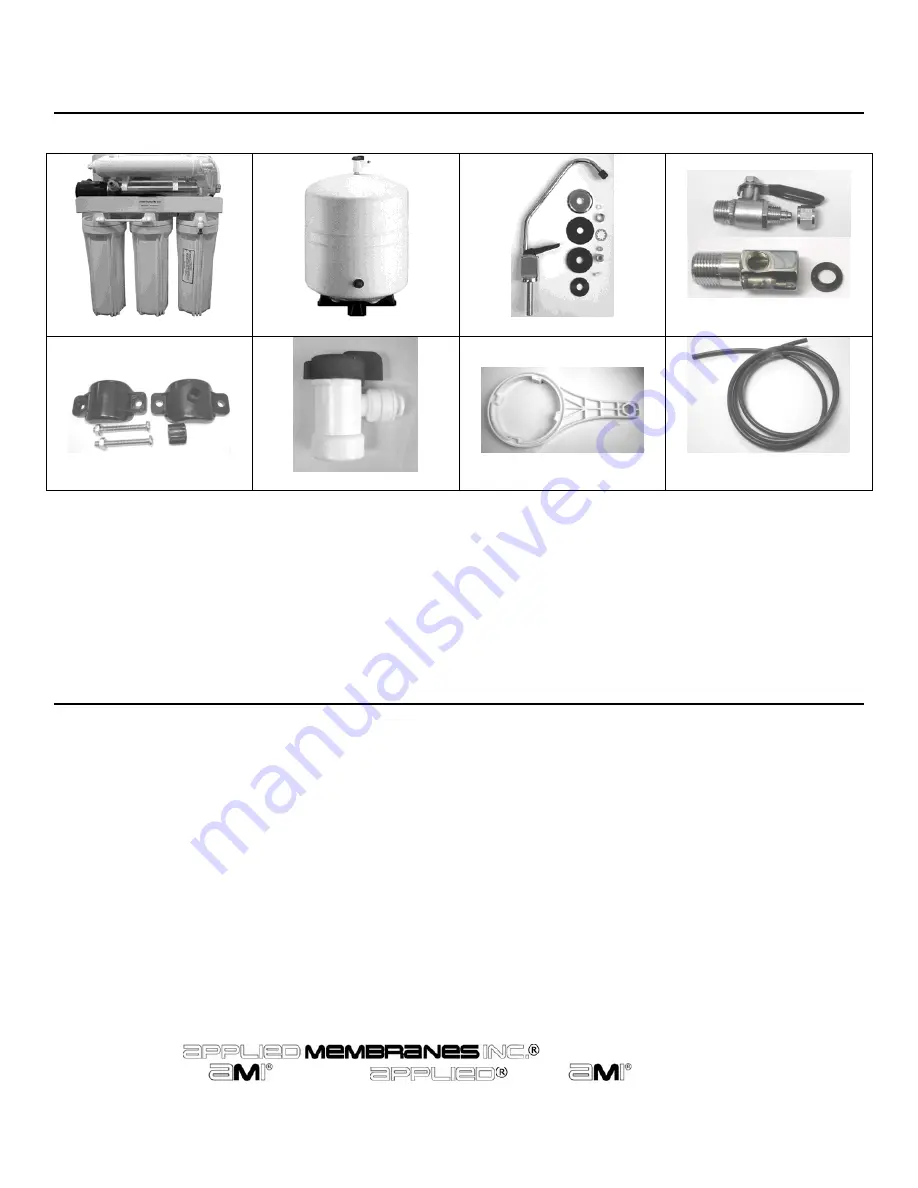
Check the following list of components to ensure that all parts are packed with your system.
RO System
Storage Tank
Faucet Kit
Feed Adapter Kit
Drain Saddle
Tank Valve
Filter Wrench
Tubing: Blue, Yellow,
Orange & Black
Recommended Tool List:
Have the below tools on hand before beginning installation. These are not included with the system.
Variable speed drill with
⅛
”, ¼" &
7
/
16
” drill bits
½”
and
7
/
16
” open-end wrenches (or adjustable)
Phillips
screwdriver
Utility
knife
Teflon
tape
Check Location:
Determine the location for the installation of the RO system. Avoid locations where the system might come in
contact with hot water pipes or other hazards. An electrical outlet is needed for the UV power supply.
Determine the location for the faucet. Check to see that drilling the faucet hole will not damage pipes or wires
running underneath the sink.
Determine the location for the storage tank. A maximum distance from tank to faucet of 15 feet is possible
(additional tubing will be needed). The system will produce a faster flow at the faucet with the shortest tubing
run from tank to faucet.


