
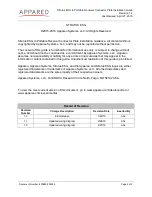
Stratus ESG to Portable Receiver Connector Plate Installation Guide
Revision 1.2
Last Revised: April 27, 2016
Document Number: 600890-000054
Page 3 of 5
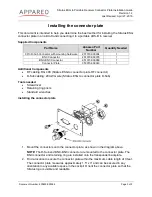
Installing the connector plate
This document is intended to help you determine the best method for installing the Stratus ESG
connector plate in an aircraft and connecting it to a portable ADS-B In receiver.
Supplied Components
Part Name
Appareo Part
Number
Quantity Needed
9 Pin D-Sub Connector with mounting hardware
251015-000094
1
BNC Connector
251015-000078
1
BNC-BNC Connector
251015-000089
1
Connector Plate
353070-000043
1
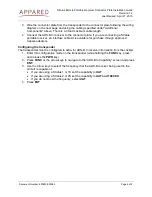
Additional Components
•
RF cabling: RG 400 (Stratus ESG to connector plate RF connector)
•
D-Sub cabling: 20 AWG wire (Stratus ESG to connector plate D-Sub)
Tools needed
•
Screwdriver
•
Retaining ring pliers
•
Standard wrenches
Installing the connector plate
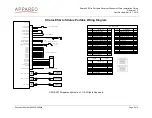
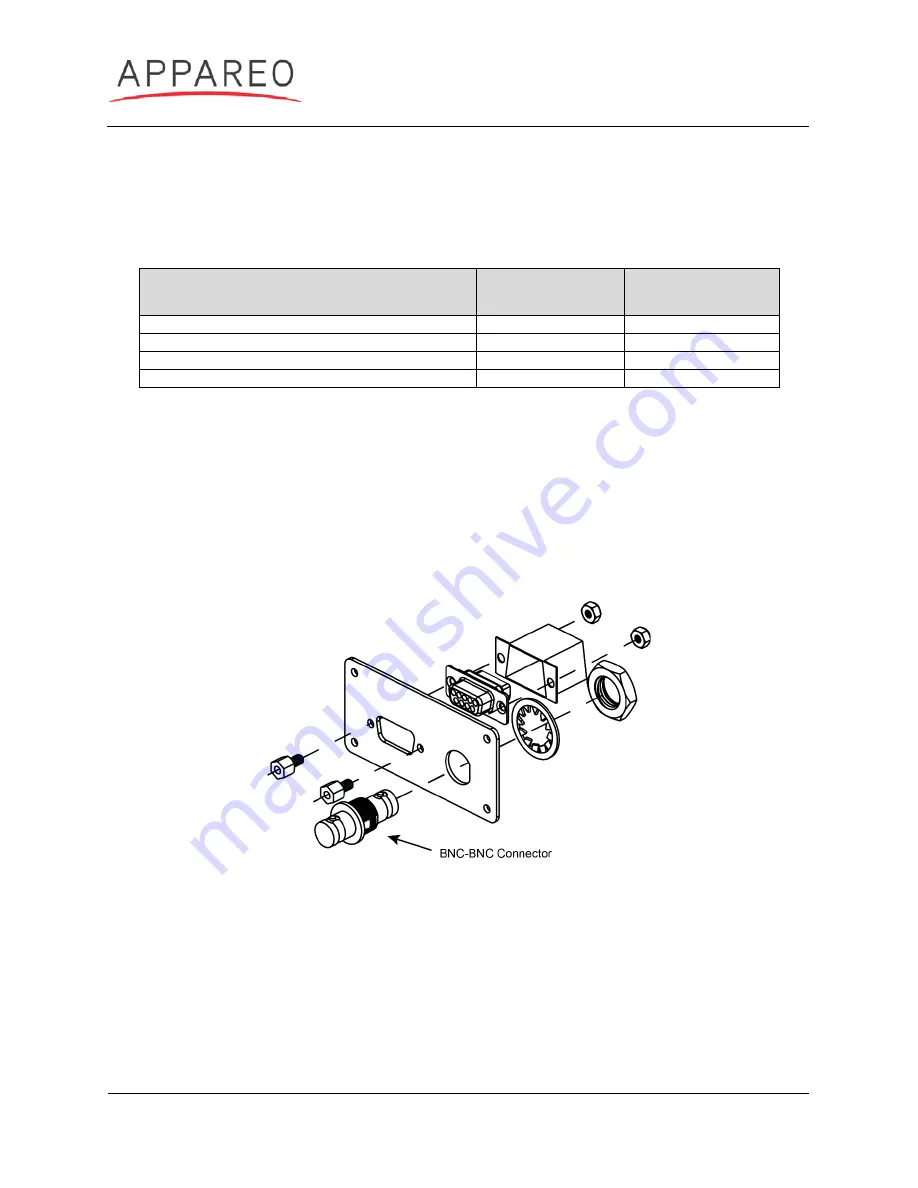
1. Mount the connectors onto the connector plate, as shown in the diagram above.
NOTE
: The D-Sub and BNC-BNC connector are mounted to the connector plate. The
BNC connector and retaining ring are installed onto the transponder backplate.
2. Find a location to secure the connector plate within the maximum cable length of 3 feet.
The connector plate measures approximately 1.5” x 3” and can be secured in any
orientation in any available space in the cockpit. Orient the connector plate so that the
Stratus logo is visible and readable.


