8
English
3. Installation
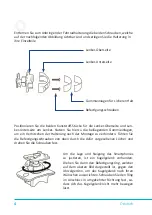
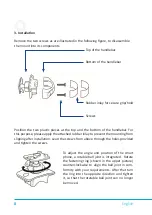
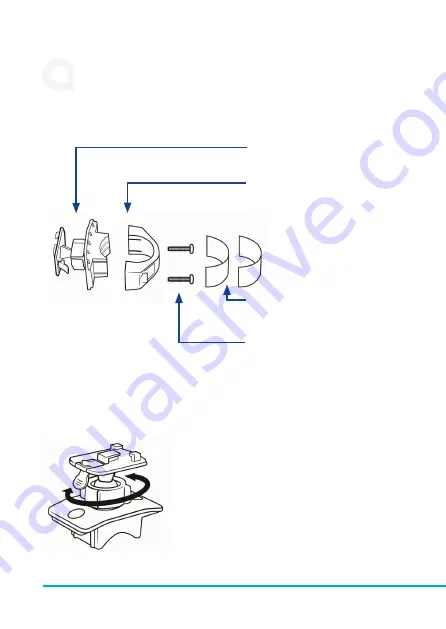
Remove the two screws as are illustrated in the following figure, to disassemble
the mount into its components.
Position the two plastic pieces at the top and the bottom of the handlebar. For
this purpose, please apply the attached rubber inlay to prevent the mounting from
slipping after installation. Lead the screws from above through the holes provided
and tighten the screws.
Top of the handlebar
Bottom of the handlebar
Rubber inlay for secure grip/hold
Screws
To adjust the angle and position of the smart
phone, a rotable ball joint is integrated. Rotate
the fastening ring (shown in the upper picture)
counterclockwise to align the ball joint in com
-
formity with your requirements. After that turn
the ring into the opposite direction and tighten
it, so that the rotatable ball joint can no longer
be moved.


