


ARCHMI-9XX Series User Manual
44
6
MSCLK
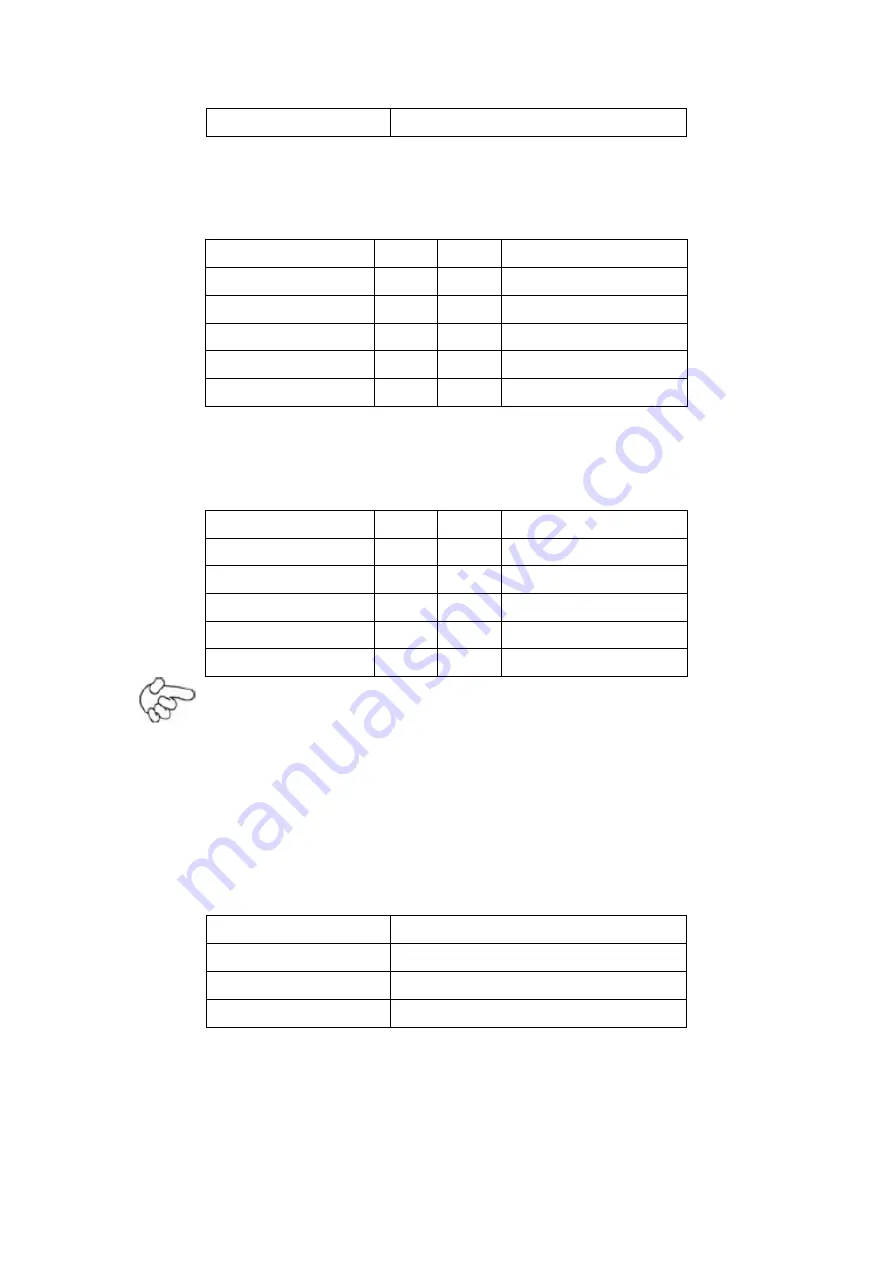
GPIO1:
(2.0mm Pitch 2x5 Pin Header), General-purpose input/output port, it provides
a group of self-programming interfaces to customers for flexible use.
Signal Name
Pin#
Pin#
Signal Name
Ground
1
2
NC
NC
3
4
SMB_DATA_R
SMB_CLK_R
5
6
PCH-GPIO56
PCH-GPIO57
7
8
PCH-GPIO59
PCH-GPIO58
9
10
+5V
USB_23:
(2.0mm Pitch 2x5 Pin Header), Front USB connector, it provides one USB port
via a dedicated USB cable, speed up to 480Mb/s.
Signal Name
Pin#
Pin#
Signal Name
5V_USB23
1
2
5V_USB23
USB4_N
3
4
USB3_N
USB4_P
5
6
USB3_P
Ground
7
8
Ground
NC
9
10
Ground
Note:
Before connection, make sure that pinout of the USB Cable is in accordance
with that of the said tables. Any inconformity may cause system down and
even hardware damages.
JP5:
(2.0mm Pitch 2x3 Pin Header), COM3 setting jumper, pin 1~6 are used to select
signal out of pin 9 of COM3 port.
JP5 Pin#
Function
Close 1-2
RI (Ring Indicator) (default)
Close 3-4
COM3 Pin9=+5V (option)
Close 5-6
COM3 Pin9=+12V (option)
COM5(SBC-7110/COM3):
(Type DB9), serial port, standard DB9 serial port is provided to make a direct
connection to serial devices. COM5 port is controlled by pins No.1~6 of
JP5
,
select output Signal RI or 5V or 12v, for details, please refer to description of
Содержание ARCHMI-9 Series
Страница 12: ...ARCHMI 9XX Series User Manual 11 Figure 1 3 Dimensions of ARCHMI 916 P Figure 1 4 Dimensions of ARCHMI 917 P ...
Страница 13: ...ARCHMI 9XX Series User Manual 12 Figure 1 5 Dimensions of ARCHMI 918 P Figure 1 6 Dimensions of ARCHMI 919 P ...
Страница 14: ...ARCHMI 9XX Series User Manual 13 Figure 1 7 Dimensions of ARCHMI 921 P ...
Страница 16: ...ARCHMI 9XX Series User Manual 15 Figure 1 9 Rear View of ARCHMI 912 P Figure 1 10 Rear View of ARCHMI 915 P ...
Страница 17: ...ARCHMI 9XX Series User Manual 16 Figure 1 11 Rear View of ARCHMI 916 P Figure 1 12 Rear View of ARCHMI 917 P ...
Страница 24: ...ARCHMI 9XX Series User Manual 23 units mm Figure 2 1 Motherboard Dimensions ...
Страница 74: ...ARCHMI 9XX Series User Manual 73 Step 4 Click Next to continue Step 5 Click Next to continue ...
Страница 77: ...ARCHMI 9XX Series User Manual 76 Step 4 Click Next to continue Step 5 Click Install to begin the installation ...
Страница 87: ...ARCHMI 9XX Series User Manual 86 Step 2 Select Resistive Touch Step 3 Click Next to continue ...
Страница 89: ...ARCHMI 9XX Series User Manual 88 Step 6 Click Yes to continue Step 7 Click Finish to complete installation ...
Страница 94: ...ARCHMI 9XX Series User Manual 93 Step 10 Go to C Program Files eGalaxTouch Click Next Step 11 Click Next ...
Страница 101: ...ARCHMI 9XX Series User Manual 100 Edge Compensation You can use Edge Compensation to calibrate more subtly ...
Страница 112: ...ARCHMI 9XX Series User Manual 111 Hardware Saturn Hardware Configuration ...
Страница 113: ...ARCHMI 9XX Series User Manual 112 About To display information about eGalaxTouch and its version ...


