background image

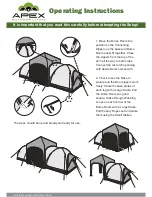
1. Move the Dome Room into 
position so the Connecting 
Zippers on the base and Dome 
Room easily fit together. Close 
the zippers from the top of the 
arch all the way to both sides. 
Connect the rest arch openning 
with desire Doors comes with.

2. Check to see the Base is 
square and the Door zippers work 
freely. Stake the base plates of 
each leg with a Large Stake. Pull 
the Dome Room sung and 
square. Stake through Webbing 
Loops on each corner of the 
Dome Room with a Large Stake. 
Pull the Guy Ropes out and stake 
them using the Small Stakes.

The Apex should be up and steady and ready for use. 

          All rights reserved Undercover

®

 2016          

It is important that you read this carefully before attempting the Setup!

Operating Instructions

Содержание BASE-CAMP

Страница 1: ...Specifications for flame resistance It is not fire proof The fabric will burn if left in continuous contact with any flame source The application of any foreign substance to the gazebo fabric may ren...

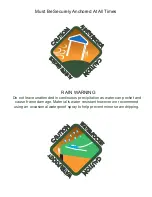
Страница 2: ...E T C A U T I O N W A T E R P O C K E T RAIN WARNING Do not leave unattended in continuous precipitation as water can pocket and cause frame damage Material is water resistant however we recommend us...

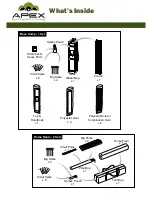
Страница 3: ...Spikes Pouch Big Spike x 4 Wrenches Spare Parts Small Spike x 6 Top Handbook x 1 Frame x 1 Wheel Bag x 1 Base Camp 1 Set Spikes Pouch x 1 Small Poles x 1 Big Poles x 2 Dome Floor x 1 Tent Bag x 1 Pole...

Страница 4: ...ce any leaking or dripping from the seams use seam sealer available at most hardware stores Your Undercover Personal Shelter should give you years of service with minimal maintenance and care Undercov...

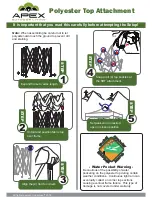
Страница 5: ...U T I O N W A T E R P O C K E T C A U T I O N W A T E R P O C K E T 5 Set peak vent to desired open or closed position STEP TOP SRT Buckle Snap in all 4 top buckles at the SRT attachment 4 STEP 3 Ali...

Страница 6: ...rame Extend the four legs to the tallest lock position 5 STEP 4 Step on footplate pull leg upward until it locks in the first extended position STEP 6 Securely anchor all four legs at the footplate ST...

Страница 7: ...infly 4 Remove dome room clips from aluminum poles 5 Remove and carefully fold the big aluminum poles 6 Fold the tent into a rectangular shape the same width as tent bag pole bag and stake bag at one...

Страница 8: ...se is square and the Door zippers work freely Stake the base plates of each leg with a Large Stake Pull the Dome Room sung and square Stake through Webbing Loops on each corner of the Dome Room with a...

Страница 9: ...roof spray application on all seams from time to time This can be found on Amazon com Quick Tips Telescopic legs feature more than one height adjustment Lock corner sliders before extending telescopic...

Страница 10: ...the frame 5 STEP 4 Lock all four upper corner sliders as shown STEP Carefully position yourself inside frame as illustrated Once under the frame gently push up from bottom of peak pole center pole unt...

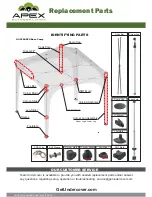
Страница 11: ...service getundercover com OUR CUSTOMER SERVICE Peak Pole CRS Wire Bolt Sleeve Corner Mold Corner Slider Leg Slider SRT Mold Footplate U Bracket Dome Cap Truss Bar Corner Leg Corner Leg Assembly Truss...

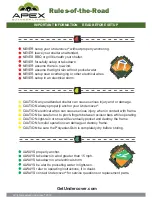
Страница 12: ...rical wires can cause serious injury when in contact with frame CAUTION be careful not to pinch fingers between scissor bars while operating CAUTION light rain or snow will eventually pocket and destr...

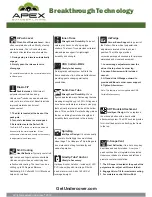
Страница 13: ...heat uncomfortable Undercover provides an underlying heat reflective skin coating The result can be a chilling up to 20 Degree difference Additionally Sil X offers 99 UV Block and helps with colorfast...

Страница 14: ...GetUndercover com C A U T I O N W A T E R P O C K E T C A U T I O N W A T E R P O C K E T APEX User HandBook...

Отзывы: