background image


6

Installation Instructions 

Before Using Your Wine Cooler


Remove all exterior and interior packing. 


Before connecting the Wine Cooler to the power 
source, let it stand upright for approximately 2 
hours.  


This will reduce the possibility of a malfunction in 
the cooling system caused by handling during 
transportation. 


Clean the interior surface with lukewarm water 
using a soft cloth. 


The door on this appliance can be opened from 
either the left or the right side. The unit is 
delivered with the door opening on the left side. 
Should you wish to open the door from the right, 
follow the instructions ‘Reversing the door swing 
of your appliance’. 

Installation of Your Wine Cooler


The appliance is designed to be built in between 
kitchen cabinets and is supplied with adjustable 
feet that can be altered to fit various worktop 
heights. This wine cooler is fully compatible with 
any 600mm deep kitchen unit. 


Place your Wine Cooler on a floor that is strong 
enough to support it when it is fully loaded. To 
level your Wine Cooler, adjust the front leveling 
leg at the bottom of the Wine Cooler. 


Locate the Wine Cooler away from direct 
sunlight and sources of heat (stove, heater, 
radiator, etc.). Direct sunlight may affect the 
acrylic coating and heat sources may increase 
electrical consumption. Extreme cold ambient 
temperatures may also cause the unit not to 
perform properly. 


Avoid locating the unit in damp areas. 


Plug the Wine Cooler into an exclusive, easily 
accessible plug socket. Any questions 
concerning power and/or earthing should be 
directed towards a qualified electrician or an 
authorized products service centre. 


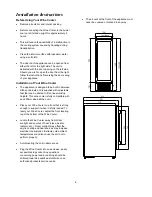
The air vent at the front of the appliance must 
never be covered or blocked in any way. 


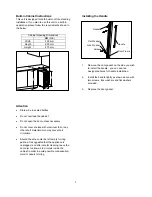
(Door)

Содержание UBWC300B

Страница 1: ...INSTRUCTION MANUAL BUILT IN WINE COOLER Model No WC300 Temp c BEFORE USE PLEASE READ AND FOLLOW ALL SAFETY RULES AND OPERATING INSTRUCTIONS ...

Страница 2: ...ardous Place the unit on a dry level surface Do not operate if the housing is removed or damaged A loose fit between the AC outlet receptacle and plug may cause overheating and a distortion of the plug Contact a qualified electrician to replace loose or worn outlet Locate the unit away from direct sunlight and sources of heat stove heater radiator etc This appliance is CFC and HFC free and contain...

Страница 3: ...destroying any snap fastenings or bolts You will thus prevent children from locking themselves in the appliance during play risk of suffocation or endangering their lives in any other way Disposal instructions The appliance must not be disposed of in the dustbin or with normal household rubbish The coolant circuit particularly the heat exchanger at the back bottom of the unit must not be damaged T...

Страница 4: ...by the earth symbol or colored GREEN or GREEN YELLOW The BLUE wire is the NEUTRAL and must be connected to the terminal which is marked with the letter N or colored BLACK The BROWN wire is the LIVE wire and must be connected to the terminal which is marked with the Letter L or colored RED Always ensure that the plug cord grip is fastened correctly If in doubt consult a qualified electrician who wi...

Страница 5: ...5 Features of Your Wine Cooler Temp c Digital Control Panel Door Handle Shelves Adjustable Legs Bottom Shelf Cabinet ...

Страница 6: ...plied with adjustable feet that can be altered to fit various worktop heights This wine cooler is fully compatible with any 600mm deep kitchen unit Place your Wine Cooler on a floor that is strong enough to support it when it is fully loaded To level your Wine Cooler adjust the front leveling leg at the bottom of the Wine Cooler Locate the Wine Cooler away from direct sunlight and sources of heat ...

Страница 7: ...aterial which may prevent air circulation Should the wine cooler be left empty for long periods it is suggested that the appliance is unplugged and after careful cleaning leave the door ajar to allow air to circulate inside the cabinet in order to avoid possible condensation mold or odours forming Installing the Handle 1 Remove the door gasket on the side you wish to install the handle you can see...

Страница 8: ...l down to remove the glass door and place it on a padded surface to prevent scratching it Figure 2 3 Remove the right top hinge and right lower hinge Figure 3 Remove the left top hinge and left lower hinge from the plastic bag that includes the instruction manual then install them at the designated positions at the left side of cabinet Figure 4 4 Turn around the glass door 180 and reinstall it Fig...

Страница 9: ...l shows the temperature inside the appliance The temperature display will flash if A different temperature is being set The temperature in the zone deviates by more than 5 C from the set temperature The temperature display flashing ensures that the temperature can not rise or fall un noticed and impair the wine Shelves To prevent damaging the door gasket make sure the door is fully open when pulli...

Страница 10: ...arm water and mild liquid detergent Rinse well and wipe dry with a clean soft cloth Power Failure Most power failures are corrected within a few hours and should not affect the temperature of your appliance if you minimize the number of times the door is opened If the power is going to be off for a longer period of time you need to take the proper steps to protect your contents Vacation Time Short...

Страница 11: ...roperly The light does not work Not plugged in The circuit breaker tripped or a blown fuse The light switch is OFF Vibrations Check to assure that the Wine Cooler is level The Wine Cooler seems to make too much noise The rattling noise may come from the flow of the refrigerant which is normal As each cycle ends you may hear gurgling sounds caused by the flow of refrigerant in your Wine Cooler Cont...

Отзывы: