


After you finish the setting of jumpers and connect correct cables. Power on
and enter the BIOS Setup, press <Del> during POST (Power On Self Test).
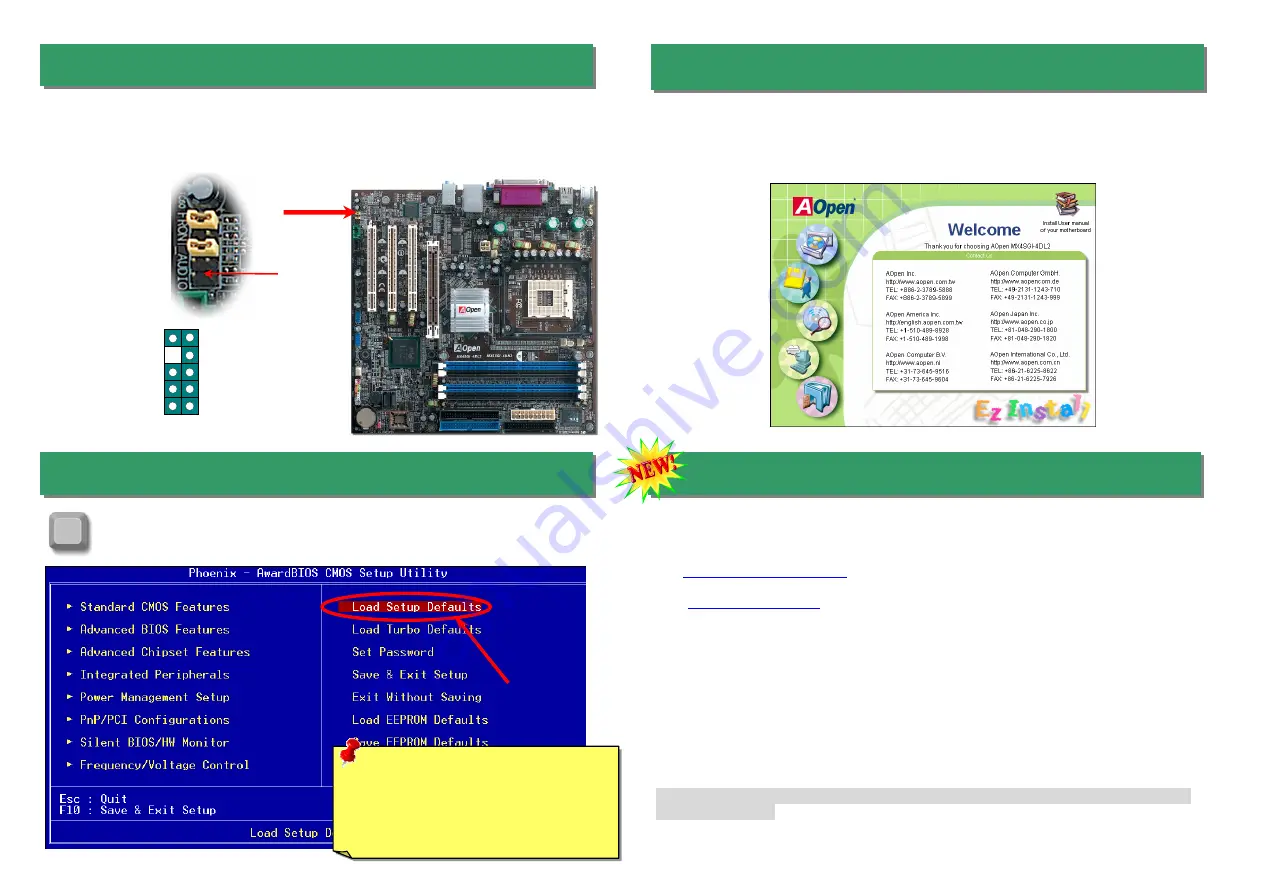
Choose "Load Setup Defaults" for recommended optimal performance.
15. Power-on and Load BIOS Setup
16. AOpen Bonus Pack CD
There are motherboard drivers and utilities in AOpen Bonus CD. You don’t need to install all
of them to boot your system. But after you finish the hardware installation, you have to
install your operation system first (such as Windows XP) before you install any drivers or
utilities. Please refer to your operation system’s installation guide.
Del
Warning:
Please avoid of using "Load
Turbo Defaults", unless you are sure
your system components (CPU, RAM,
HDD, etc.) are good enough for turbo
setting.
14. Front Audio Connector
17. BIOS Upgrade under Windows Environment
You may accomplish BIOS upgrade procedure with EzWinFlash by the following steps,
and it’s STRONGLY RECOMMENDED to close all the applications before you start the
upgrading.
1. Download the new version of BIOS package zip file from AOpen official web site. (ex:
http://english.aopen.com.tw
)
2. Unzip the download BIOS package (ex: WMXSG4SGI-4DL2102.ZIP) with WinZip
(
http://www.winzip.com
) in Windows environment.
3. Save the unzipped files into a folder, for example, WMXSG4SGI-4DL2102.EXE &
WMXSG4SGI-4DL2102.BIN.
4. Double click on the WMXSG4SGI-4DL2102.EXE; EzWinFlash will detect the model
name and BIOS version of your motherboard. If you had got the wrong BIOS, you
will not be allowed to proceed with the flash steps.
5. You may select preferred language in the main menu, then click [Start Flash] to start
the BIOS upgrade procedure.
6. EzWinFlash will complete all the process automatically, and a dialogue box will pop
up to ask you to restart Windows. You may click [YES] to reboot Windows.
7. Press <Del> at POST to enter BIOS setup, choose "Load Setup Defaults", then
“Save & Exit Setup”. Done!
It is strongly recommended NOT to turn off the power or run any application during
FLASH PROCESS.
If the housing has been designed with an audio port on the front panel, you’ll be able to
connect onboard audio to front panel through this connector. By the way, please remove 5-6
and 9-10 jumper caps from the Front Audio Connector before connecting the cable. Please
do not remove these 5-6 and 9-10 yellow jumper caps if there’s no audio port on the front
panel.
Front Audio Connector
1
AUD_FPOUT_L
NC
AUD_FPOUT_R
AUD_MIC_BIAS
AUD_MIC
AUD_RET_L
KEY
AUD_RET_R
AUD_VCC
AUD_GND
Pin 1


