


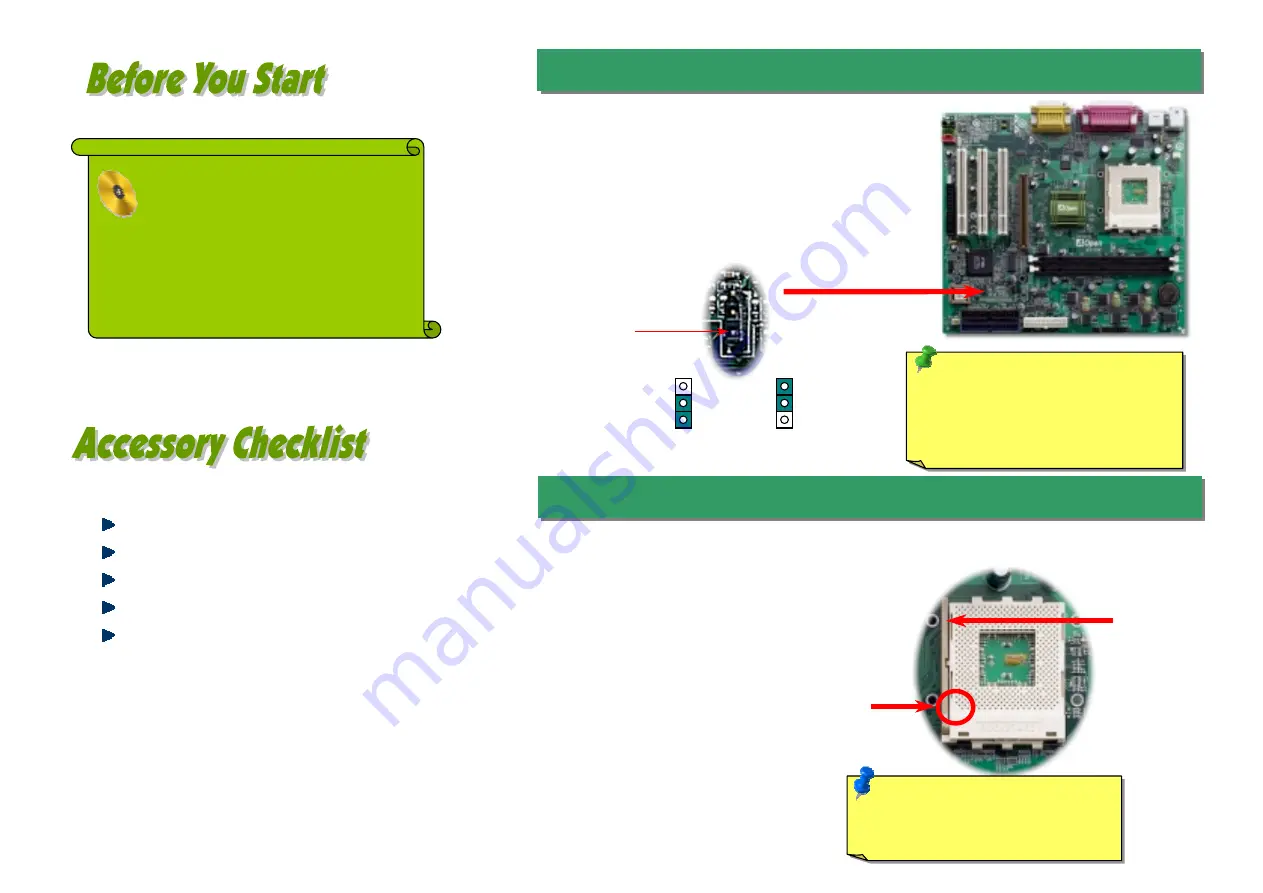
1.
Pull up the CPU socket
lever and up to 90-degree
angle.
2.
Locate Pin 1 in the socket
and look for a (golden) cut
edge on the CPU upper
interface.
Match Pin 1 and
cut edge. Then insert the
CPU into the socket.
3.
Press down the CPU
socket lever
and finish
CPU installation.
1. JP14 Clear CMOS
2. Installing CPU
Everything you need to boot this
motherboard is included in this
Easy Installation Guide. For more
information, a complete
Online
User's Manual
can be found in the
Bonus Pack CD Disc
. Thanks for
the help of saving our earth.
PART NO: 49.89504.001
DOC. NO: MK33MA-EG-E0103A
Hard Drive IDE Cable x 1
80-Wire IDE Cable x 1
Floppy Drive Cable x 1
Bonus Pack CD disc x 1
This Easy Installation Guide x 1
This motherboard supports AMD
®
Athlon and Duron Socket A series CPU and 200/266MHz EV6 bus. Be
careful of CPU orientation when you plug it into CPU socket. The following steps will guide you to finish
CPU installation:
Note: If you do not match the CPU
socket Pin 1 and CPU cut edge well,
it may damage the CPU.
You can clear CMOS to restore system default setting. To
clear the CMOS, follow the procedure below.
1. Turn off the system and unplug the AC power.
2. Remove ATX power cable from connector PWR2.
3. Locate JP14 and short pins 2-3 for a few seconds.
4. Return JP14 to its normal setting by shorting pins 1 & pin2.
5. Connect ATX power cable back to connector PWR2.
Tip: When should I Clear CMOS?
1. Boot fail because of overclocking…
2. Forget password…
3. Troubleshooting…
Pin 1
Normal Operation
(default)
Clear CMOS
1
1
CPU socket lever
CPU Pin 1 and
cut edge


