Hardware Installation English
-- E-7 --
3.2.
Hardware Instruction
Front Panel
Don’t use force to pull out or push in the disc tray. This might cause
damage to the loading section of the drive.
y
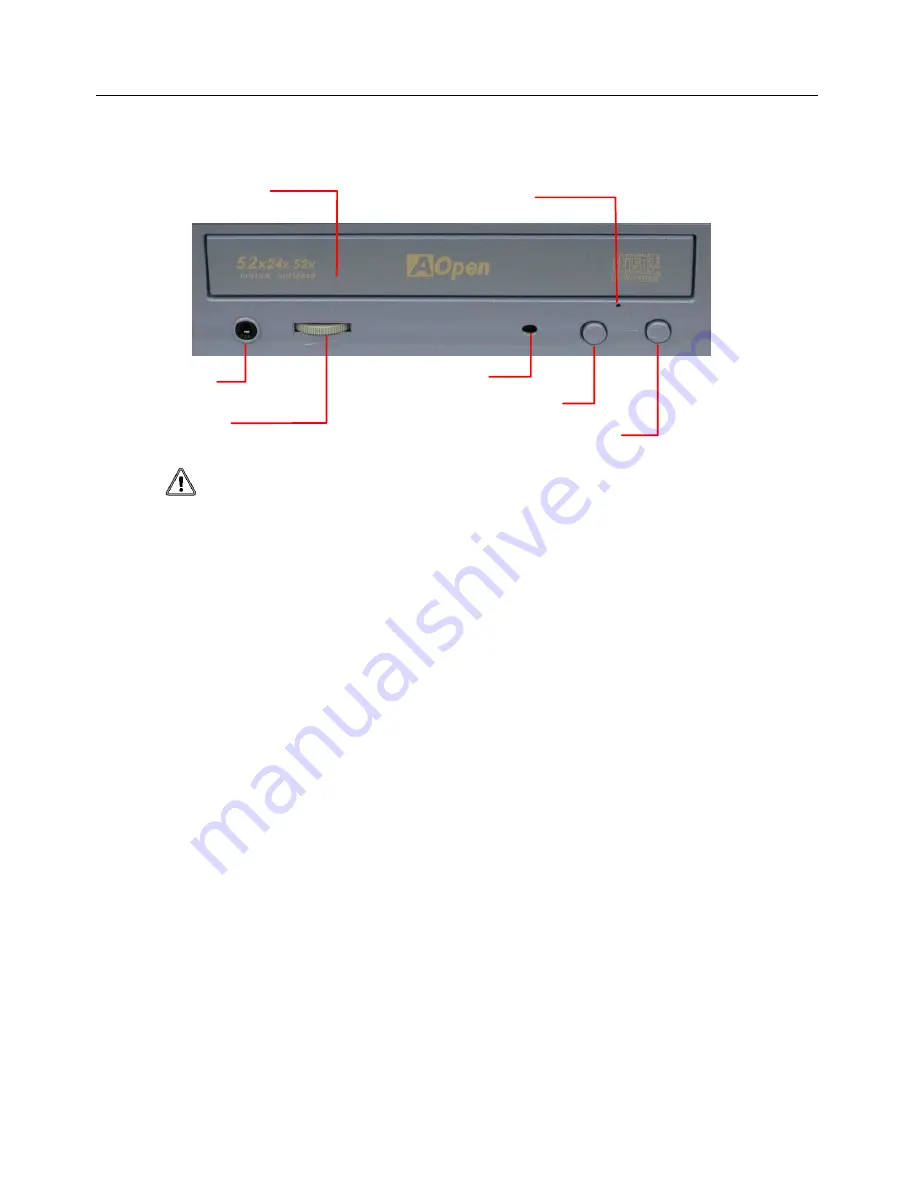
Disc Tray
This is the tray for the disc. Place the disc on the ejected disc tray, and then
slightly push the tray (or push the eject button), the CD will be loaded.
y
Eject Button
This is the button used to eject or bring in the disc tray.
y
Busy Indicator
When the disc tray or disc is being accessed, the light shines or flashes orange.
Even when a disc is loaded or a disc is not being accessed, the light goes out.
When an illegal disc is loaded or some hardware trouble occurs, the indicators
blinks.
y
Headphone Jack
This jack is for connecting headphones or mini-speakers.
y
Play / Next Button
When a CD-DA (Music) disc is loaded and the drive is not playing, pressing this
button will make the drive start playing from the 1
st
track (song). When the drive
is playing, pressing this button will cause the drive to skip to the next track
(song).
y
Volume Control
This is used to adjust the output volume of the headphone jack. It can’t be used
to adjust the output volume for the audio output connectors on the rear panel.
y
Emergency Eject Hole
When the drive cannot eject the disc tray because of power failure, pushing the
emergency eject hole of the front panel by the thin pole make drive be able to
eject the disc tray.
Disc Tray
Emergency Eject Hole
Headphone Jack
Volume Control
Eject Button
Busy Indicator LED
Play/ Next Button


