AOC P2479VWC Скачать руководство пользователя страница 28


28 


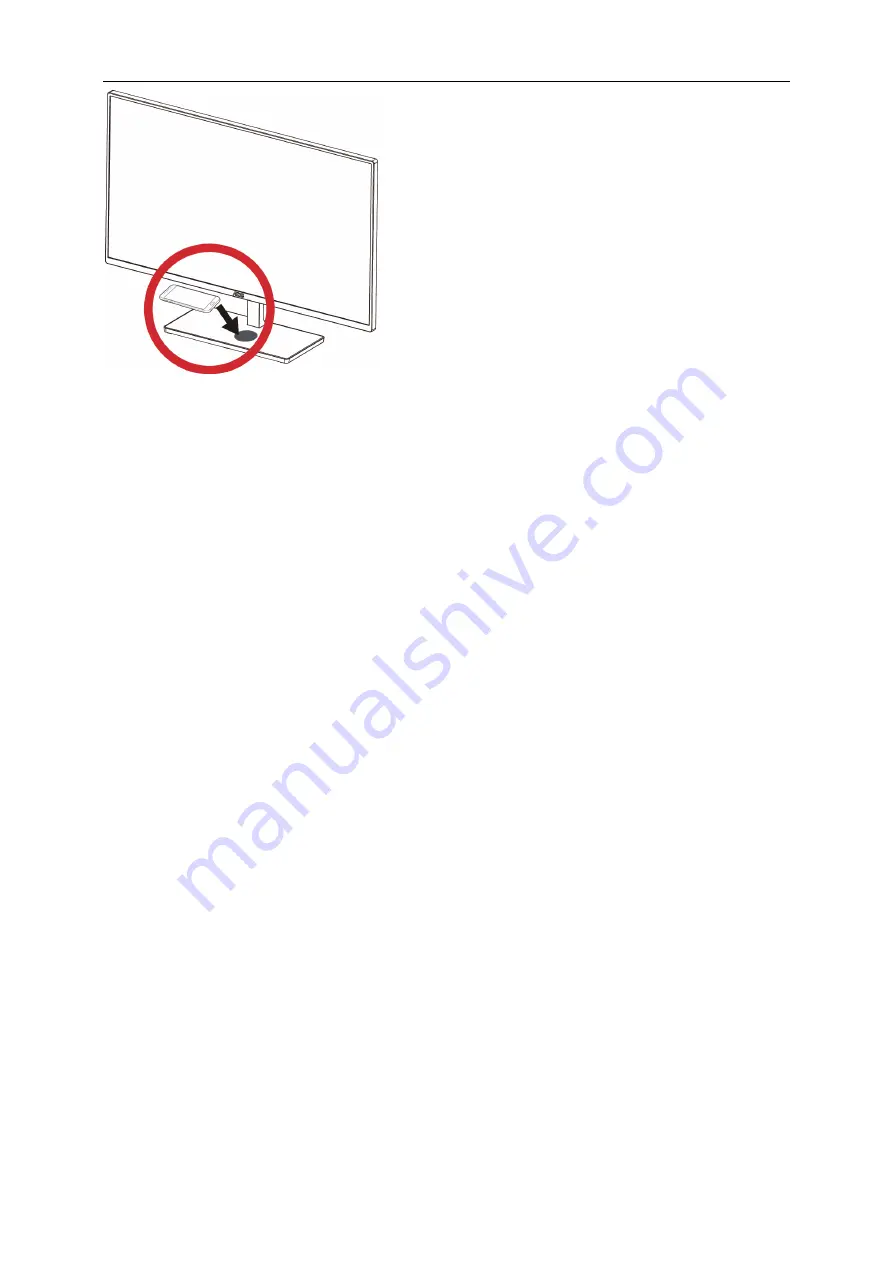
1. Connect the adapter to the monitor, 
2. then check the effective wireless charging range indicated on the stand. 
3. Next, place your mobile device in the centre of the range.   
4. Make sure that the device supports wireless charging. 
5. After placing the mobile device in the correct position, make sure that the device starts charging. 
6. The charging progress is indicated by the LED at the bottom of the stand, in addition to charging icon 
notifications on the device. 


Do not place a metallic object, such as a coin, under the mobile device in the wireless charging area. An 
external accessory made out of metal can interfere with the charging progress. 


Do not place an object other than your mobile device in the wireless charging area. 


Make sure that the monitor and the charging area are clean before charging. There should be no water, dust 
or other foreign substances in the charging area. 


Charging may not work if there is a wireless pager or a device that generates strong radio waves, such as a 
radio or microwave 


Placing an object that has a magnet, such as a credit card, phone card, bankbook and transportation ticket,   

in the wireless charging area can damage data contained in the object. Take extra care to prevent data loss. 


An object larger than 2mm, including an accessory and wireless charging cover, can interfere with charging.   

Remove any unnecessary object before charging your device. 


Do not clean the monitor using alcohol or benzene. 


Do not transform, repair, modify or disassemble the monitor. 


OSD menu to make sure that wireless charging is set to On (P19) 


After charging is complete, remove the mobile device from the monitor. 


Содержание P2479VWC

Страница 1: ...1 LCD Monitor User Manual P2479VWC P2779VC LED Backlight www aoc com 2016 AOC All Rights Reserved...

Страница 2: ...mage Setup 21 Color Setup 22 Picture Boost 23 OSD Setup 24 Extra 25 Exit 26 LED Indicator 26 Driver 29 Monitor Driver 29 Windows 10 29 Windows 8 33 Windows 7 37 i Menu 41 e Saver 42 Screen 43 Troubles...

Страница 3: ...vice 54 Warranty Statement for Europe 54 Warranty Statement for Middle East and Africa MEA 56 AOC International Europe B V 58 Warranty Statement for North South America excluding Brazil 59 EASE PROGRA...

Страница 4: ...used as follows NOTE A NOTE indicates important information that helps you make better use of your computer system CAUTION A CAUTION indicates either potential damage to hardware or loss of data and...

Страница 5: ...ug the unit during a lightning storm or when it will not be used for long periods of time This will protect the monitor from damage due to power surges Do not overload power strips and extension cords...

Страница 6: ...bination should be moved with care Never push any object into the slot on the monitor cabinet It could damage circuit parts causing a fire or electric shock Never spill liquids on the monitor Do not p...

Страница 7: ...t the stain instead of strong detergent which will cauterize the product cabinet When cleaning make sure no detergent is leaked into the product The cleaning cloth should not be too rough as it will s...

Страница 8: ...ot engage the LCD monitor in severe vibration or high impact conditions during operation For display with glossy bezel the user should consider the placement of the display as the bezel may cause dist...

Страница 9: ...all signal cables Analog HDMI will be provided for all countries and regions Please check with the local dealer or AOC branch office for confirmation CD Manual Warranty card Adapter Power Cable Analo...

Страница 10: ...u are able to adjust the monitor s angle from 1 5 to 21 5 P2779VC You are able to adjust the monitor s angle from 3 to 21 5 P2479VWC P2779VC P2479VWC NOTE Do not touch the LCD screen when you change t...

Страница 11: ...nitor 2 Connect one end of the D Sub cable to the back of the monitor and connect the other end to the computer s D Sub port 3 4 Optional for machine type with HDMI function Connect one port of HDMI c...

Страница 12: ...12 Adjusting Setting Optimal Resolution Windows 10 For Windows 10 Right click START Click CONTROL PANEL Click DISPLAY...

Страница 13: ...13 Click on the Change display settings button Set the resolution SLIDE BAR to Optimal preset resolution...

Страница 14: ...14 Windows 8 For Windows 8 Right click and click All apps at the bottom right of the screen Set the View by to Category Click Appearance and Personalization...

Страница 15: ...15 Click DISPLAY Set the resolution SLIDE BAR to Optimal preset resolution...

Страница 16: ...16 Windows 7 For Windows 7 Click START Click CONTROL PANEL Click Appearance Click DISPLAY...

Страница 17: ...17 Click on the Change display settings button Set the resolution SLIDE BAR to Optimal preset resolution...

Страница 18: ...age Ratio D SUB Qi When there is no OSD Press the button to activate wireless charger menu Press or button to select QI on off default is off Auto Exit When there is no OSD press Auto Exit button cont...

Страница 19: ...ion repeat steps 2 3 4 OSD Lock Function To lock the OSD press and hold the MENU button while the monitor is off and then press power button to turn the monitor on To un lock the OSD press and hold th...

Страница 20: ...st from Digital register Brightness 0 100 Backlight Adjustment Eco mode Standard Standard Mode Text Text Mode Internet Internet Mode Game Game Mode Movie Movie Mode Sports Sports Mode Gamma Gamma1 Adj...

Страница 21: ...to exit Clock 0 100 Adjust picture Clock to reduce Vertical Line noise Phase 0 100 Adjust Picture Phase to reduce Horizontal Line noise Sharpness 0 100 Adjust picture sharpness H Position 0 100 Adjust...

Страница 22: ...olor Temperature from EEPROM sRGB Recall SRGB Color Temperature from EEPROM User Red Red gain from Digital register Green Green gain from Digital register Blue Blue gain from Digital register DCB Mode...

Страница 23: ...adjust 5 Press AUTO to exit Bright Frame ON OFF Enable Disable Bright Frame Frame Size 14 100 Adjust the Size of the Frame Brightness 0 100 Brightness Adjustment for Enhance Area Contrast 0 100 Contr...

Страница 24: ...AUTO to exit Language Select the OSD language Timeout 5 120 Adjust the OSD timeout H Position 0 100 Adjust the horizontal position of the OSD V Position 0 100 Adjust the vertical position of the OSD T...

Страница 25: ...ut Select Auto D SUB HDMI1 HDMI2 Select input signal source Auto Config Yes No Auto adjust the picture to default Off Timer 0 24 hrs Select DC off time Image Ratio wide or 4 3 Select wide or 4 3 forma...

Страница 26: ...xit 1 Press MENU Menu to display menu 2 Press or to select Exit and press MENU to enter 3 Press AUTO to exit Exit Exit the main OSD LED Indicator Status LED Color Full Power Mode White Power Saving Or...

Страница 27: ...ff Blink 4 times in 4 seconds Repeat it after 5 seconds Indications can vary depending on the mobile device and wireless charging cover Wireless module Information Operating Voltage 4 75 5 25V DC Nomi...

Страница 28: ...s charging area Make sure that the monitor and the charging area are clean before charging There should be no water dust or other foreign substances in the charging area Charging may not work if there...

Страница 29: ...29 Driver Monitor Driver Windows 10 Start Windows 10 Right click START Click Control Panel Click on the Display icon...

Страница 30: ...30 Click on the Change display settings button Click the Advanced Settings button...

Страница 31: ...or tab and then click the Properties button Click the Driver tab Open the Update Driver Software Generic PnP Monitor window by clicking on Update Driver and then click the Browse my computer for drive...

Страница 32: ...he drive letter designator for the CD ROM drive Select the xxx inf file and click the Open button Click the OK button Select your monitor model and click the Next button The files will be copied from...

Страница 33: ...33 Windows 8 Start Windows 8 Right click and click All apps at the bottom right of the screen Click on the Control Panel icon Set the View by to Large icons or Small icons Click on the Display icon...

Страница 34: ...34 Click on the Change display settings button Click the Advanced Settings button...

Страница 35: ...or tab and then click the Properties button Click the Driver tab Open the Update Driver Software Generic PnP Monitor window by clicking on Update Driver and then click the Browse my computer for drive...

Страница 36: ...he drive letter designator for the CD ROM drive Select the xxx inf file and click the Open button Click the OK button Select your monitor model and click the Next button The files will be copied from...

Страница 37: ...37 Windows 7 Start Windows 7 Click on the Start button and then click on Control Panel Click on the Display icon Click on the Change display settings button...

Страница 38: ...38 Click the Advanced Settings button Click the Monitor tab and then click the Properties button Click the Driver tab...

Страница 39: ...en click the Browse my computer for driver software button Select Let me pick from a list of device drivers on my computer Click the Have Disk button Click on the Browse button and navigate to the fol...

Страница 40: ...lect your monitor model and click the Next button The files will be copied from the CD to your hard disk drive Close all open windows and remove the CD Restart the system The system will automatically...

Страница 41: ...i Menu makes it easy to adjust your monitor display setting by using on screen menus instead of the OSD button on the monitor To complete installation please follow the installation guide The software...

Страница 42: ...l wizard to complete software installation Under each of the four PC statuses you may choose the desired time in minutes from the pull down menu for your monitor to automatically shutdown The example...

Страница 43: ...to different panels and each panel displays a different window You only need to drag the window to a corresponding panel when you want to access it It supports multiple monitor display to make your ta...

Страница 44: ...0 and then change the frequency of the video card Refer to the Setting the Optimal Resolution If the initial screen the login screen does not appear contact the Service Center or your dealer Can you s...

Страница 45: ...he LED should either turn ON or OFF after hitting the CAPS LOCK key Missing one of the primary colors RED GREEN or BLUE Inspect the monitor s video cable and make sure that no pin is damaged Make sure...

Страница 46: ...Optimal preset resolution 1920 1080 60Hz Plug Play VESA DDC2B CI Input Connector VGA 2 HDMI Input Video Signal Analog 0 7Vp p standard 75 OHM Positive TMDS Power Source 19VDC 2A Power Consumption Typ...

Страница 47: ...eset resolution 1920 1080 60Hz Plug Play VESA DDC2B CI Input Connector VGA 2 HDMI Input Video Signal Analog 0 7Vp p standard 75 OHM Positive TMDS Power Source 19VDC 2 37A Power Consumption Typical Bri...

Страница 48: ...GA 800x600 75Hz 46 875 75 000 SVGA 832x624 75Hz 49 725 74 551 XGA 1024x768 60Hz 48 363 60 004 XGA 1024x768 70Hz 56 476 70 069 XGA 1024x768 75Hz 60 023 75 029 XGA 1024x768 75Hz 60 241 74 927 1280x960 6...

Страница 49: ...14 V sync 7 GND G 15 DDC Serial clock 8 GND B 19 Pin Color Display Signal Cable Pin No Signal Name Pin No Signal Name 1 TMDS Data 2 11 TMDS Clock Shield 2 TMDS Data 2 Shield 12 TMDS Clock 3 TMDS Data...

Страница 50: ...SA DDC STANDARD It allows the monitor to inform the host system of its identity and depending on the level of DDC used communicate additional information about its display capabilities The DDC2B is a...

Страница 51: ...io frequency energy and if not installed and used in accordance with the instructions may cause harmful interference to radio communications However there is no guarantee that interference will not oc...

Страница 52: ...dispose of your waste equipment by handing it over to a designated collection point for the recycling of waste electrical and electronic equipment The separate collection and recycling of your waste e...

Страница 53: ...STAR is a U S registered mark As an ENERGY STAR Partner AOC International Europe BV and Envision Peripherals Inc have determined that this product meets the ENERGY STAR guidelines for energy efficienc...

Страница 54: ...ber on the address label Put the RMA number on the shipping carton AOC International Europe B V will pay the return shipping charges within one of the countries specified within this warranty statemen...

Страница 55: ...AL EUROPE B V OBLIGATIONS AND YOUR REMEDIES HEREUNDER ARE SOLELY AND EXCULSIVELY AS STATED HERE AOC INTERNATIONAL EUROPE B V LIABILITY WHETHER BASED ON CONTRACT TORT WARRANTY STRICT LIABILITY OR OTHER...

Страница 56: ...anty as per the product ID serial number and for such exceptional cases Original Invoice Proof Of Purchase Receipt is mandatory If the product appears to be defective please contact your AOC authorize...

Страница 57: ...CT INCLUDING THE WARRANTIES OF MERCHANTABILITY AND FITNESS FOR A PARTICULAR PURPOSE ARE LIMITED IN DURATION TO A PERIOD OF ONE 1 to THREE 3 YEARS FOR PARTS AND LABOR FROM THE ORIGINAL DATE OF CONSUMER...

Страница 58: ...acceptable defect levels for each type In order to qualify for repair or replacement under warranty the number of pixel defects on a TFT monitor panel must exceed these acceptable levels Pixels and S...

Страница 59: ...mage during shipment Pay all shipping charges EPI is not responsible for damage to inbound product that was not properly packaged EPI will pay the return shipment charges within one of the countries s...

Страница 60: ...GHTS YOU MAY HAVE OTHER RIGHTS WHICH MAY VARY FROM STATE TO STATE In the United States of America this limited warranty is only valid for Products purchased in the Continental United States Alaska and...

Страница 61: ...a UPS Call Tag to pick up the defective unit Step 6 Please review the following chart to see your EASE program qualifications WARRANTY PERIOD COVERAGE AT NO CHARGE CUSTOMER CHARGES Within the first t...

Отзывы: