background image


31 

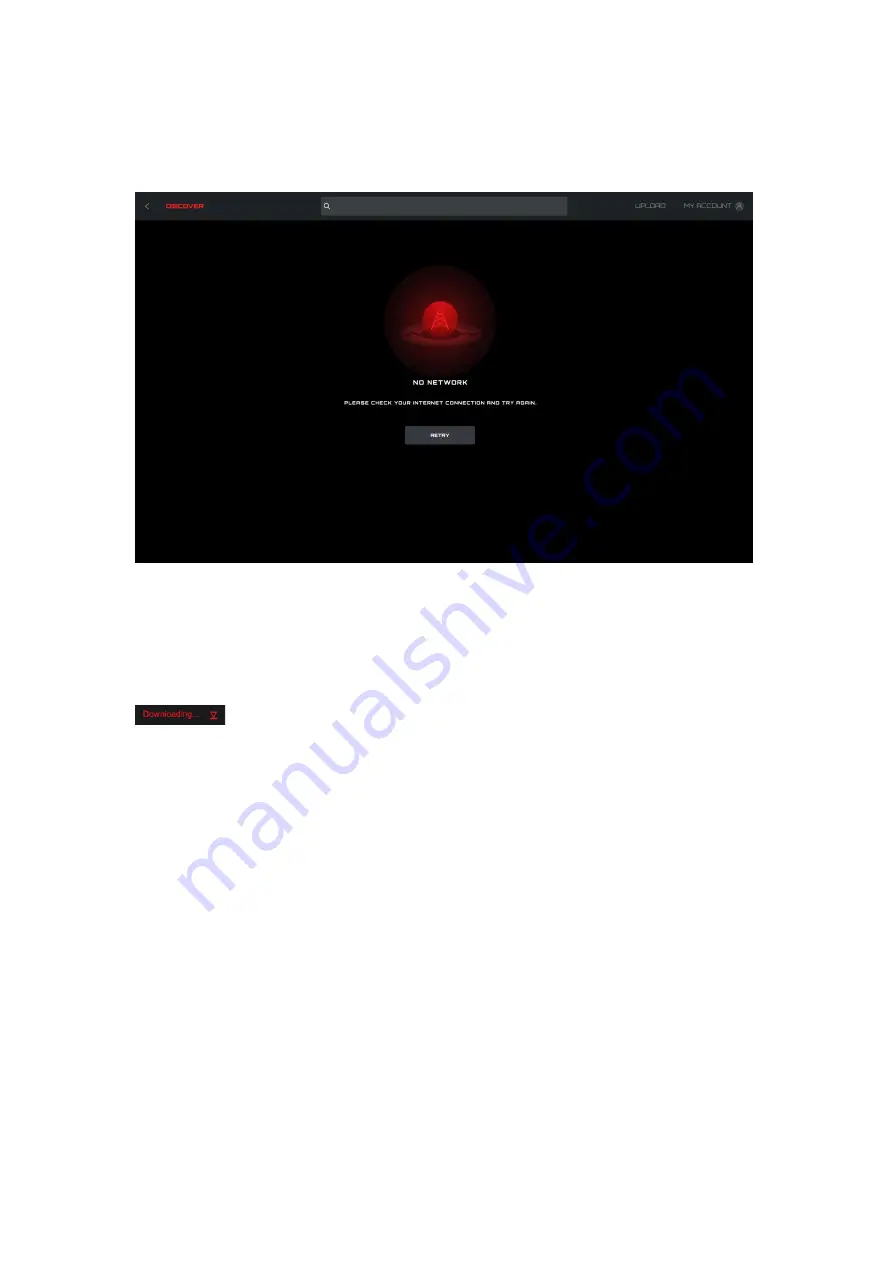
9.7 If the network cannot be reached the following error screen will appear.


Click the 

Retry

 button to try connecting again.


9.8 Download Profile


9.8.1 Click the 

Download

 button to start downloading the selected profile. 


This display will change to 'Downloading...'.


9.8.2 After the download is complete. 


Click the 

Apply

 button to begin configuration.


Click the 

Dismiss

 button to configure later.


Содержание GH300

Страница 1: ...1 AOC GH300 GAMING HEADSET USER MANUAL Ver 1 0 0 CAUTION To use this product properly please read the user s guide before installing ...

Страница 2: ...rements 3 2 Technical Specifications 4 3 Device Layout Overview 5 4 Software Installation 6 5 Software Running 9 6 Software Update 10 7 Home Page 11 8 Headset Settings 16 9 Discovery 28 10 Macro 45 11 Language 49 12 Safety Guide and Maintenance 50 ...

Страница 3: ...ed gaming headset Quick start guide Product Requirements Windows 7 or above Available USB port AOC G Menu Requirements Windows 7 or above 500MB free hard disk space Internet connection Technical Support 2 years limited warranty Free online technical support at www aoc com ...

Страница 4: ...Audio 7 1 Virtual Surround Sound PC AOC G Menu support up to 24bit 96kHz Hi Res Audio PC Mac by internal DAC Software AOC G Menu Microphone Detachable Omnidirectional Control In line control LED lighting AOC Light FX RGB lighting customizable via AOC G Menu Approximate Size Weight Length 160 mm Width 100 mm Height 195m Weight 363g including the cable and the remote controller ...

Страница 5: ...5 3 Device Layout Overview ...

Страница 6: ...te by http www aoc com and double click the EXE file to start the installation Accept the license agreement by selecting the I Agree radio button and clicking the Next button Select the installation folder Select the default folder by pressing the Next button Selecting the Browse button will open a Browse for Folder dialog box ...

Страница 7: ...7 Confirm Installation by pressing the Next button Complete the installation by pressing the Close button Congratulations on installing G menu ...

Страница 8: ... For Windows 10 Go to Windows Settings Apps Apps and Features select G Menu and press the Uninstall button For Windows 7 8 8 1 Go to Control Panel Programs Programs and Features select G Menu and press the Uninstall button ...

Страница 9: ...9 5 Software Running There are 3 ways to run the AOC G Menu application Start Menu G Menu Taskbar Right click on the taskbar icon Double click the shortcut on Desktop ...

Страница 10: ...re will automatically check for updates if there is a new version it will be downloaded in the background After the download is complete the interface will alert you to install the update Note If there is no network connection G Menu will not be able to detect updates ...

Страница 11: ...ng interface where you can modify the language Device display The device types supported by the current software are displayed by default including Monitor Keyboard Mouse Mouse mat and Headset Currently connected devices are highlighted and may be clicked Other device types are grayed out and cannot be clicked Click on the device icon to enter the device settings interface Discover Click the Disco...

Страница 12: ...for you to use the AOC GH300 headset you may need to install the AOC AUDIO CENTER application to activate the audio driver when clicking the headset device icon and prompt will be displayed By following the scree prompt click the DOWNLOAD to download the AOC AUDIO CENTER software ...

Страница 13: ...yed After the downloading click INSTALL to start the installation of AOC AUDIO CENTER software package Wait for a while click Yes to permit your system to run the Setup exe if you are receiving an alert about the installation when the installation interface is displayed please click Next ...

Страница 14: ...14 Choose I accept the terms of the license agreement and click Next ...

Страница 15: ...15 When the installation is finished you may need to restart your computer ...

Страница 16: ...t be displayed Click an active button to open the device settings interface Click the Home button to return to the homepage 8 1 2 Left Navigation Navigation button are from top to bottom Monitor Keyboard Mouse Mouse mat Headset The icons of unconnected devices are hidden 8 1 3 Profile Management Display Profiles Click on the Profile drop down menu to display all local profiles ...

Страница 17: ...ocal executable file or enter the execution path in the input box directly Click the Save button to add the profile Click the Cancel button to close the pop up box B Import Opens a File Explorer dialog box Locate the file to import and select it Press the OK button to import the profile The profile will be imported and populate the currently selected profile The previous profile will be overwritte...

Страница 18: ...name Click the Save button to save the new name Click the Cancel button to close the pop up box E Associate You may associate an executable file to run each time the profile is selected Click the File button to open a File Explorer dialog box that shows exe files Or you can directly enter the execution path in the input box After selecting the application click the Open button the path will be aut...

Страница 19: ...the profile Click the Cancel button to close the pop up box 8 1 4 On board memory Click the icon to open the On Board Memory pop up interface The left side of the interface is the current device onboard the right side is list of all local profile files ...

Страница 20: ...g on board color After completion the profile will be immediately applied to the on board to take effect Delete a profile Click the delete icon behind the profile to delete it The profile currently in use does not support deletion Click the close icon to close the pop up window ...

Страница 21: ...tton in the bottom to cancel the modifications you have done or click the Reset button to set the headset to the default factory settings or click the APPLY button to confirm and save the settings you have done Cancel Click the Cancel button to cancel this setting and return to the last saved state Apply Click the Apply button to save this setting Reset Click the Reset button to restore the defaul...

Страница 22: ...NTROL Default MASTER FRONT 20dB LOCK Enabled MUTE Disabled You can either adjust the volume of the master speaker MASTER or adjust the Left Right side speakers FRONT L R individually MUTE button can mute the whole master speaker ...

Страница 23: ...ake the other side speaker follow the same adjustment you have done on one side speaker SAMPLE RATE Default 44 1 KHz You can adjust the sample rate on the speakers here 44 1 48 0 88 2 96 0KHz VOICE CLARITY Default Disabled ...

Страница 24: ...y of Speakers here After enabling the Voice Clarity you can adjust the Voice Clarity Level 0 6 and the Noise Suppression 0 20dB BIT RATE Default 16 bits You can adjust the bit rate on the speakers here 16 24 Bits SURROUND SOUND Default Disabled ...

Страница 25: ...und sound will be optimized based on the space size You can also experience the 7 1 surround sound on the testing audio by clicking the TEST button 8 2 2 MICROPHONE VOLUME CONTROL Default MIC IN 19 53dB LOCK Enabled MUTE Disabled You can either adjust the overall mic volume LOCK button Enabled or adjust the Left Right side mic volume FRONT L R individually LOCK button Disabled You can mute unmute ...

Страница 26: ...d You can enable disable the Noise Reduction on the microphone here MAGIC VOICE Default Disabled You can enable disable the Magic Voice on the microphone here After enabling the Magic Voice you can change your real voice by one of the four virtual magic voices MONSTER CARTOON MALE FEMALE 8 2 3 LIGHT FX ...

Страница 27: ...Let the computer select a random color SINGLE COLOR A color can be selected from the color palette color block or a color can be defined by entering RGB values PULSATION Select how fast the color will change BRIGHTNESS Select the brightness the color will glow or turn off ...

Страница 28: ...scover and share profiles with others on the G Menu network 9 1 Back Click the Back button to return to the main menu 9 2 Discover Click the Discover button in the upper left corner to refresh the screen 9 3 Search Bar ...

Страница 29: ... enter the login credentials and click the Login button See below for creating an account 9 6 Profiles Select a sorting method from the drop down menu Hot default Displays the most popular profiles New Displays the newest profiles Profile Details Cover image Each profile comes with a cover image Publisher name The account that created and uploaded the profile Supported devices Select the icon to r...

Страница 30: ...he profile was downloaded Download Icon Click on the Download button to download the profile Once the profile has been downloaded the profile will be available for configuration Click the Configure button to enter the configuration dialog box Load a Profile Double click on a profile to load a profile for use ...

Страница 31: ...y button to try connecting again 9 8 Download Profile 9 8 1 Click the Download button to start downloading the selected profile This display will change to Downloading 9 8 2 After the download is complete Click the Apply button to begin configuration Click the Dismiss button to configure later ...

Страница 32: ...ation If the download is interrupted the software will attempt to continue or you may re download later 9 9 Configure Profile 9 9 1 When the profile download is complete click the Apply button Enter the Profile Configuration ...

Страница 33: ... Configure Name Enter a name for the configuration Devices Select your specific device models Profile The current profile is displayed by default and the selection cannot be switched Close Click the Close button to cancel the configuration Next Click the Next button to apply the current profile to your device s ...

Страница 34: ...ture Click the Choose File button to open a File Explorer dialog box to add a picture to the profile Monitor Keyboard Mouse and Mouse Pad Models With the checkboxes select the connected devices and device models for this profile Select a profile Select an existing profile to use with each device Share with Other Users Enabled Shares this profile with the public Disabled Only visible in your My Upl...

Страница 35: ...g box will appear 9 11 Search Prerequisite Click the search bar Supports search of the publisher profile name and description text 9 12 Login Log into your account When not logged in you may also click on the Upload button to enter the login interface EMAIL Enter your Email address PASSWORD Enter your password LOGIN ...

Страница 36: ...ormation see below To reset your password Enter the email address associated with your account A recovery link will be sent Click the Email Me button to have the password reset email being sent to the email address input above Login to your email address input above and open the Password Reset email and click the Reset Password button ...

Страница 37: ...licking the Reset Password button the Password reset interface is displayed as below You can enter and confirm a password containing between 6 to 18 characters numbers or letters And click the Reset Password button If the passwords match and pass verification the password is changes and the success dialog box appears ...

Страница 38: ...38 Possible error message The reset password link has expired CREATE ACCOUNT Click the Create Account button to create an account ...

Страница 39: ...nd Confirm Password Enter and confirm a password From 6 18 characters letters digits or special characters Click the Next button to receive a verification code email The code will expire in 15 minutes Verification code confirmation Enter the verification code you received ...

Страница 40: ...is wrong the error The verification code is wrong will appear If the verification code is expired the error Verification code has expired will appear Privacy Policy Click the Privacy Policy button to read the privacy policy for this software Terms of Service Click the Terms of Service button to read the Terms of Service for this software Back Click in the main window to dismiss the menu 9 13 My Ac...

Страница 41: ...on to enter the My Uploads interface Click the My Downloads button to enter the My Downloads interface Click the Account Setting button to enter the Account Settings interface Click the Log out button to log the account out of the device 9 13 1 My uploads Click the Discover button to return to the discover homepage Click the Back button to return to the main menu ...

Страница 42: ... avatar Profile title and introduction Adaptation equipment and model Public Private Release time Download configure delete button Click the Delete button to delete the Profile file from the discover screen Click the Upload button to upload a profile ...

Страница 43: ...aded and saved locally Click the Configuration button to enter the configuration interface Click the Delete button to delete the profile file locally and return to the Profile list 9 13 3 ACCOUNT SETTING The Email address cannot be changed changing the email address will create a new account PROFILE PICTURE ...

Страница 44: ...ield New password and new password confirmation input field always obscures the password field Click the Cancel button to cancel the modification Click the Done button to confirm the modification After verification the new password takes effect and the login interface is opened to log into BACK Click the Back button to return to the previous interface ...

Страница 45: ...and edit macros from the Macro interface 10 1 EDIT Select a macro from the drop down menu 10 2 ADD Click the ADD button to display the macro editing interface 1 MACRO NAME Enter a name into the text box 50 characters max ...

Страница 46: ...remove the actions and begin a new recording While recording the Start button becomes a Stop button During a recording the macro setting options are disabled and only the keypress record box will be updated Click the Stop button to finish recording 4 Keypress record Provides a real time recording of all device keypress operations Device Show which device initiated the event or the delay between ev...

Страница 47: ...o creation process 10 3 DEL Click the DEL button to delete the macro Then confirm or cancel the deletion 10 4 Import Click the Import button to open a File Explorer dialog box Find the macro file to import Click the Open button to import the macro file Click the Cancel button to cancel the import and close the dialog box ...

Страница 48: ...ton to open a Save As dialog box the file name defaults to the current macro name Navigate to your desired export folder Click the Save button to export the macro file Click the Cancel button to cancel the export and close the dialog box ...

Страница 49: ... Switch Language Displays all currently supported languages among which the currently used language is highlighted Click the appropriate language button to switch languages immediately Back Click the Back button to return to the previous interface ...

Страница 50: ...c com for support Do not attempt to repair the device yourself Safety Federal Communication Commission Interference Statement This device complies with Part 15 of the FCC Rules Operation is subject to the following two conditions 1 This device may not cause harmful interference 2 This device must accept any interference received including interference that may cause undesired operation Note This d...

Страница 51: ...the separation between the device and receiver Connect the device into an outlet on a circuit different from that to which the receiver is connected Consult the dealer or an experienced radio TV technician for help ...

Отзывы: