


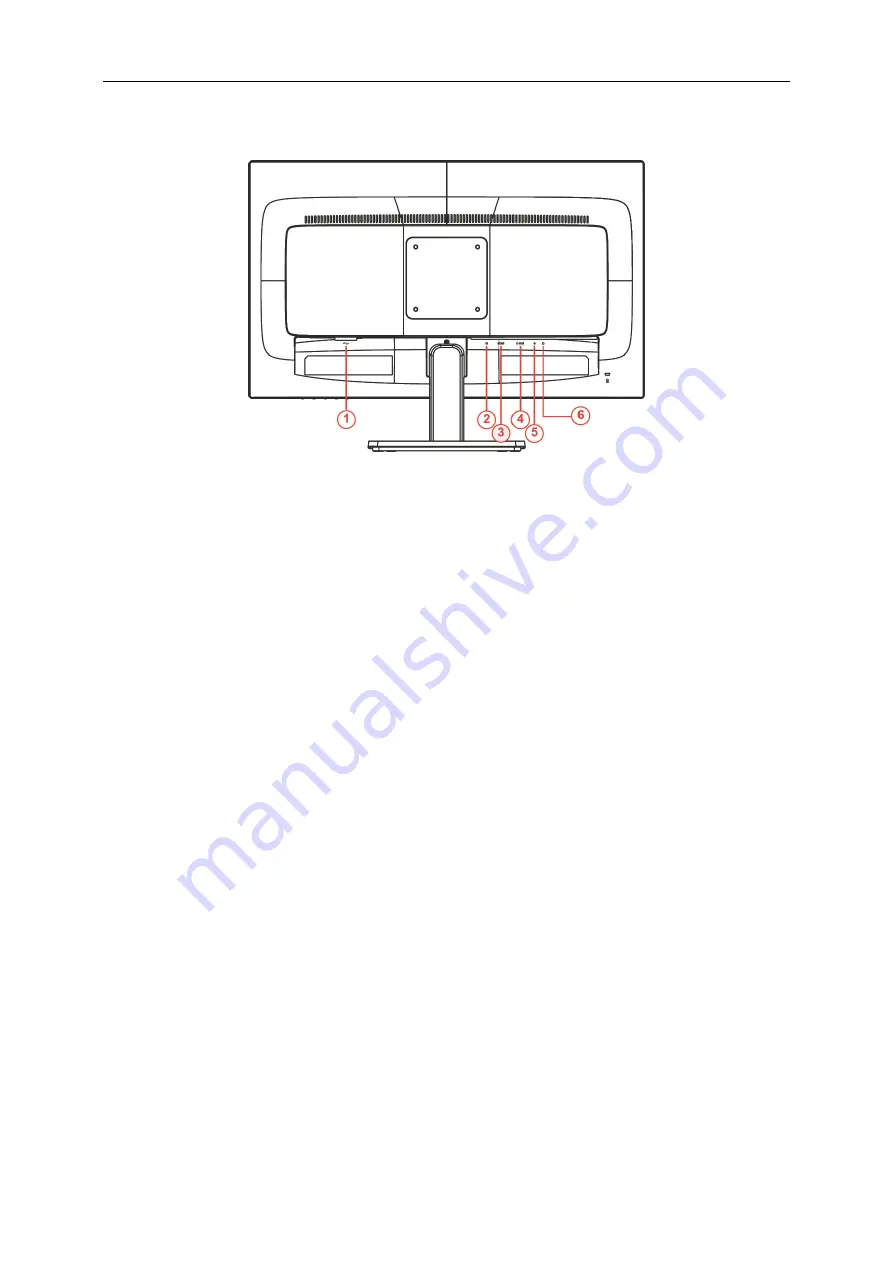
Connecting the Monitor
Cable Connections In Back of Monitor and Computer:
1
Power
2
Display port
3
HDMI
4
Analog (D-Sub 15-Pin VGA cable)
5
AUDIO IN
6
Earphone out
To protect equipment, always turn off the PC and LCD monitor before connecting.
1
Connect the power cable to the AC port on the back of the monitor.
2
Connect one end of the 15-pin D-Sub cable to the back of the monitor and connect the other end to the
computer's D-Sub port.
3
Optional – (Requires a video card with DP port) – Connect one end of the DP cable to the back of the monitor
and connect the other end to the computer’s DP port
4
Optional – (Requires a video card with HDMI port) – Connect one end of the HDMI cable to the back of the
monitor and connect the other end to the computer’s HDMI port.
5
Turn on your monitor and computer.
If your monitor displays an image, installation is complete. If it does not display an image, please refer
Troubleshooting.
12
Содержание E2775SQ
Страница 1: ...LCD Monitor User Manual E2775SQ LED backlight www aoc com 2016 AOC All Rights Reserved 1 ...
Страница 14: ... Click on the Change display settings button Set the resolution SLIDE BAR to Optimal preset resolution 14 ...
Страница 16: ... Click DISPLAY Set the resolution SLIDE BAR to Optimal preset resolution 16 ...
Страница 17: ...Windows 7 For Windows 7 Click START Click CONTROL PANEL Click Appearance Click DISPLAY 17 ...
Страница 18: ... Click on the Change display settings button Set the resolution SLIDE BAR to Optimal preset resolution 18 ...
Страница 30: ... Click on the Change display settings button Click the Advanced Settings button 30 ...
Страница 34: ... Click on the Change display settings button Click the Advanced Settings button 34 ...
Страница 62: ...TCO DOCUMENT FOR TCO CERTIFIED MODELS 62 ...


