


7
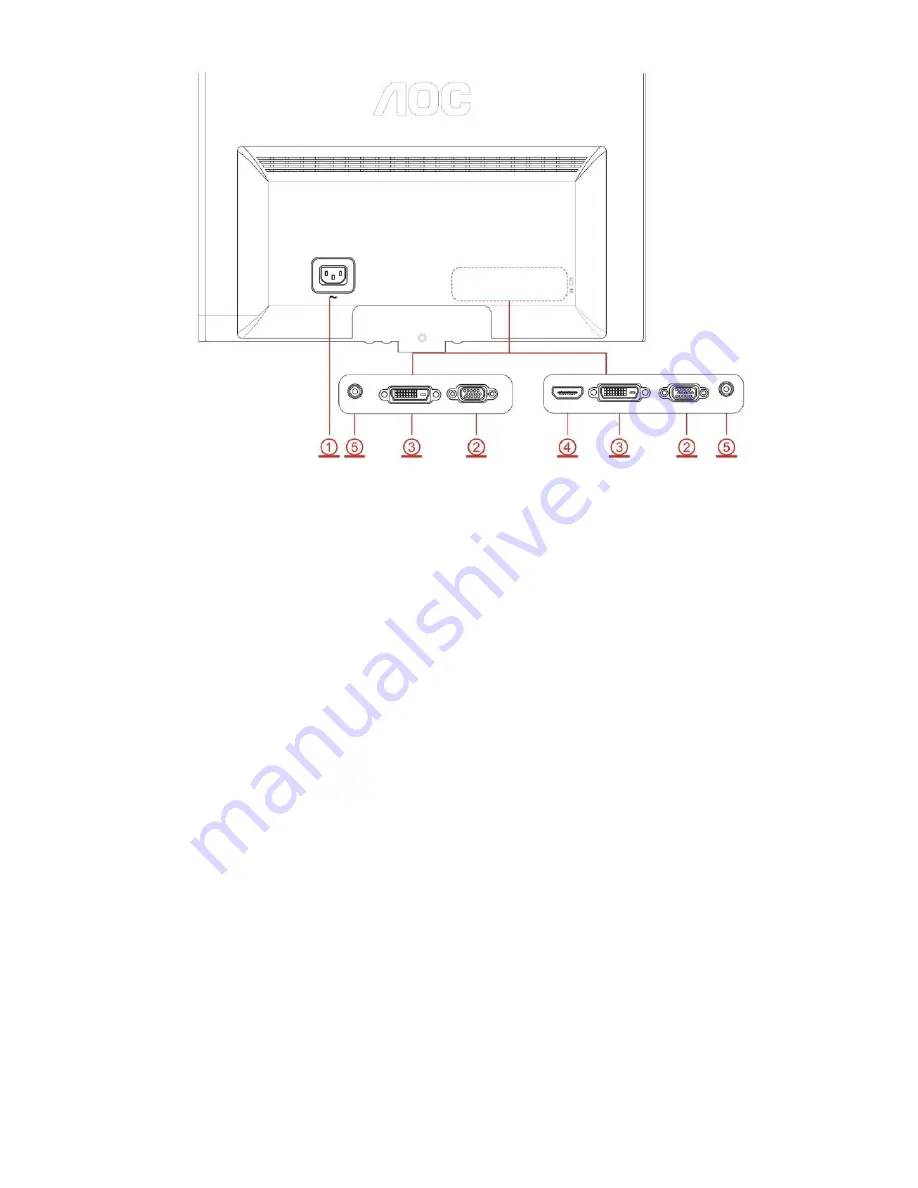
1. AC port
2. VGA
3. DVI (available for selected models)
4. HDMI(available for selected models)
5. Audio(available for selected models)
To protect equipment, always turn off the PC and LCD monitor before connecting.
1. Connect the power cable to the AC port on the back of the monitor.
2. Connect one end of the 15-pin D-Sub cable to the back of the monitor and connect the other end to the computer's
D-Sub port.
3. Optional
–( Requires a video card with DVI port) - Connect one end of the DVI cable to the back of the monitor and
connect the other end to the computer’s DVI port.
4. Optional
–( Requires a video card with HDMI port) - Connect one end of the HDMI cable to the back of the monitor
and connect the other end to the computer’s HDMI port.
5. Optional
–(Requires a video card with Audio port) - Connect one end of the Audio cable to the back of the monitor
and connect the other end to the computer’s Audio port..
6. Turn on your monitor and computer.
If your monitor displays an image, installation is complete. If it does not display an image, please refer
Troubleshooting.
Содержание e2050Swd
Страница 4: ...4 1 Monitor Specifications ...
Страница 18: ...18 4 Input Output Specification 4 1 Input Signal Connector ...
Страница 19: ...19 4 2 Preset Display Modes ...
Страница 21: ...21 Back Light Unit Ta 25 2 º C 4 3 4 Optical Characteristics ...
Страница 32: ...32 7 PCB Layout 7 1 Main Board 715G4502M01000004I ...
Страница 33: ...33 ...
Страница 34: ...34 7 2 Power Board 715G4744P01003001M ...
Страница 35: ...35 V ...
Страница 36: ...36 7 3 Key Board 715G4747K02000001C ...


