


8
INPUT CONNECTION OF PC SIGNAL(PC/DVD)
Notice: If you see that display abnormality in screen, you need to check the cable
connection and DVD setup.
Notice:If your DVD doesn’t have
φ
3.5 earphone output jack,Please use cable from RCA
to
φ
3.5 earphone jack to connect.
●
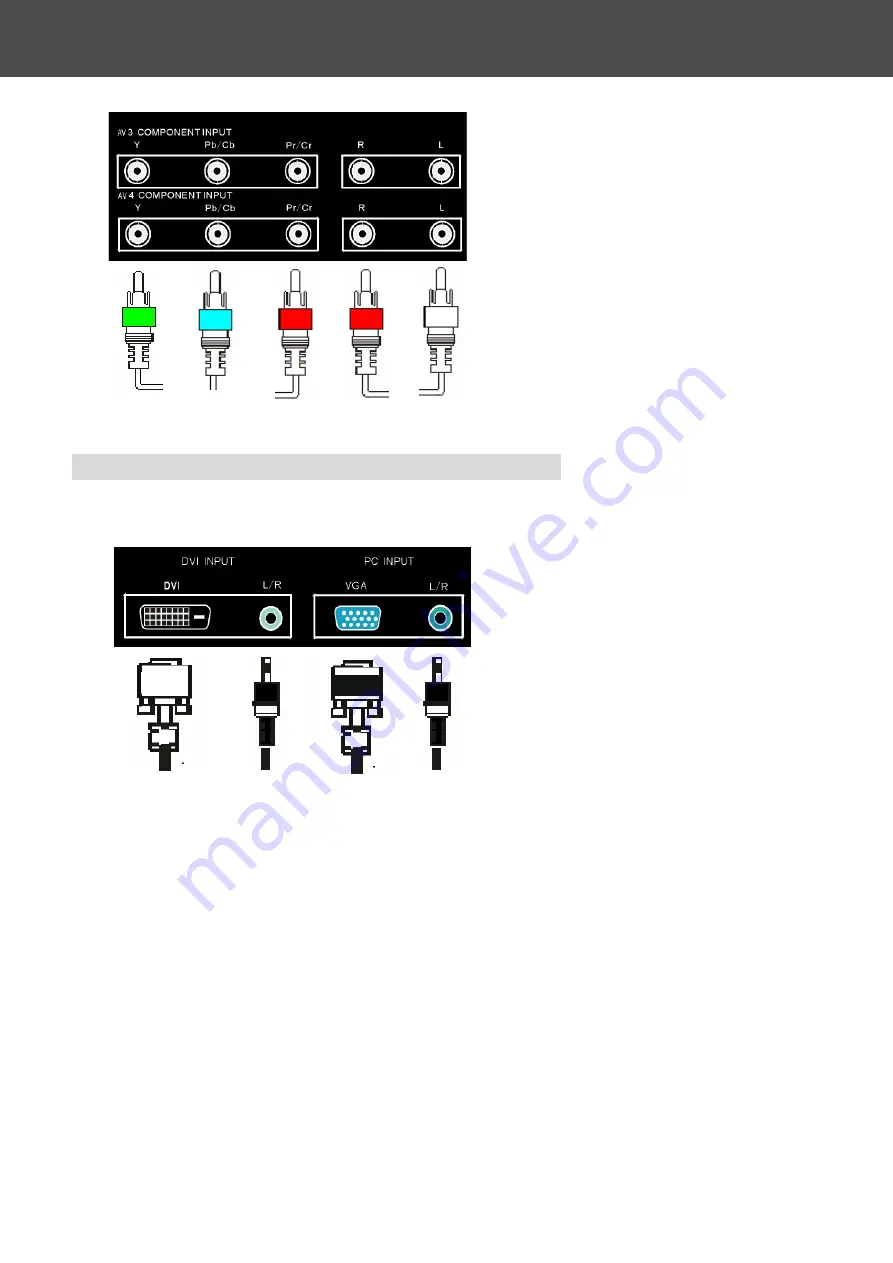
D-SUB 15 Pin:
Connect D-SUB signal cable
(
VGA cable
)
from PC to D-SUB jack at the back of this display.
And connect the earphone cable from PC earphone output jack to AUDIO input jack near to the
D-SUB jack.
Setup:
Use the key
“
Digital
”
in Remote Control Transmitter or
“
MODE
”
key on Front panel controls
to select source to
“
VGA
”
state. Then turn on the PC.
●
DVI-D:
Connect DVI-D 24 Pin signal cable
(
TMDS cable
)
from equipment with DVI-D jack to the
back of this display. And connect earphone cable from equipment with earphone output jack to
AUDIO input jack near the DVI-D jack.
Setup:
Use the key
“
Digital
”
in Remote Control Transmitter or
“
MODE
”
key on Front panel controls
to select source to
“
DVI
”
state. Then turn on the equipment.
We have 2 component signal input
jacks: Y Cb Cr and Y Pb Pr. The R / L is
Audio input for every Y Cb Cr and Y Pb Pr.
If your DVD or Set Top Box have Y Cb
Cr or Y Pb Pr output, you can connect it to
Y Cb Cr or Y Pb Pr input jack. And select to
Y Cb Cr or Y Pb Pr source input.
(
Some
DVD or Set Top Box need to set to Y Cb Cr
or Y Pb Pr output
)
Notice: If you see that display abnormality
in screen, you need to check the cable
connection and DVD setup.
24PIN DVI R/L INPUT 15PIN VGA R/L INPUT
▲
Notice: The PC output can not set out of
range.The highest resolution input is
1280 X 1024 / 60Hz.
Some PC models cannot be connected to
the set.
G B R R W
Connection to other equipment


