


11
Adjusting
Hotkeys
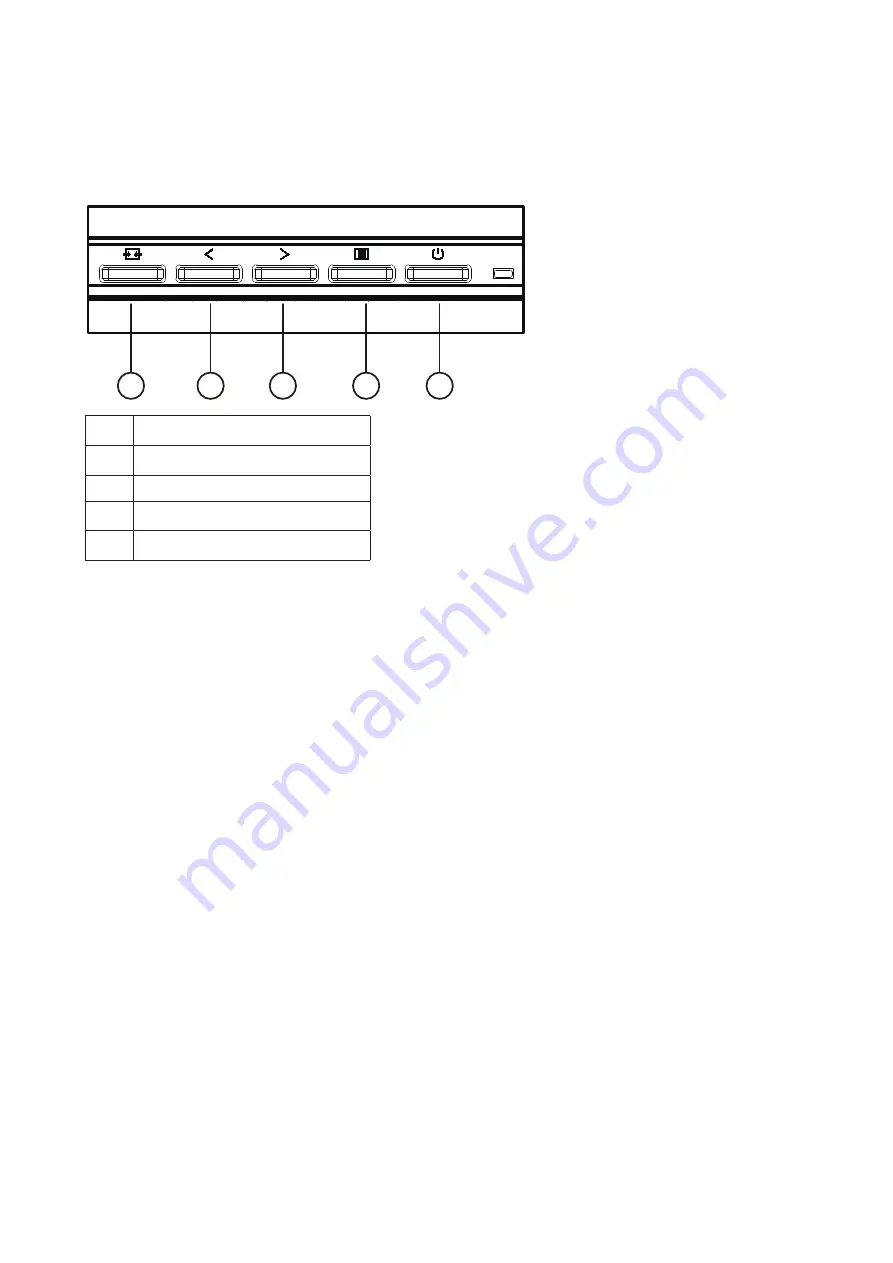
1
2
3
4
5
1
Source/Auto/Exit
2
Clear Vision/<
3
Volume/>
4
Menu/Enter
5
Power
Menu/Enter
When there is no OSD, Press to display the OSD or confirm the selection.
Power
Press the Power button to turn on the monitor.
Volume
When there is no OSD, Press > Volume button to active volume adjustment bar, Press < or > to adjust volume.
Source/Auto/Exit
When the OSD is closed, press Source/Auto/Exit button will be Source hot key function.
When the OSD is closed, press Source/Auto/Exit button continuously about 2 second to do auto configure (Only for the
models with D-Sub).
Содержание 24P2Q
Страница 1: ...1 www aoc com 2020 AOC All Rights Reserved LCD Monitor User Manual 24P2Q Q24P2Q 27P2Q Q27P2Q...
Страница 9: ...7 Setup Stand Base Please setup or remove the base following the steps as below Setup 4 Remove 4...
Страница 24: ...22 LED Indicator Status LED Color Full Power Mode White Active off Mode Orange...


