


18
So, turn on the machine, fully tighten the 4 nuts underneath the print platform, and
increase the height of print head by clicking “Tools”-->“Axis”-->“10”on +Z column.
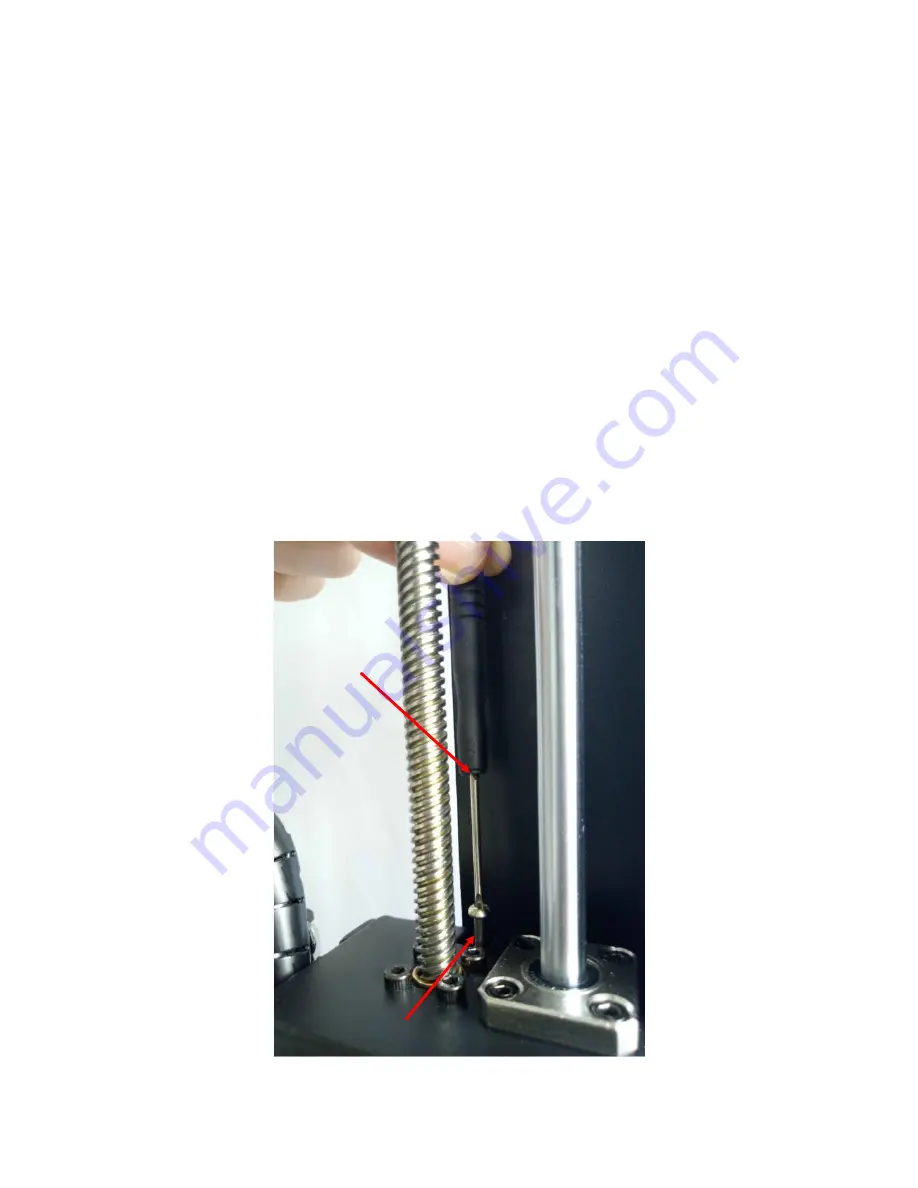
As shown in
Fig. 20
, at the right side of X axis, tighten the Z adjustable nut by ~2-3mm
(which equals to the thickness of the glass bed).
Reason behind: the other end of Z adjustable nut can trigger the Z end stop when Home
(going down) and ‘tells’ the machine that Z axis is now getting to the Zero position
and stop moving. So, tighten the Z adjustable nut (~3mm) would let the Z axis getting to
the Zero position and stop there ~3mm higher than before, thereby avoid hitting into
the platform. It may need adjustment few times.
After adjustment, please click “Tools”-->“Home”-->“Home all” to verify.
Lastly, follow
Step 2
in manual leveling above to start.
Tighten it
(Figure 20)
Z adjustable nut
Содержание i3 MEGA
Страница 1: ......
Страница 2: ......
Страница 28: ...22 Figure 22 Next there are few more settings regarding the machine type show in Fig 23 3 4 ...


