

5
3 - Installation and menu structure
3.1 - Installation
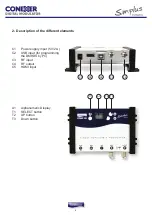
Install the DMHD01L against a wall using the wall fixing brackets to ensure cooling of the
housing through natural convection.
Connect the audio and video source using a HDMI cable. Connect the RF input cable (if
present) and the RF output cable. If the RF input is not used, please connect a 75 ohm
terminating resistor to it. Once the modulator is installed and the cables connected, please
proceed connecting the power supply to the modulator.
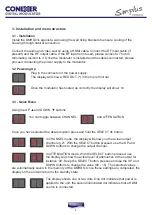
3.2 Powering Up
Plug in the connector of the power supply.
The display will show a RED DOT (
•
) in the top left corner.
Once the modulator has booted up correctly the display will show ‘ch’.
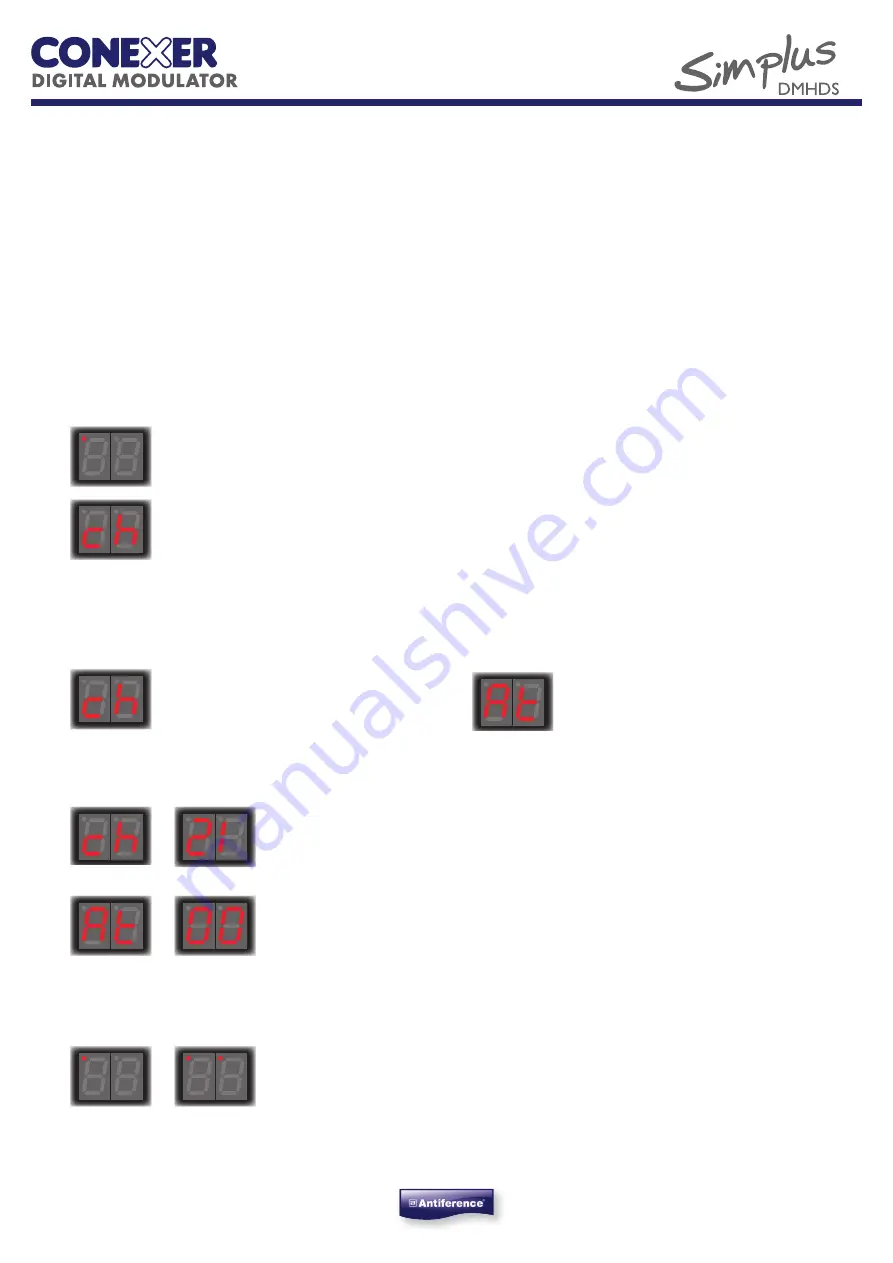
3.3 - Quick Menu
Using the UP ▲ and DOWN ▼ buttons
You can toggle between CHANNEL
and ATTENUATION
Once you have selected the desired option press and hold the SELECT
Ò
button
In CHANNEL mode, the display will show you the actual output
channel eg 21. With the SELECT button pressed, use the UP and
DOWN buttons to change the output channel.
In ATTENUATION mode, With the SELECT button pressed, use
the display will show the actual level of attenuation at the output for
instance ‘00’. Keep the SELECT button presses and use the UP and
DOWN buttons to change the value (00 - 15). The selected values
are automatically saved in the memory of the DMHDS. Once these settings are completed, the
display on the unit will return to the standby state.
The display shows one or two dots. One dot indicates that power is
applied to the unit, the second illuminated dot indicates that a HDMI
source is connected.
Содержание CONEXER Simplus DMHDS
Страница 1: ...USER MANUAL DIGITAL MODULATOR SINGLE DVB T ENCODER MODULATOR...
Страница 8: ...www antiference co uk...


